Vegetable Bin Cupboard
how to build vegetable bin cupboards.

Dimensions
Use the size-specific shopping and cut lists below.

What you need
- 1 - 1x12 @ 12 feet long
- 3 - 1x2 @ 8 feet long
- 4 feet of 4-1/4" tall base moulding
- 1/4 sheet (2' x 4') of 1/4" thick plywood, beadboard or other backing material
- 3 sets of surface mount hinges (can also use basic butt hinges)
- 3 clasps
- 3 knobs or handles
- 1-1/4" pocket hole screws
- 1-1/4" and 1" finish nails
Chicken wire or wire mesh and staples for attaching the chicken wire
- CARCASS
- 1 - 1x12 @ 17" (top)
- 2 - 1x12 @ 38-1/2" (sides)
- 3 - 1x12 @ 14-1/2" (shelves)
- 1- 1/4" plywood @ 16" x 39-1/4" (back)
- 4-1/4" base moulding cut to fit
- 1 - 1x2 @ 17" (top)
- 2 - 1x2 @ 38-1/2" (Sides)
- 4 - 1x2 @ 13" (shelf trim)
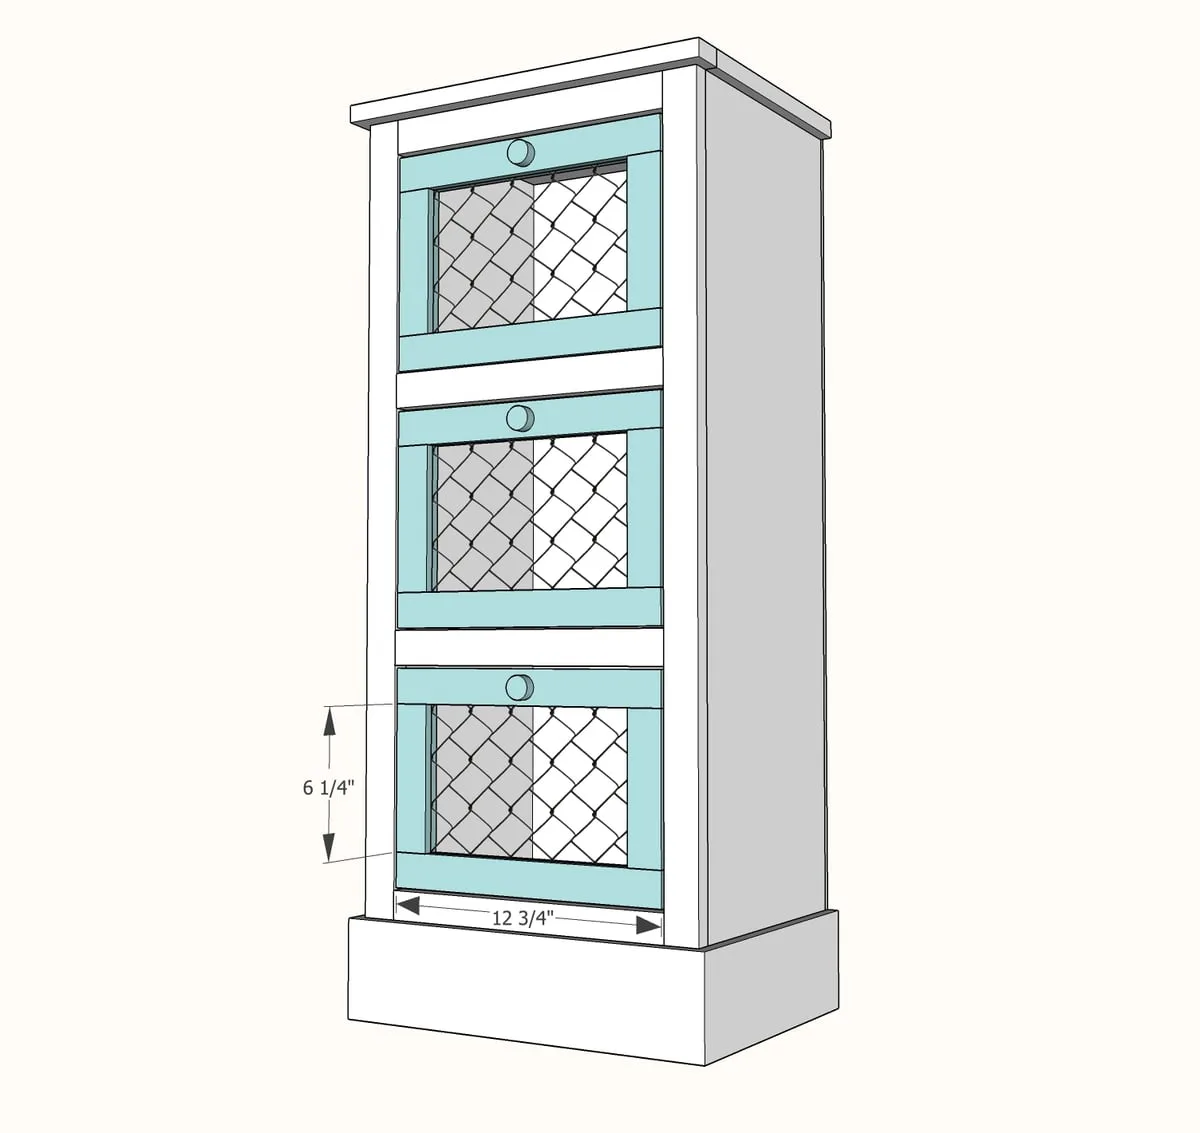
- 6 - 1x2 @ 6-1/4"
- 6 - 1x2 @ 12-3/4"
FACE FRAME
DOORS - CUT TO FIT, 1/4" less in height and width than opening
- measuring tape
- square
- pencil
- safety glasses
- hearing protection
- kreg-jig
- drill
- circular saw
- compound miter saw
- nailer
- staple gun
Step by step
Step 1
Build the basic carcass out of the 1x12 boards. You can use 3/4" pocket holes and 1-1/4" pocket hole screws to make.

Step 2
Build the face frame with 3/4" pocket holes and 1-1/4" pocket hole screws first. Then attach the completed face frame to front of project with 1-1/4" finish nails and glue.

Step 3
Attach back 1/4" plywood with 1" finish nails and glue.

Step 4
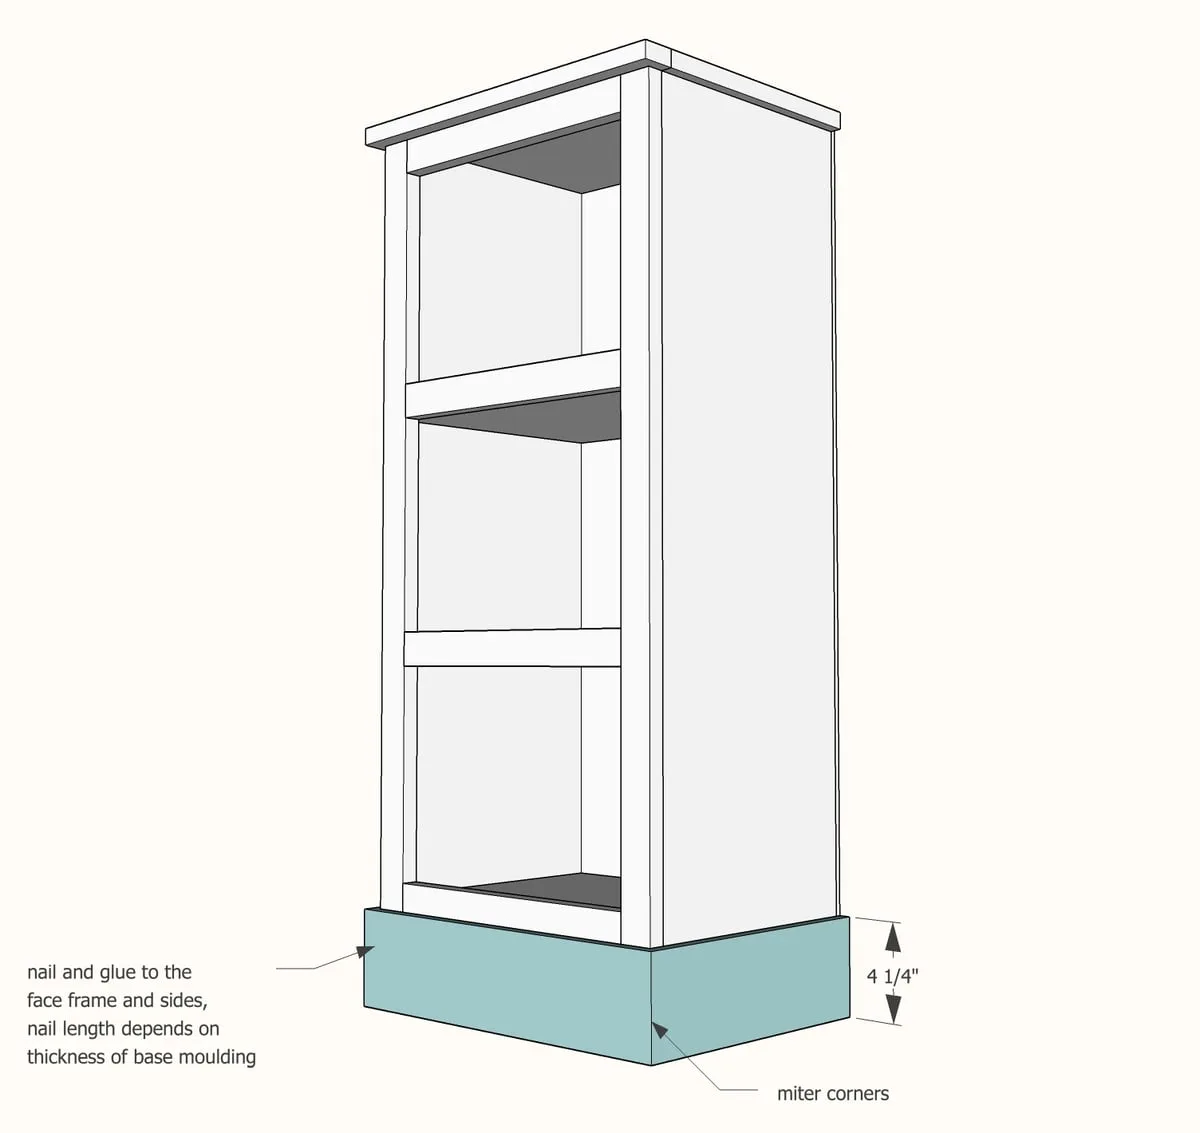
Cut 4-1/4" base moulding to fit, mitering front corners. Nail on with nails long enought to pass through moulding into 3/4" thick sides and front (most likely 1" long nails). Use glue.
Step 5
Finishing
Sand all surfaces, starting with a medium grit and finishing with fine. Wipe off the dust, fill any holes or gaps with wood filler, and sand smooth once dry. Apply primer if you're painting, then finish with your choice of paint or stain and seal with a durable clear topcoat. For outdoor projects, use exterior-rated primer, paint or stain, and sealer so the piece stands up to the weather.