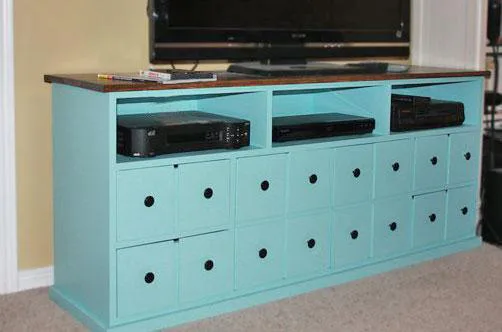
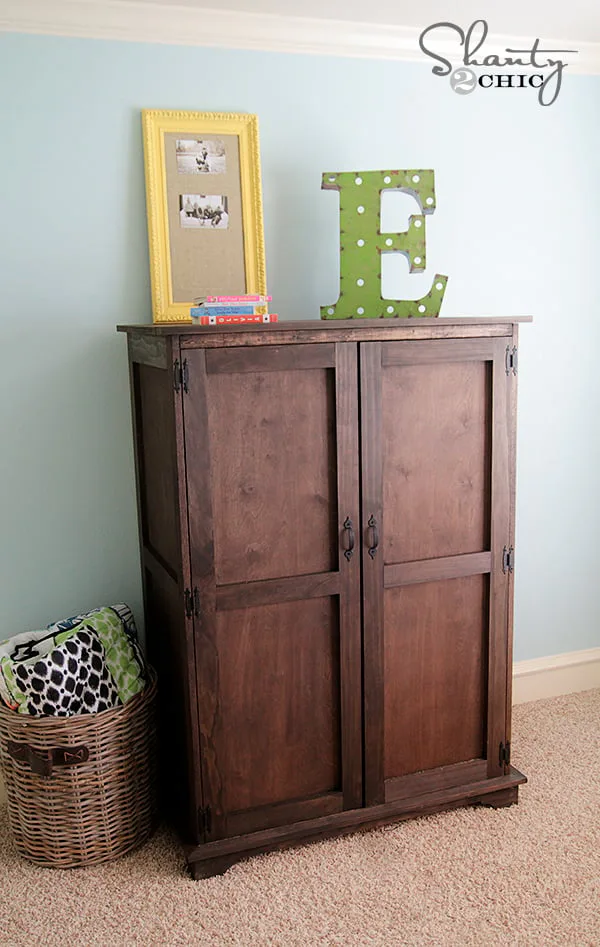
Toy or TV Armoire
to build a toy or tv armoire.
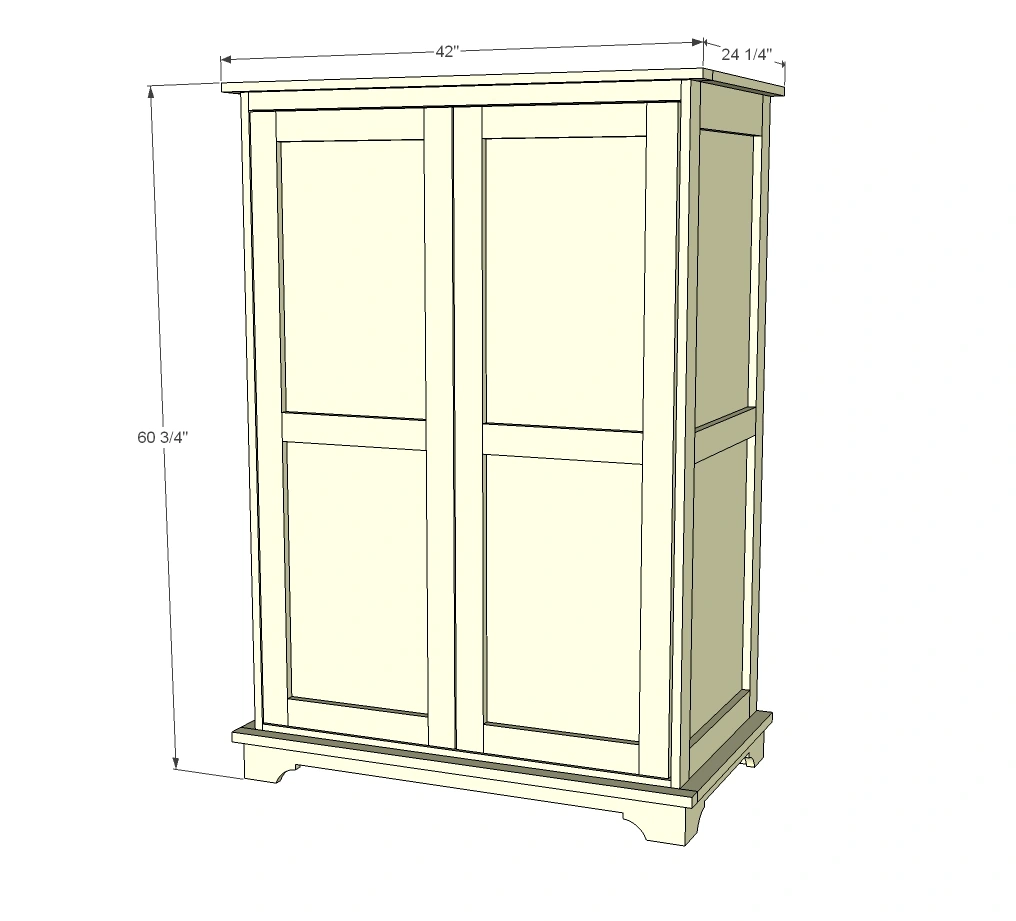
Dimensions
Use the size-specific shopping and cut lists below.
What you need
- 2 - sheets 3/4" plywood ripped into 21 3/4" wide strips
- 2 - sheets 1/4" plywood (for back and doors)
- 8 - 1x3 @ 8 feet long
- 2 - 1x4 @ 8 feet long
- 1 - 2x2 @ 8 feet long
- 1 - 1x2 @ 8 feet long
- 1 1/4" pocket hole screws, 1 1/4" and 2" finish nails
- 6 hinges
- 2 magnetic clasps
- 2 knobs
- 2 - 3/4" plywood @ 21 3/4" x 59" (sides)*
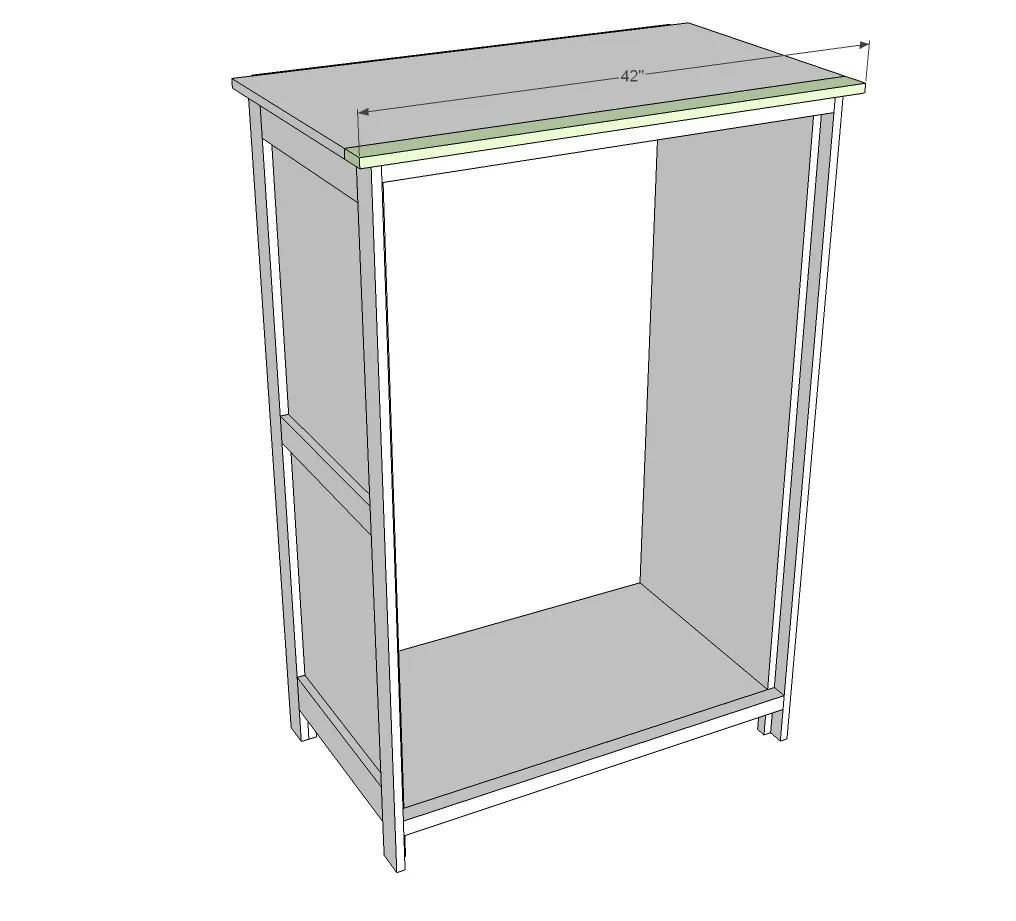
- 1 - 3/4" plywood @ 21 3/4" x 42" (top)
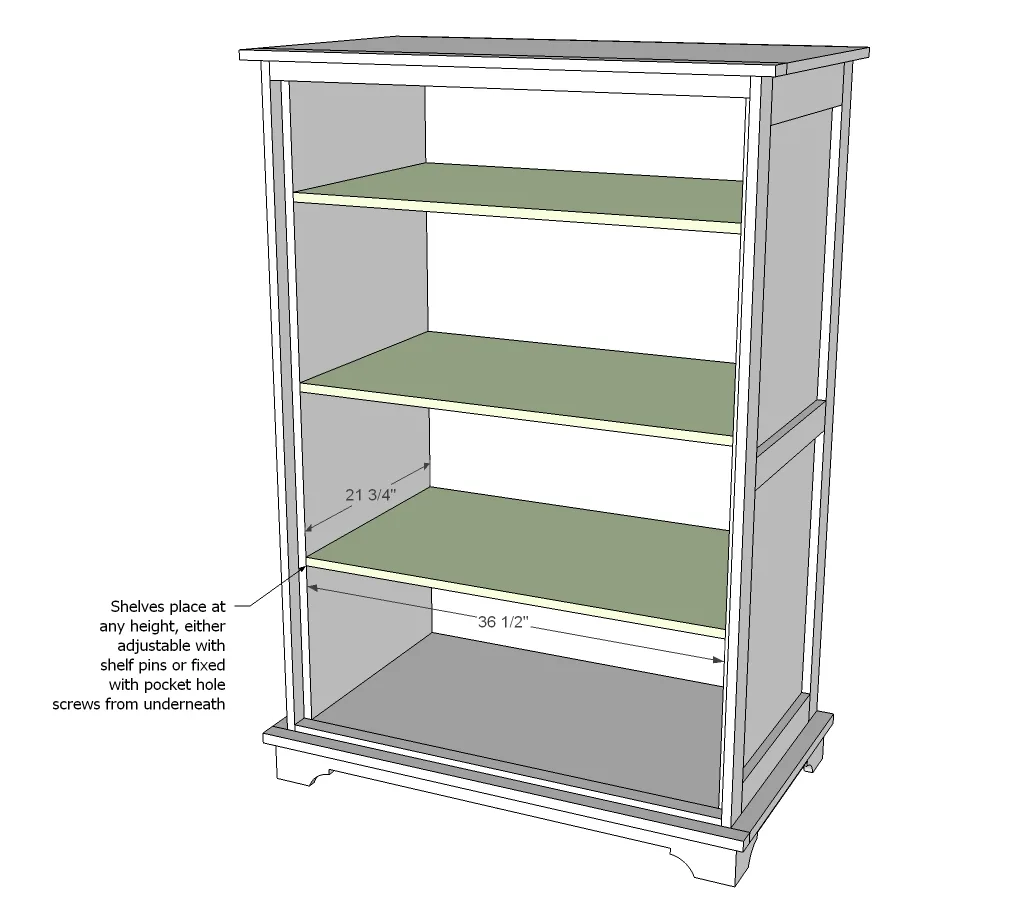
- 1 - 3/4" plywood @ 21 3/4" x 36 1/2" (shelves)
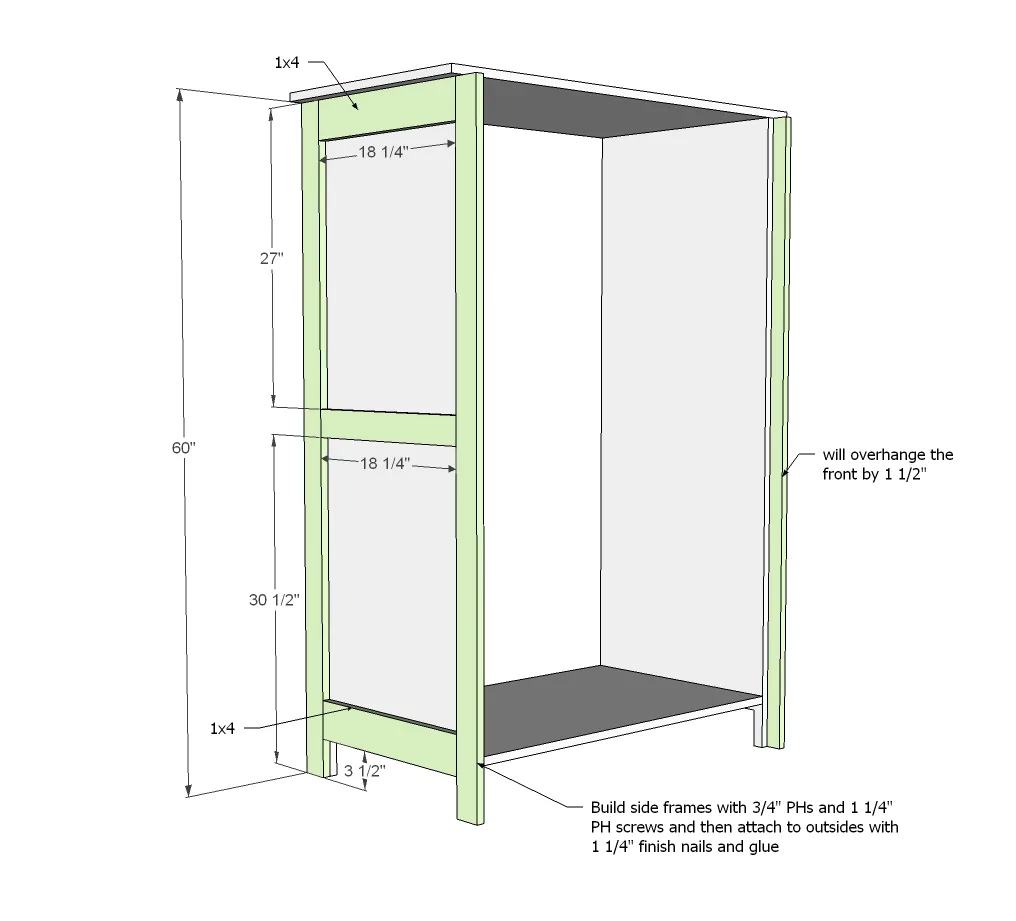
- 4 - 1x3 @ 59" (side frame)*
- 4 - 1x4 @ 18 1/4" (side frame)
- 2 - 1x3 @ 18 1/4" (side frame)
- 1 - 1/4" plywood @ 59 3/4" x 38 1/2" (back)*
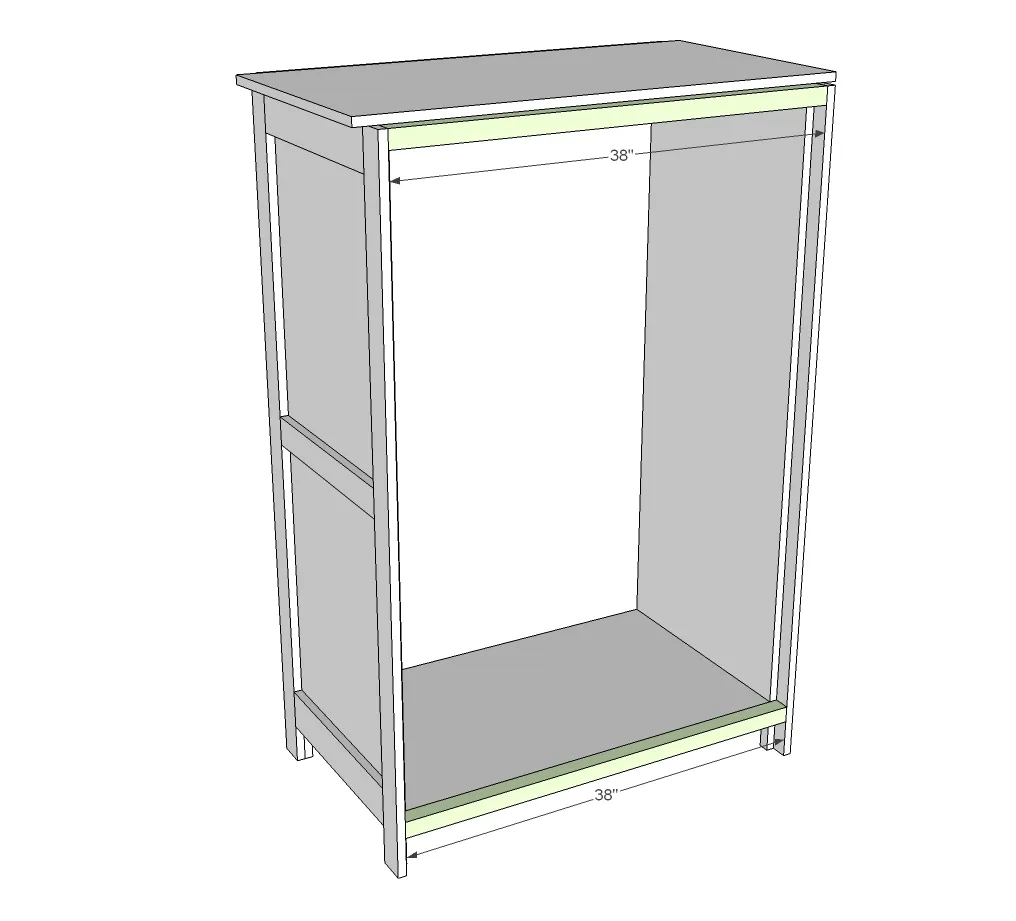
- 2 - 2x2 @ 38" (top/bottom supports)
- 1 - 1x3 @ 42" (top front)
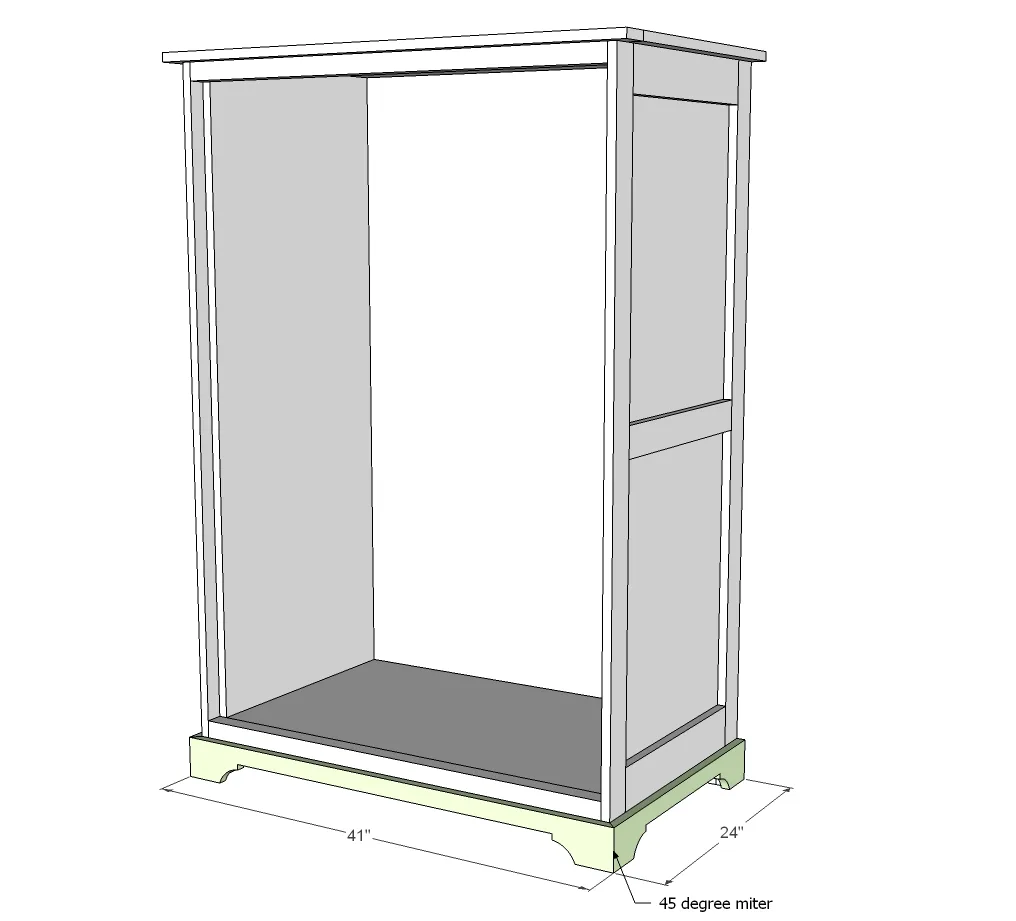
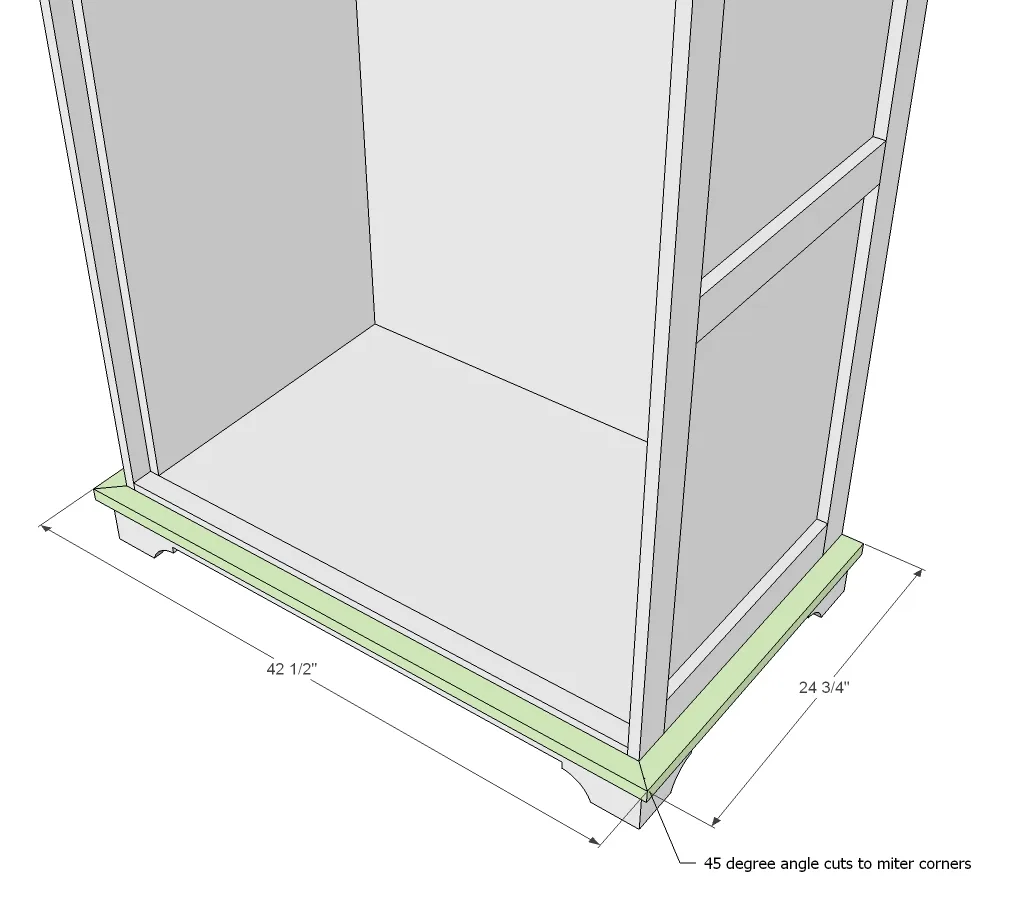
- 1 - 1x4 @ 41" (long point to long point, both ends cut NOT parallel at 45 degree BEVEL)
- 2 - 1x4 @ 24" (long point, one end cut at 45 degree BEVEL)
- 1 - 1x2 @ 42 1/2" (long point to long point, both ends cut NOT parallel at 45 degree ANGLE)
- 2 - 1x2 @ 24 3/4" (long point, one end cut at 45 degree ANGLE)
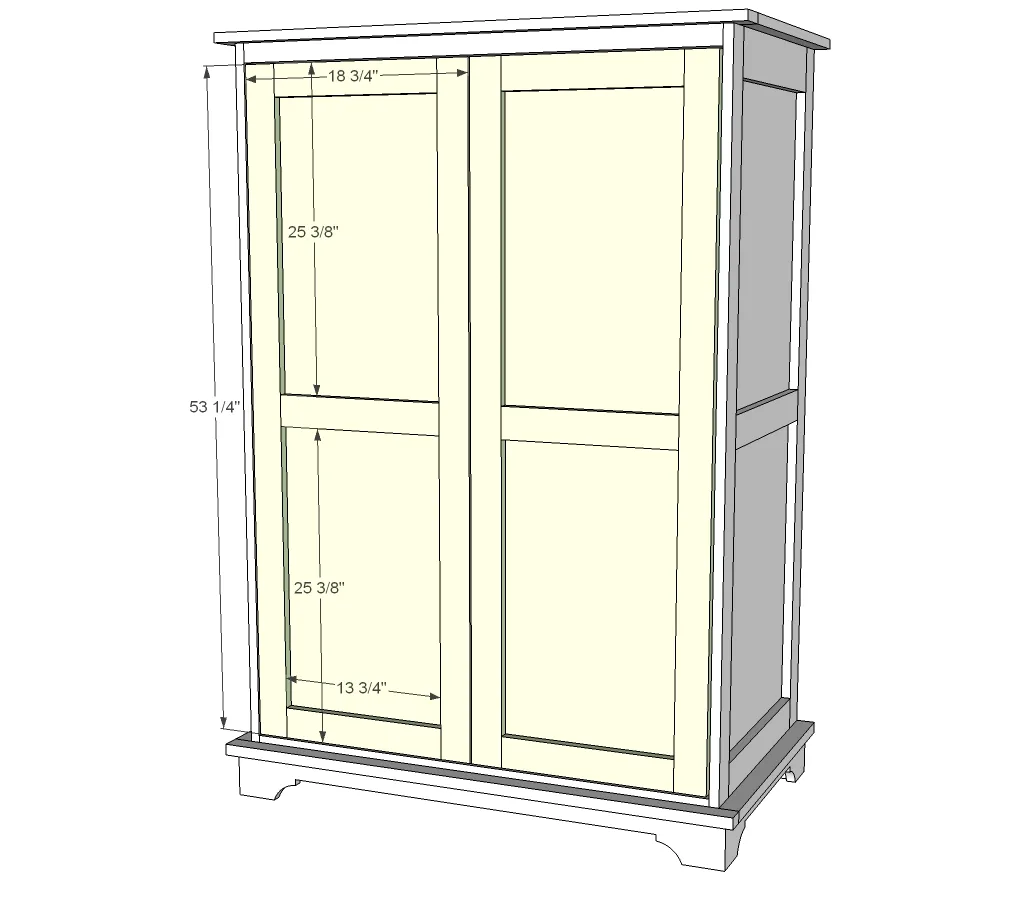
- DOORS - MEASURE AND CUT TO FIT!!!
- 4 - 1x3 @ 52 1/4"*
- 6 - 1x3 @ 13 3/4" (cut these to fit as 1x3 widths may vary in size - overall door width should be 18 3/4" or half the overall opening minus 1/4")
- 1/4" back plywood is 18 3/4" x 52 1/4"*
Additional shelves are 3/4" plywood @ 21 3/4" x 36 1/2"
*Starred cut list items have been shortened by 1" and will not match diagrams. This is because I opted to shorten to make the pieces fit on a single sheet of plywood.
Step by step
Step 1
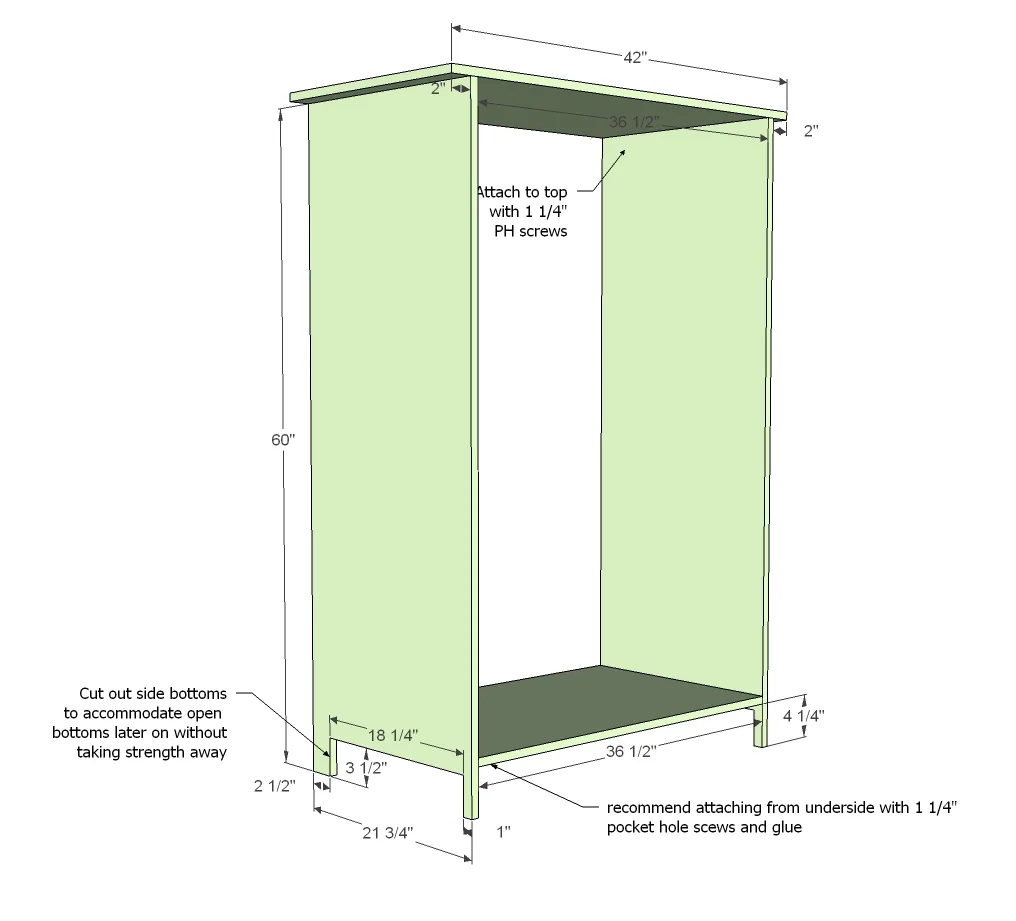
Attach sides to the top and ad bottom shelf. Note all overhangs and mark before attaching. Recommended joinery is 3/4" pocket holes and 1 1/4" pocket hole screws. NOTE: I shortened the side length by 1" to allow for plywood cutting efficiency. This does not change placement of bottom shelf.
Step 2
Build the side frames separately, and then attach to sides of the toy armoire, with the back flush to the back of the plywood. Front will overhang 1 1/2".
Step 3
Attach back to back with glue and finish nails.

Step 4
Attach top and bottom with 3/4" pocket holes and 1 1/2" pocket hole screws. Hide pocket holes on underside of bottom, top side of top.
Step 5
Step 6
Attach base to the bottom.
Step 7
Cut out with a jigsaw as shown above in diagram.

Step 8
Cut top of footer and nail and glue in place.
Step 9
Add shelves to the armoire if desired. We will be adding a drawer insert plan soon too!
Step 10
Measure and build your doors to fit, leaving about 1/8" gap around all sides.
Finishing
Sand all surfaces, starting with a medium grit and finishing with fine. Wipe off the dust, fill any holes or gaps with wood filler, and sand smooth once dry. Apply primer if you're painting, then finish with your choice of paint or stain and seal with a durable clear topcoat. For outdoor projects, use exterior-rated primer, paint or stain, and sealer so the piece stands up to the weather.