House Bed (Twin)
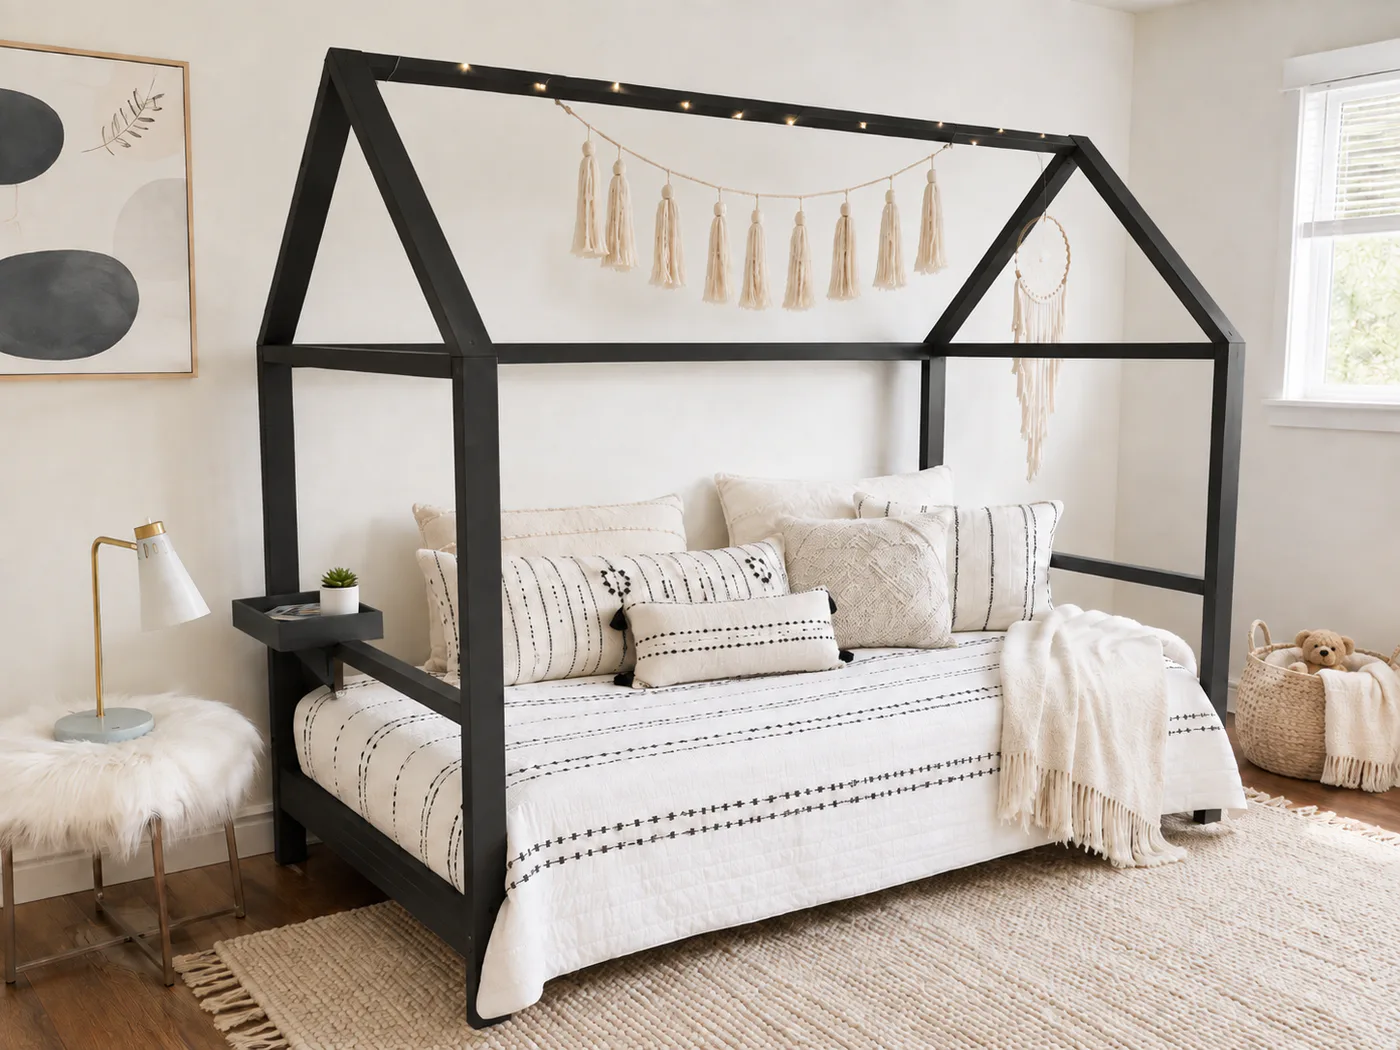
House Frame Kids Bed — Turn bedtime into a cozy retreat with this charming house-shaped kids bed frame. Built with simple 2x lumber, this design features a gable roof silhouette that sparks imagination while maintaining a clean, modern look perfect for any child’s bedroom. Crafted to fit a standard twin mattress, the frame sits low to the ground for added safety and easy access, making it an ideal choice for toddlers transitioning to their first “big kid” bed. The open frame allows for endless customization — drape fairy lights, hang fabric canopies, or leave it simple for a minimalist, Scandinavian-inspired style. Features • House-frame design adds fun and style to any kids’ room • Fits a standard twin mattress (no box spring required) • Low profile for safe, easy climbing in and out • Built from affordable, sturdy 2x lumber • Can be painted, stained, or left natural for a rustic farmhouse feel • Beginner-friendly build — straightforward cuts and joinery Perfect For • Toddlers transitioning to their first bed • Kids’ bedrooms or playrooms • Creative décor themes (farmhouse, modern, Scandinavian, Montessori-inspired) • Parents wanting a budget-friendly, customizable project What’s Included in the • Step-by-step instructions with clear diagrams • Complete cut list and materials list • Assembly tips for a strong, wobble-free build • Finishing ideas to suit your style (paint, stain, or natural wood) Why Build It Yourself? Similar house-frame beds retail for hundreds of dollars, but with this DIY woodworking plan, you can build one for a fraction of the cost using basic tools and simple lumber. This project is approachable for beginners yet satisfying for experienced woodworkers, resulting in a durable piece that will last through years of imaginative play and sweet sleep. Download the today and build a house-shaped kids bed that’s both practical and playful — a centerpiece for your child’s room that they’ll love climbing into every night.
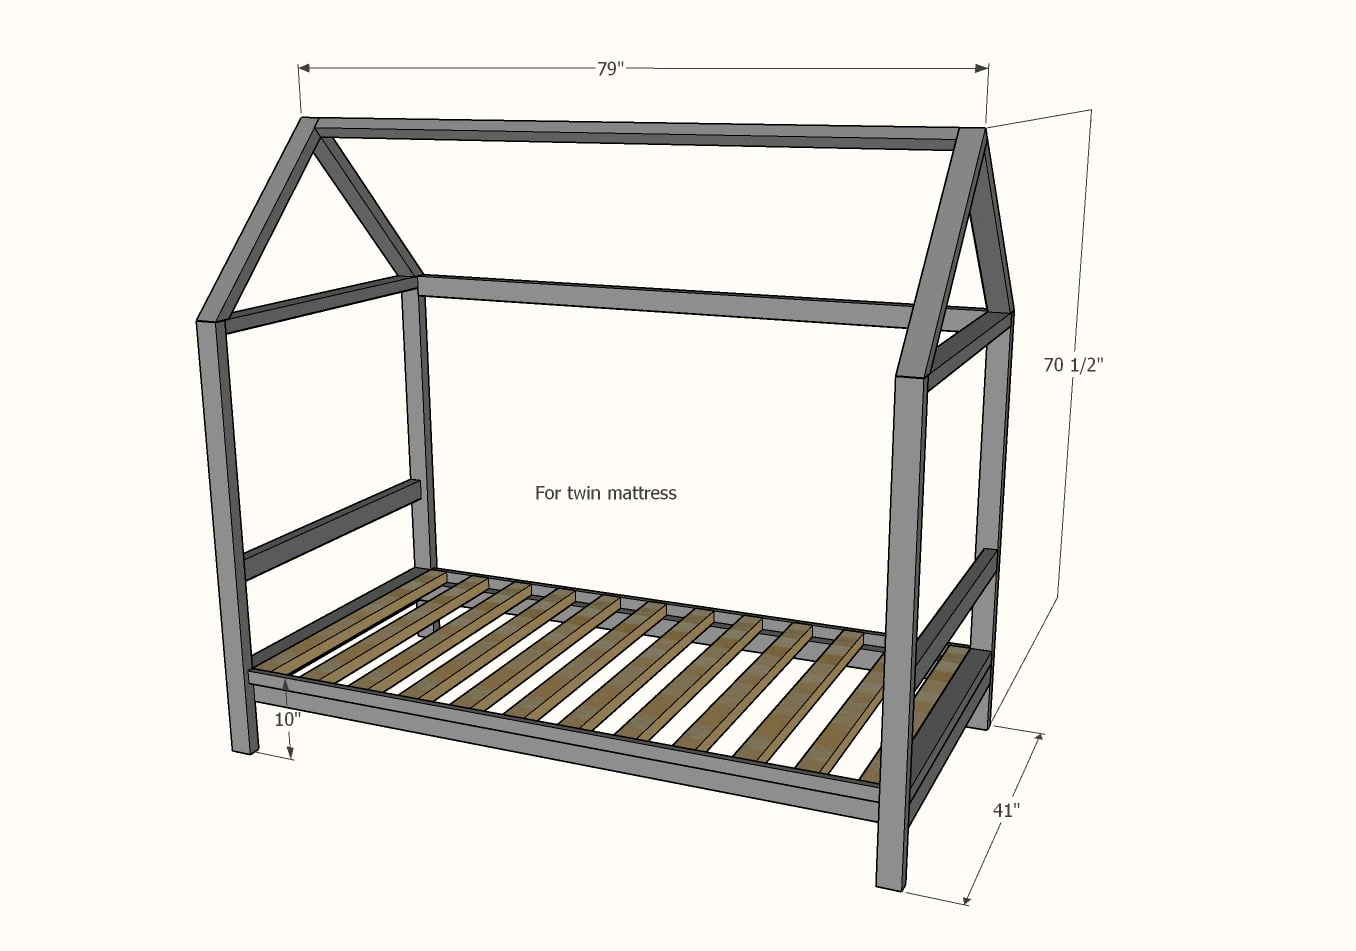
Dimensions
Use the size-specific shopping and cut lists below.
What you need
- 11 - 2x3 @ 8 feet long
- 6 - 2x3 or 1x3 @ 8 feet long (for the slats in step 6)
- 2 - 1x2 @ 8 feet long
- 1 - 2x2 @ 8 feet long
- 2-1/2" pocket hole screws (about 100)
- 1-1/4" brad nails (recommended)
- House Shaped Bed Ends
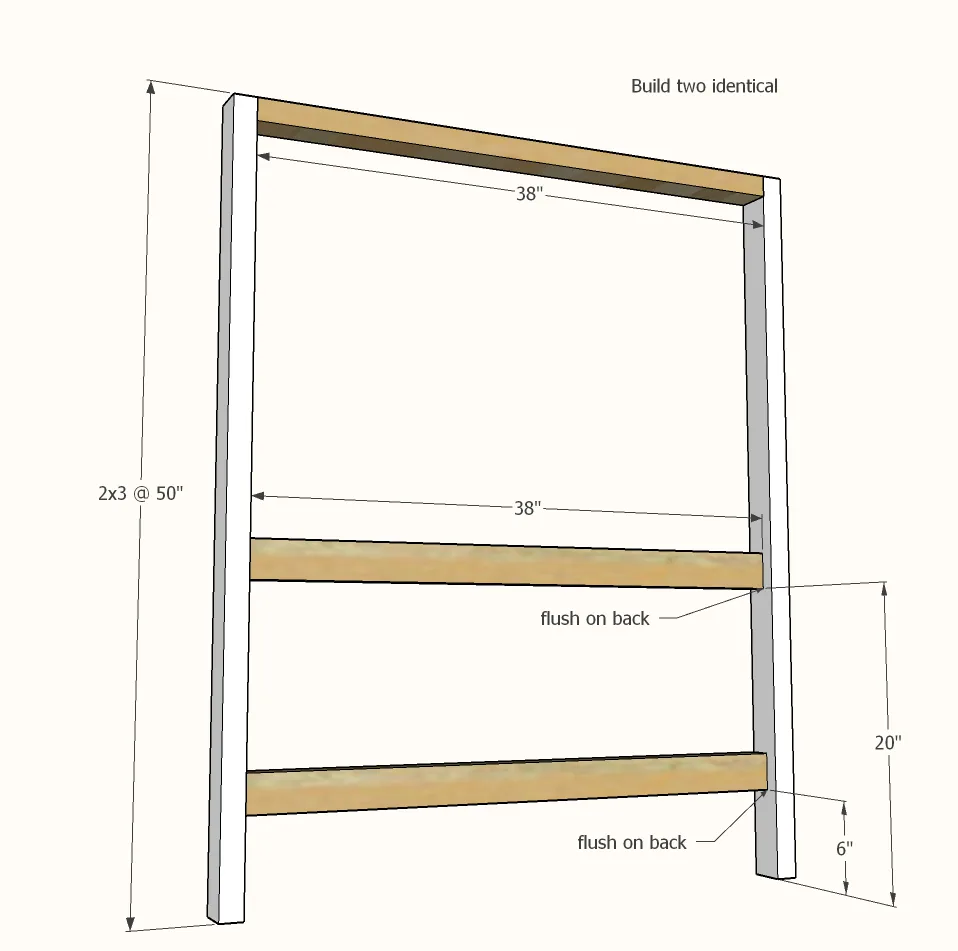
- 4 - 2x3 @ 50" - legs
- 8 - 2x3 @ 38"
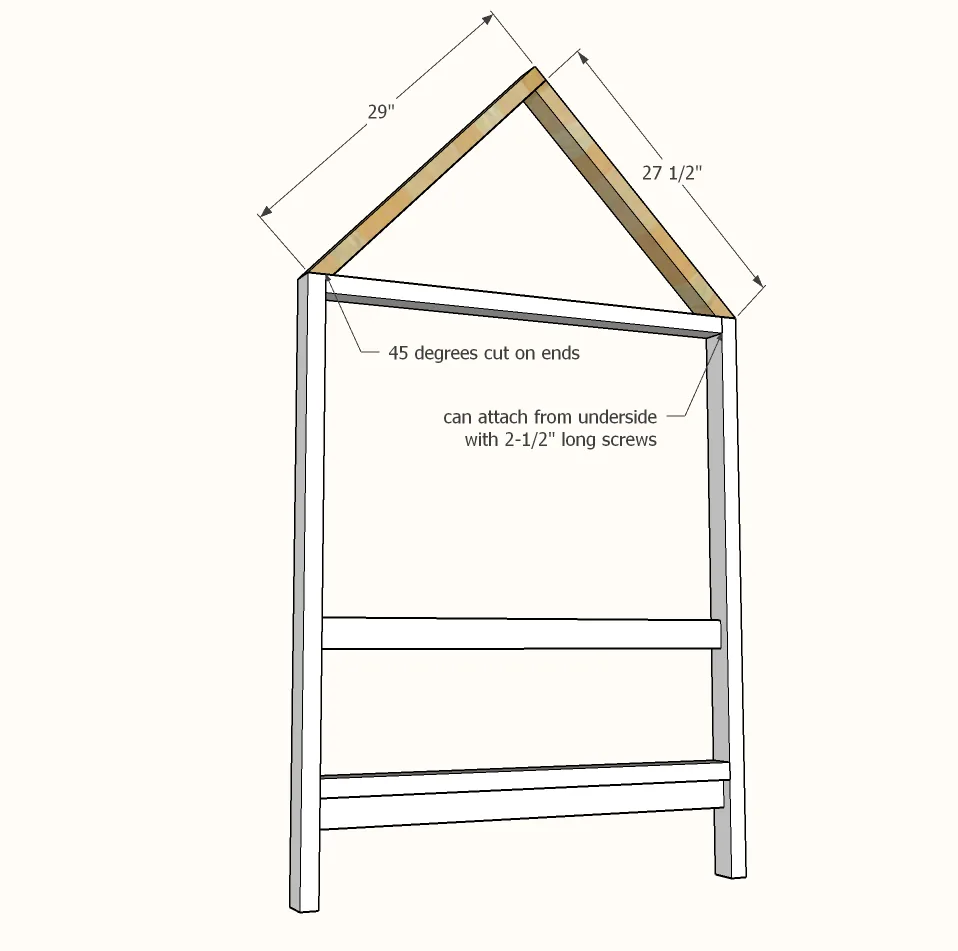
- 2 - 2x3 @ 29" - longest point measurement, one end cut at 45 degrees
- 2 - 2x3 @ 27-1/2" - longest point measurement, one end cut at 45 degrees
- Lengthwise Boards
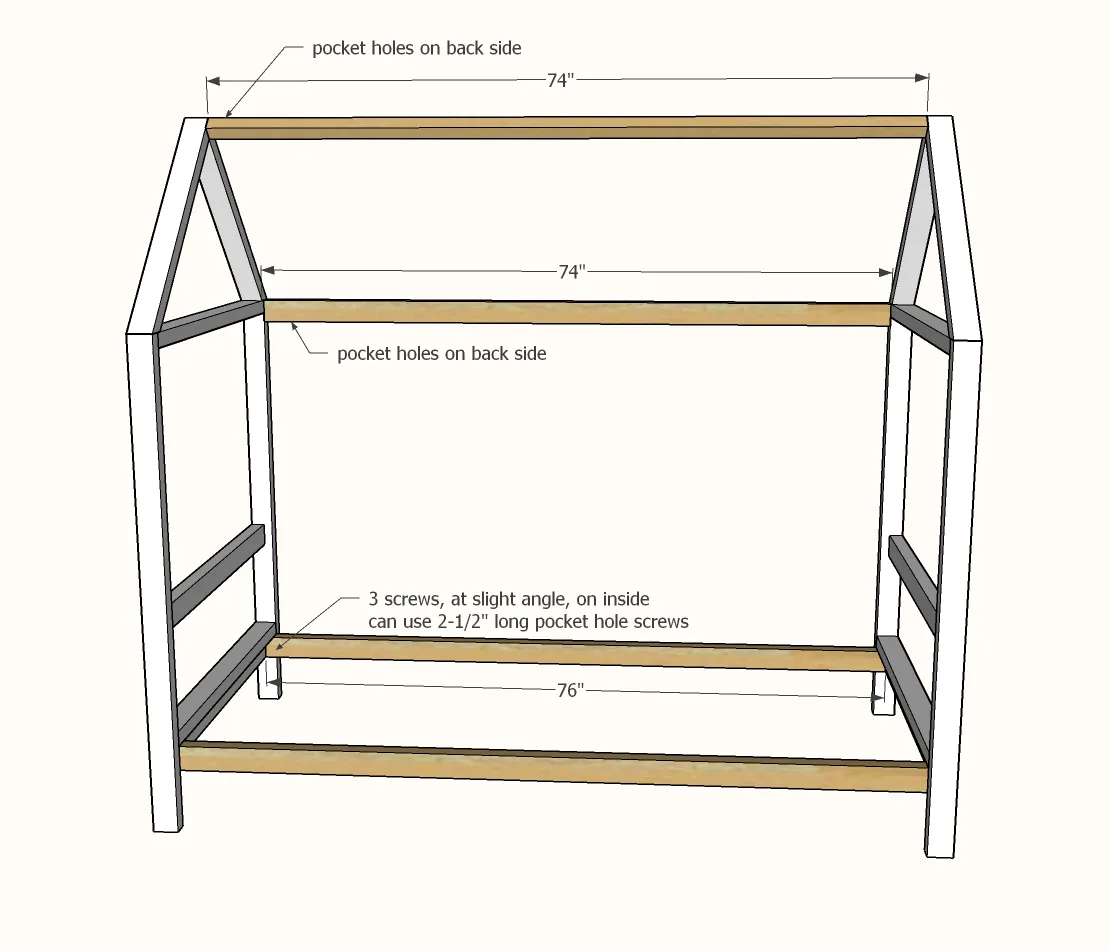
- 2 - 2x3 @ 76" - siderails
- 1 - 2x3 @ 74" - back top
- 1 - 2x2 @ 74" - peak
- Slat System
- 12 - 2x3 or 1x3 @ 38" - slats
- 2 - 1x2 @ 74" - slat trim
- measuring tape
- square
- pencil
- safety glasses
- kreg-jig
- drill
- compound miter saw
- sander
Step by step
Begin building the legs sets using 1-1/2" pocket hole setting, and 2-1/2" pocket hole screws.
NOTE: A fourth 2x3 is set on top of the lowest 2x3 (see next diagram)
Step 2
Add the angled roof line with screws.
Drill pocket holes on ends of the lengthwise boards.
On assembly, attach to the house shaped ends.
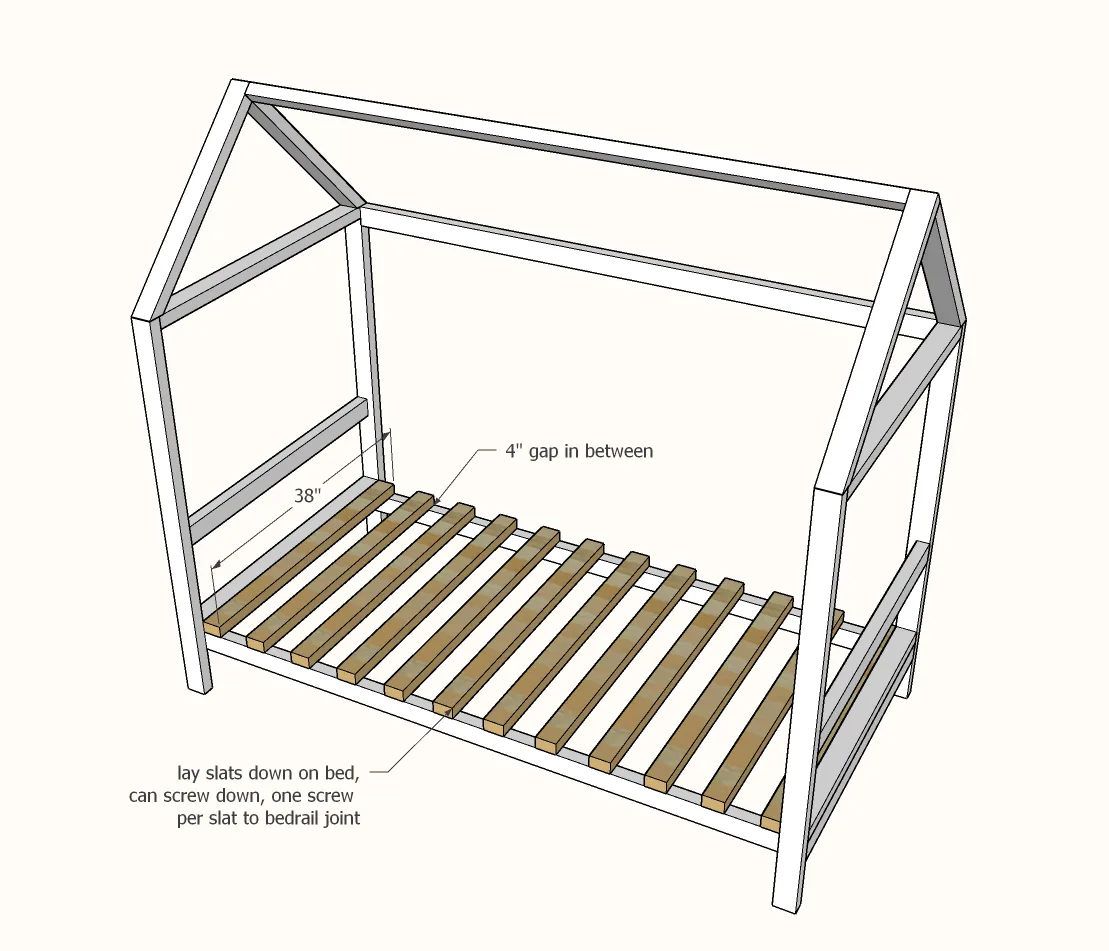
On assembly, lay the slats out on the siderails.
You can attach, or since all will be attached to the 1x2 trim in next step, you can wait and then attach only a few to conserve screws.
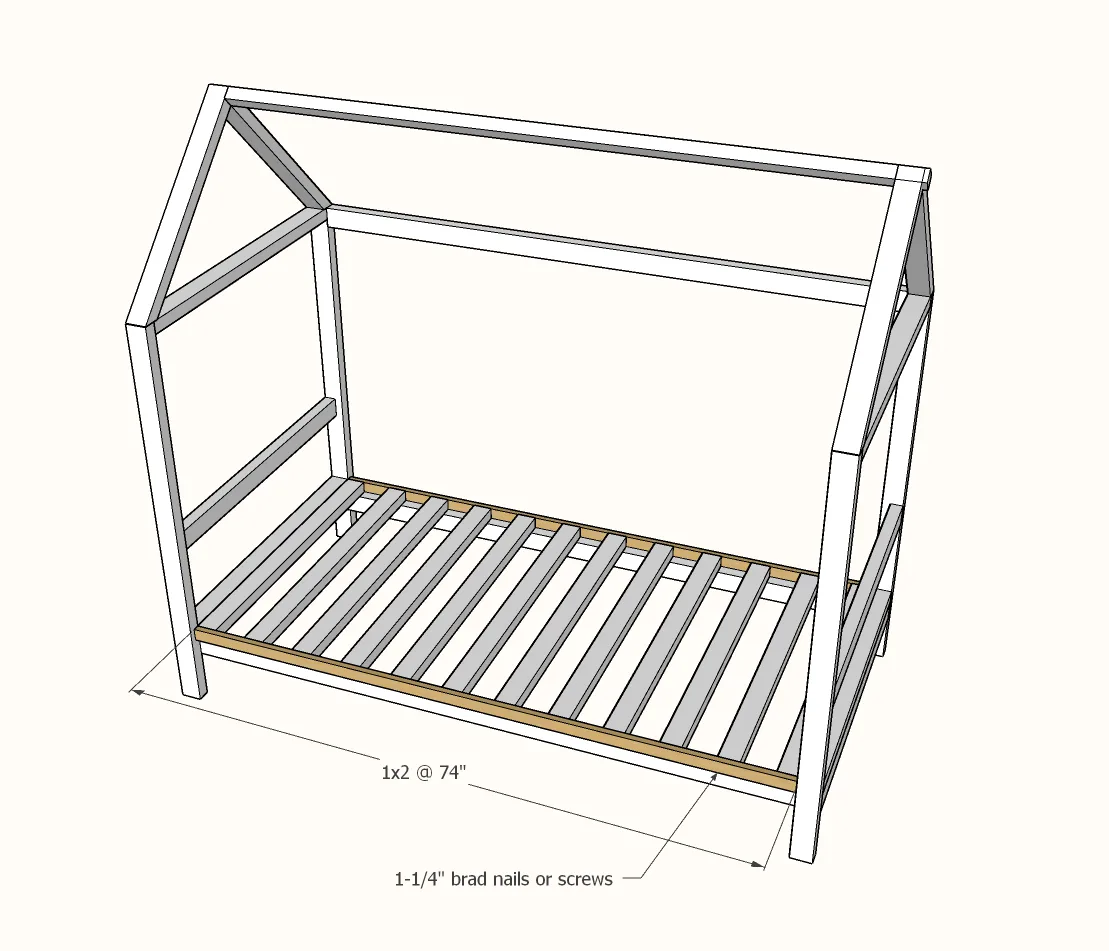
Attach the 1x2 trim to the outside edges of the slats, with glue and 1-1/4" brad nails.
You can also use a trim screw to secure. Once the slat system is one, attach in just a few points to the siderails.
Step 6
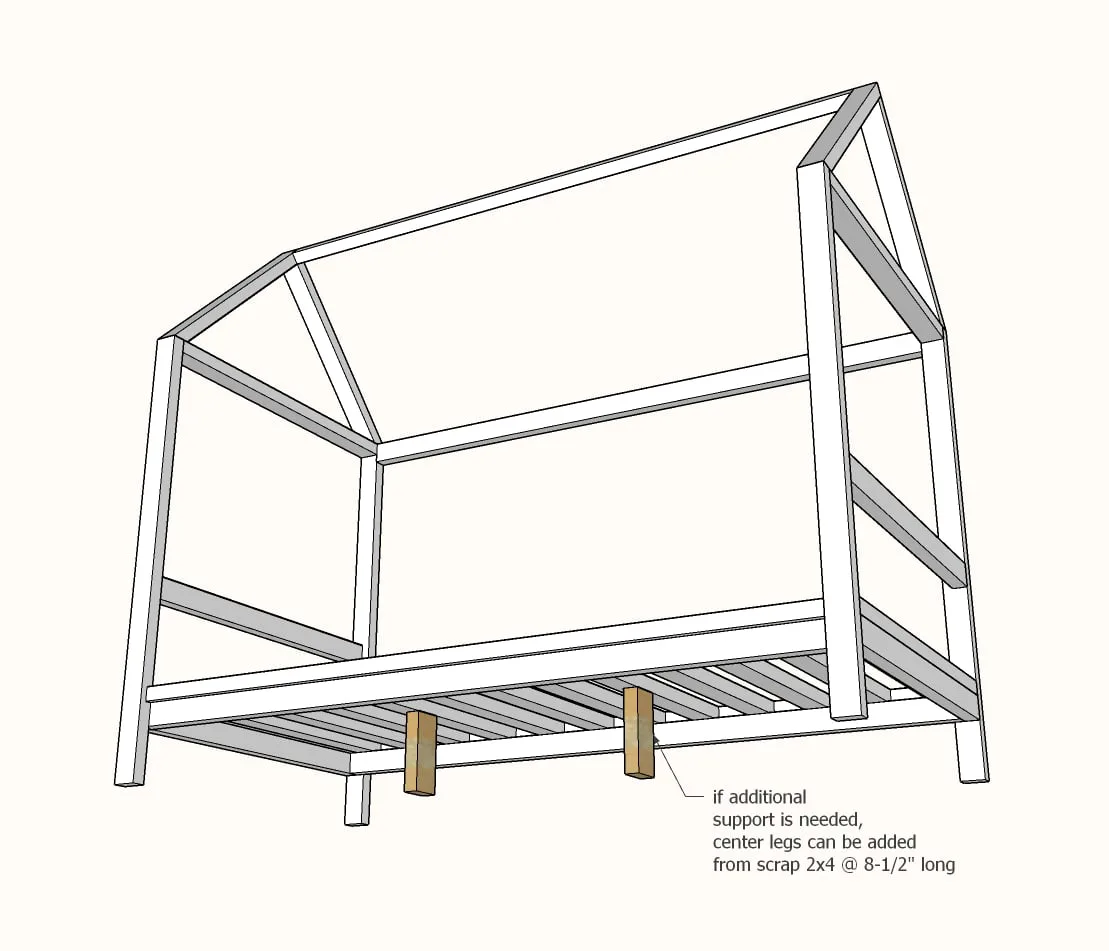
Optional Center Legs: If you would like to increase the support under the mattress, scrap 2x4s can be cut and screwed to the center slats.
Step 7
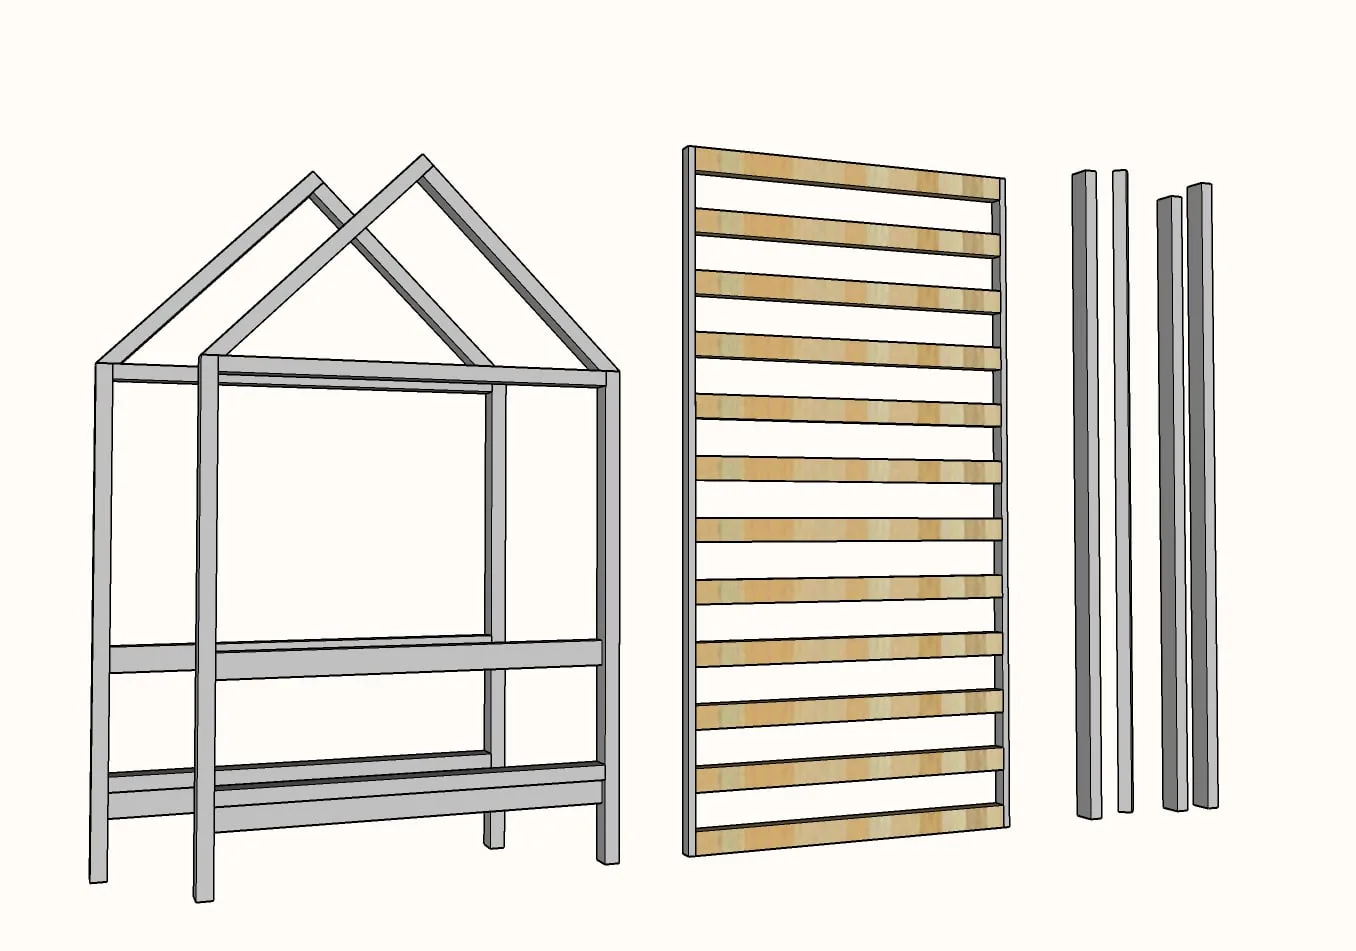
Transporting the Bed: This bed may not be able to fit through doorways. It can be easily broken down into pieces as shown for transport, and reassembled inside the room.
Finishing
Sand all surfaces, starting with a medium grit and finishing with fine. Wipe off the dust, fill any holes or gaps with wood filler, and sand smooth once dry. Apply primer if you're painting, then finish with your choice of paint or stain and seal with a durable clear topcoat. For outdoor projects, use exterior-rated primer, paint or stain, and sealer so the piece stands up to the weather.