Grace's Mailbox
Shop at the hardware store (or your scrap pile) instead of the toy aisle! Your money is going to go much further and you will be able to give quality gifts that will be played with and loved for years.
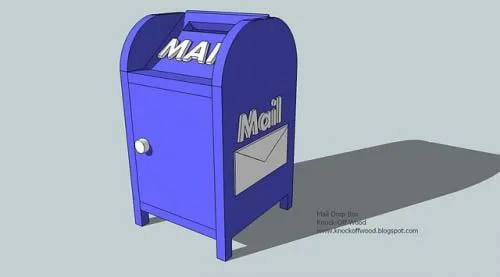
What you need
- 1 - 1x10 @ 4feet
- 1 - 1x3 @ 1 foot
- 1 - 1x8 @ 3feet
- 1 – 1/4″ Plywood @ 7 1/2″ x 5″ (approximate, measure for exact fit)
- B) 1 – 1×10 @ 7 1/2″ (Bottom)
- D) 1 – 1×8 @ 10″ (Back)
A) 2 – 1×10 @ 16″ (Sides, cut out into the shapes of the sides)
C) 1 – 1×2 @ 7 1/2″ (Top front trim)
E) 1 – 1×8 @ 6″ (Top, Front, slot cutout)
F) 1 – 1/4″ Plywood @ 7 1/2″ x 5″ (approximate, measure for exact fit)
G) 1 – 1×8 @ 9 1/4″ (1/4″ give for the door)
- measuring tape
- square
- safety glasses
- hearing protection
- drill
- circular saw
- jigsaw
- nailer
- sander
Step by step
Step 1
Using a jigsaw or similar tool, cut out the following shapes out of boards A. Use the measurements above to guide you.

Step 2
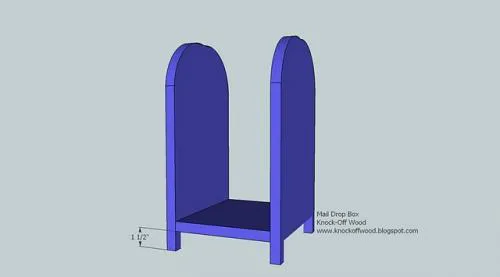
Fasten the bottom, B, keeping the bottom of the bottom flush with the cutout bottom on the sides, A. Use the diagram above to guide you.
Step 3
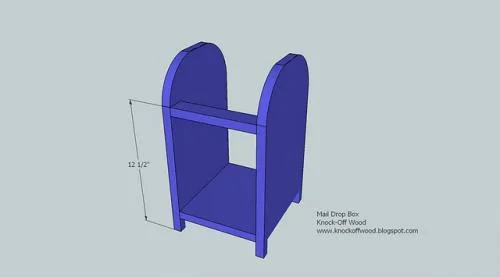
Add the top front trim piece, C, as shown above.
Step 4
Add the back piece, D, as shown above. Make sure you nail through the bottom into the edge of D, and through the sides, A.

Step 5
Step 6
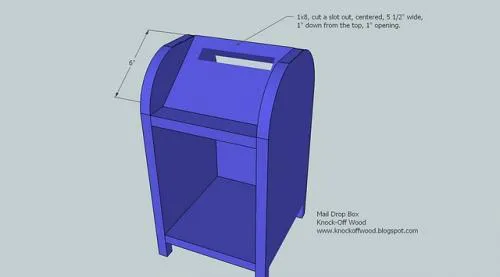
Measure the distance from the top of E to the back of D (should be around 5″) and cut a piece of 1/4″ plywood to this measurement, 7 1/2″ wide. This is board F. Fasten to D and E using 1″ nails.

Step 7
Fit the door, G, leaving a 1/4″ gap around the door.

Finishing
Sand all surfaces, starting with a medium grit and finishing with fine. Wipe off the dust, fill any holes or gaps with wood filler, and sand smooth once dry. Apply primer if you're painting, then finish with your choice of paint or stain and seal with a durable clear topcoat. For outdoor projects, use exterior-rated primer, paint or stain, and sealer so the piece stands up to the weather.