Corner Unit for the Twin Storage Bed
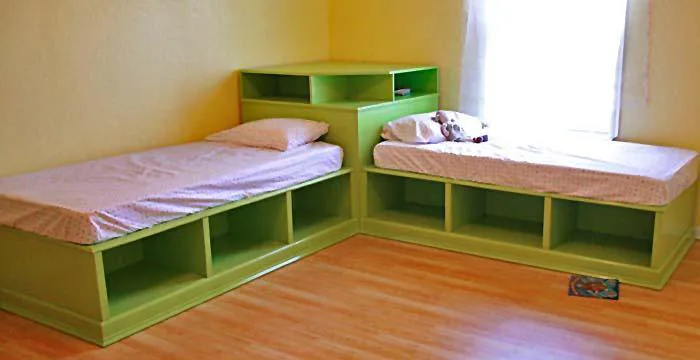
Take advantage of often wasted corner space by building a hutch for the storage beds. This hutch sits on top of the pictured corner unit.
Dimensions
Use the size-specific shopping and cut lists below.

What you need
- 1 – 1×2 8′ Length
- 2 – 1×12 10′ Length
- 1 – 2×2 8′ Length
- 1/4″ Plywood for the Backs (1 Sheet)
- 3/4″ MDF for the Top and Face (1 Sheet)
- 2″ brad nails or Screws
- wood glue
- 1 1/4″ Screws
- 1 1/4″ Nails
- 8 – 1×12 @ 24 1/2″ (Sides and Shelves)
- 2 – 1×12 @ 26″ (Tops)
- 2 – 1/4″ Plywood @ 25 1/4″ x 26″ (Backs)
- 8 – 1×2 @ 11″ (Cleats, one end cut at a 45 degree bevel)
- 1 – 3/4″ Plywood or MDF @ 19 1/2″ x 25 1/4″ (Face)
- 2 – 2×2 @ 27 1/4″ (Back Supports)
- 1 – 2×2 @ 25 1/4″ (Back Leg)
- 1 – 3/4″ Plywood or MDF @ 40 1/2″ x 40 1/2″ (Top, end clipped off at angle as shown in step 6)
- measuring tape
- square
- pencil
- safety glasses
- hearing protection
- drill
- circular saw
- compound miter saw
- nailer
- sander
- level
Step by step
Step 1
Build your box as shown above. You can use either 2″ screws or nails and glue. Screws will be stronger but nails (with a nailer) will be easier and easier to hide and fine for this application. Use screws if you plan on heavy objects resting on the top shelf. Build two as shown above.

Back
Fasten the back on with 1 1/4″ nails and glue. Make sure you also fasten to the back shelf. Finish the bookshelves at this stage, painting as desired.

Cleats
Use 1 1/4″ nails and glue to fasten the cleats to the side of the bookshelves, on the insides. The cleats will NOT be fastened to the same side on the two bookcases, so line your bookcases up as shown below and attach the cleats.

Face
Paint or finish the face as desired at this stage. Then on room assembly, use 1 1/4″ screws to fasten the face to the cleats as shown above.

Step 5

Top
Paint or finish the top piece independently. Then on assembly, attach as shown above to the tops of the bookcases and the back support pieces. You may wish to also attach the bottoms of the bookcases to the tops of the corner unit.

Finishing
Sand all surfaces, starting with a medium grit and finishing with fine. Wipe off the dust, fill any holes or gaps with wood filler, and sand smooth once dry. Apply primer if you're painting, then finish with your choice of paint or stain and seal with a durable clear topcoat. For outdoor projects, use exterior-rated primer, paint or stain, and sealer so the piece stands up to the weather.