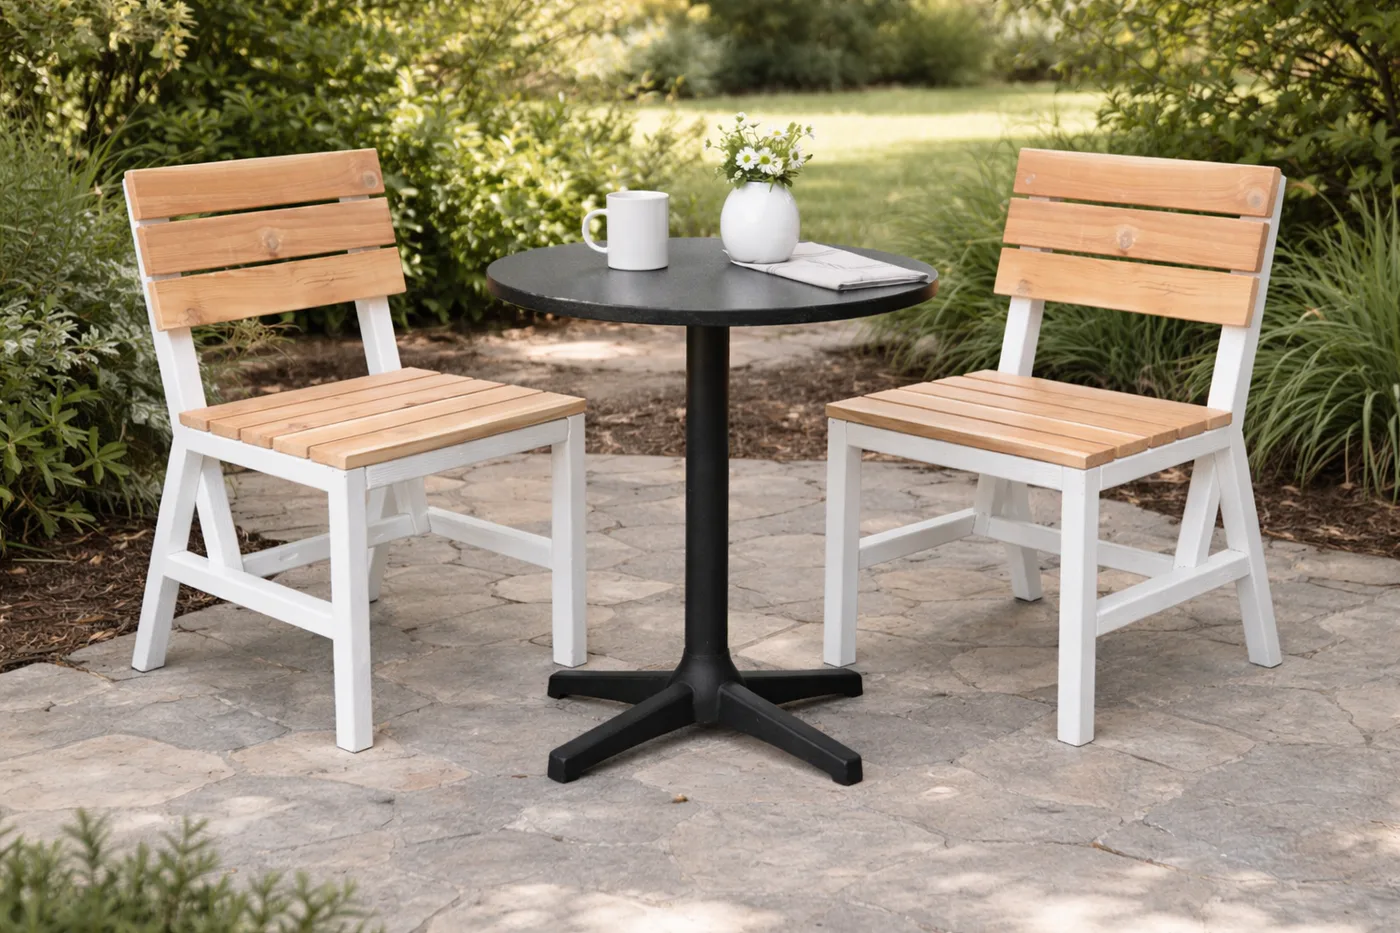
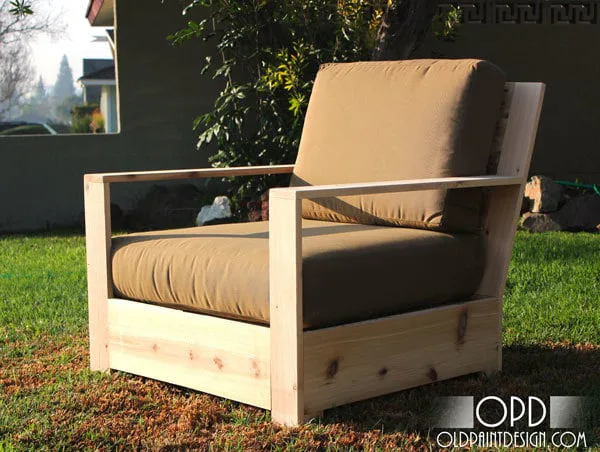
Classic Adirondack Chair
DIY adirondack chair plans from This plan features a more upright seating angle, more traditional styling, with a chunkier base. Photos by Hamilton Park Home.

Dimensions
Use the size-specific shopping and cut lists below.

What you need
- 1 – 1×8, 8′ Long
- 4 – 1×4, 8′ Long
- 1 – 2×2, 8′ Long
- 1 – 1×3 8′ Long
- 1 1/4″ Exterior rated star bit screws
- 2″ Exterior rated star bit screws
- Wood Glue
- 2 – 1×8 @ 32 3/4″ (Stringers)
- 1 – 1×8 @ 21″ (Front)
- 5 – 1×4 @ 21″ (Seat Slats)
- 2 – 1×4 @ 20 3/4″ (Front Legs)
- 2 – 1×3 @ 24″ (Arm Supports)
- 5 – 1×4 @ 30 1/2″ (Back Slats)
- 1 – 1×3 @ 19 1/2″ (Top Back Trim)
- 1 – 1×4 @ 19 1/2″ (Bottom Apron Back)
- 1 – 2×2 @ 22 1/2” (Center Back Support)
- 2 – 1×4 @ 25 1/2″ (Arm Rests)
- 2 – 1×3 @ 6″ (Decorative Front Arm Supports)
- measuring tape
- square
- pencil
- hammer
- safety glasses
- hearing protection
- drill
- circular saw
- compound miter saw
- level
Step by step
Cut Your Stringers
From the 1×8 stringers listed in the cut list, use a speed square and carefully mark out the cuts needed with a pencil on the board. After all cuts are made, clamp the board down securely and cut off with a circular saw. Repeat for the second stringer.

Step 2
FRONT APRON Attach your front apron with 2″ screws and glue as shown above.
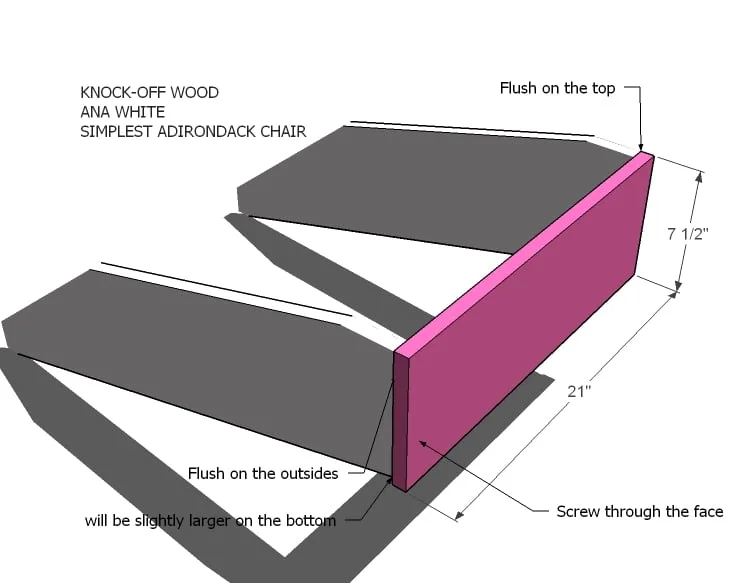
Step 3
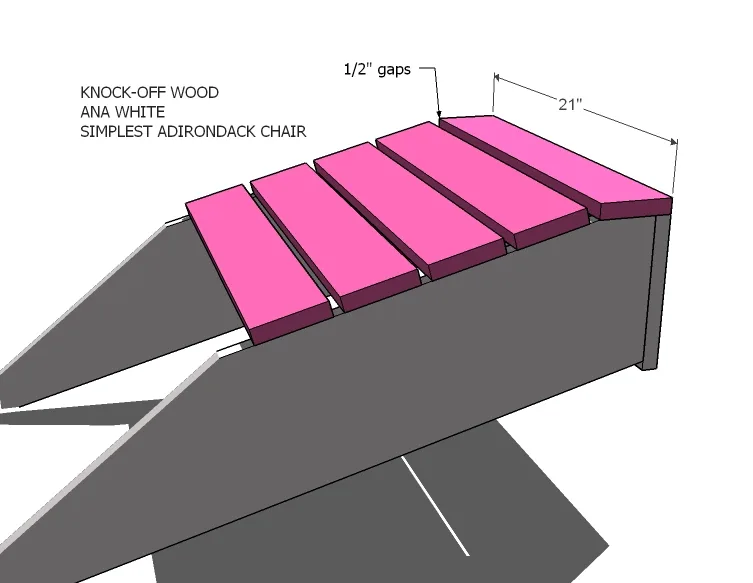
SEAT SLATS Lay your seat slats as shown above, starting with the first flat seat slat. Leave a 1/2″ gap between the slats. Screw down with 2″ screws and glue.
Step 4
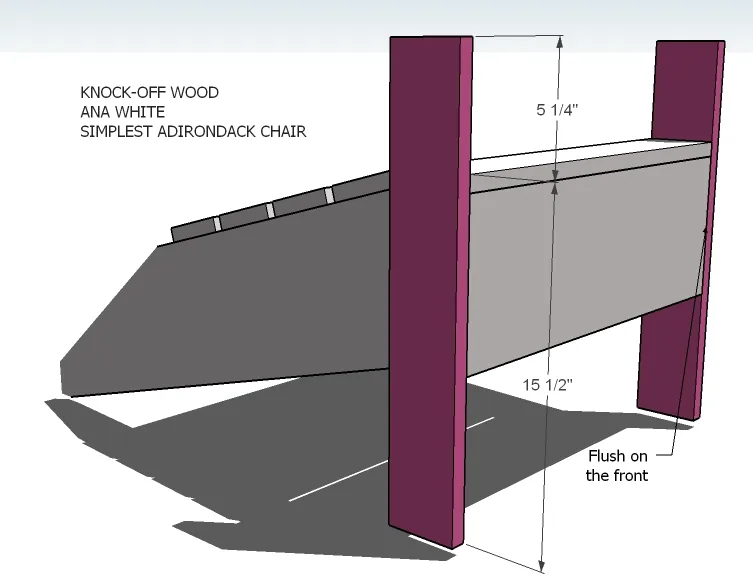
FRONT LEGS Use 1 1/4″ screws and glue to attach the front legs as shown above.
Step 5
Step 6
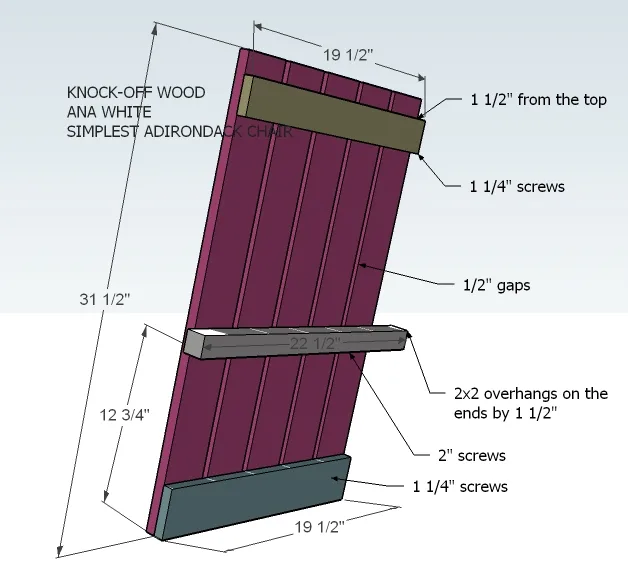
BACK Build the back as shown above.
Step 7
ATTACHING THE BACK Attach the back as shown above. This isn’t an exact science, I purposely choose to use a 1×3 for the arm supports and a 2×2 for the back support so that it would be super easy for you to get the back to line up just right with the seat and arm supports. You may want to enlist your neighbors assistance.
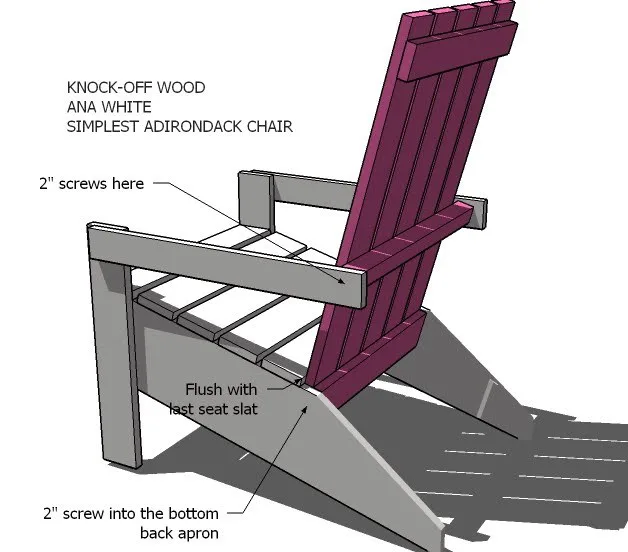
Step 8
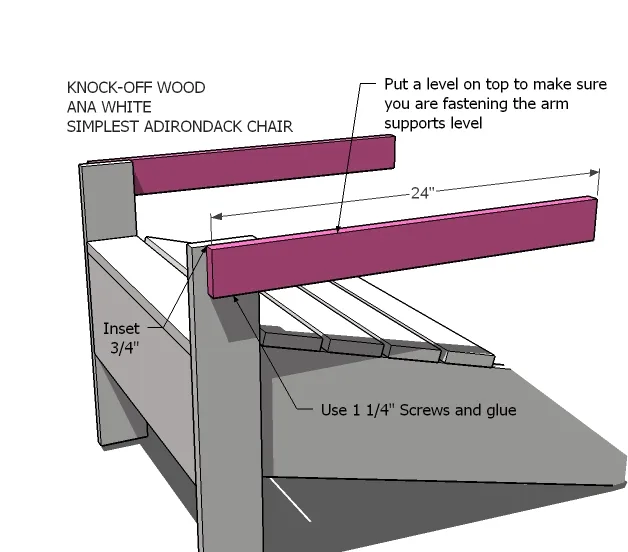
ARMS & SUPPORTS Attach your arms with 2″ screws and glue. Then attach the arm supports.
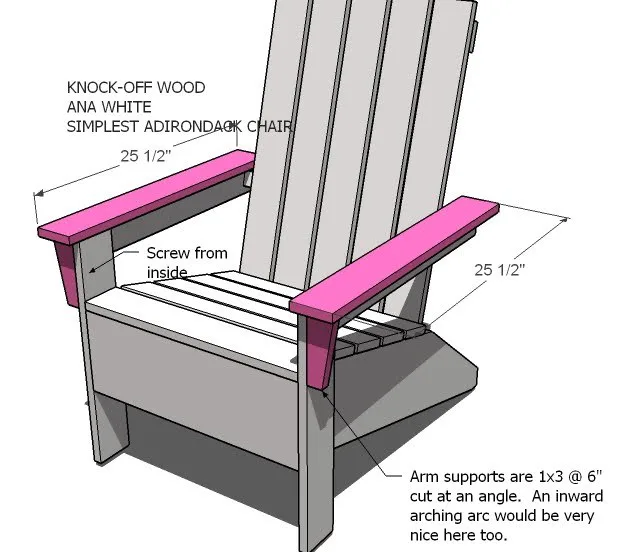
Finishing
Sand all surfaces, starting with a medium grit and finishing with fine. Wipe off the dust, fill any holes or gaps with wood filler, and sand smooth once dry. Apply primer if you're painting, then finish with your choice of paint or stain and seal with a durable clear topcoat. For outdoor projects, use exterior-rated primer, paint or stain, and sealer so the piece stands up to the weather.