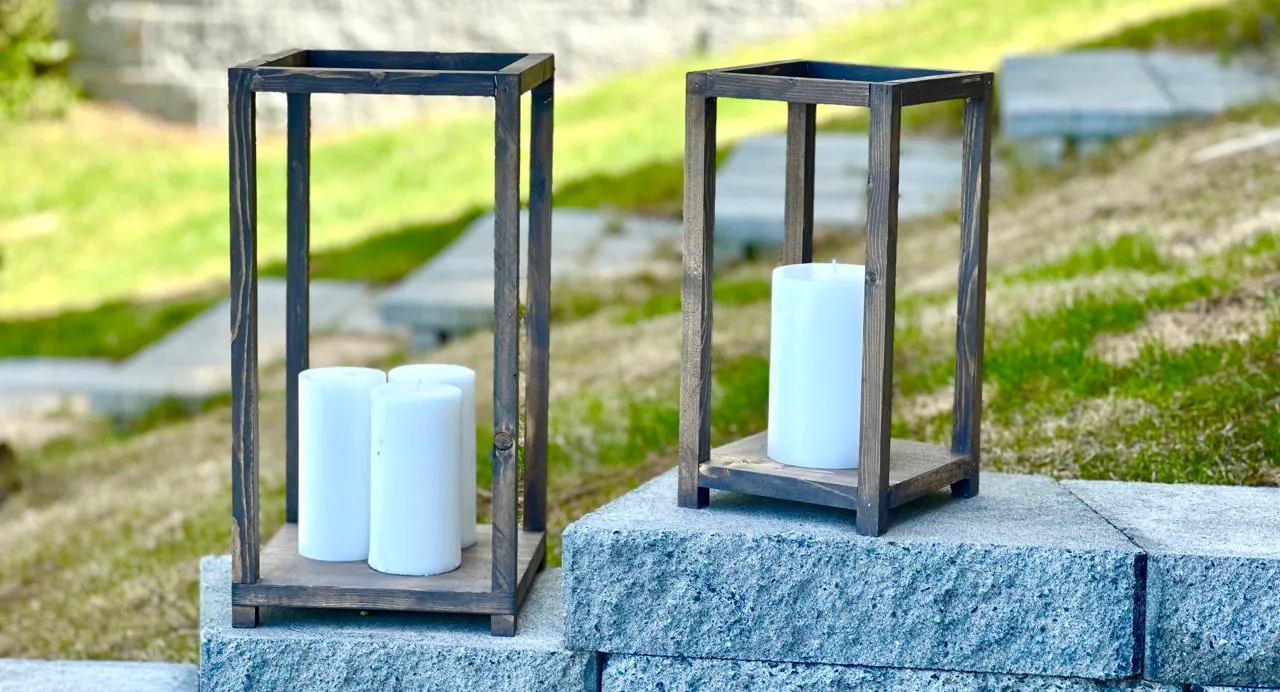
Wood Lantern Tutorial
The ultimate wood lantern tutorial! Plans for three different sizes, and three different styles. Build in bulk for a wedding, or a few to add decor to your space, these beautiful wood lanterns are inexpensive and easy to make. with video, diagrams, shopping and cut lists.
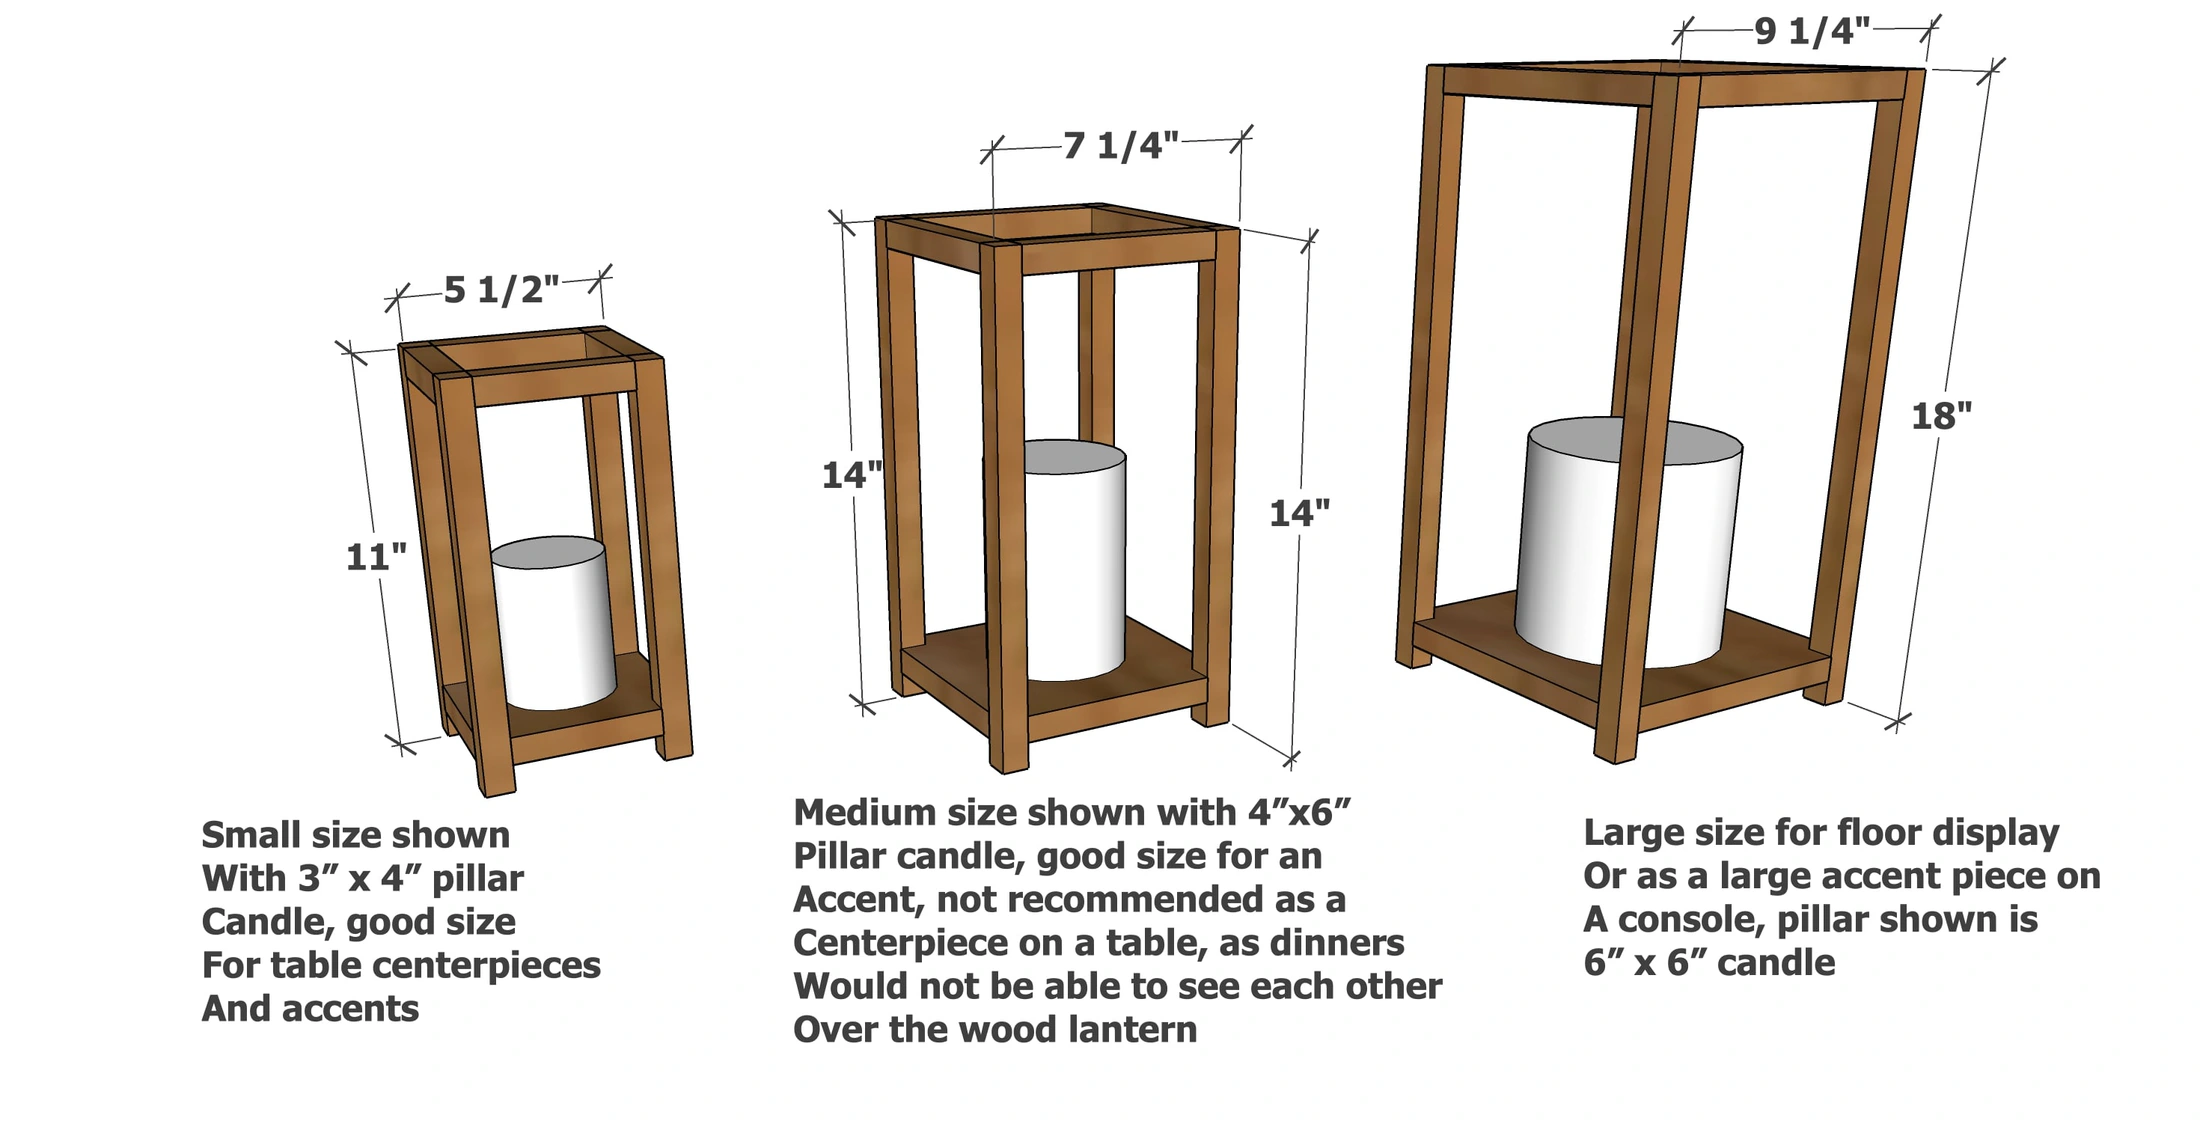
Dimensions
Use the size-specific shopping and cut lists below.
What you need
- Small
- Medium
- Large
- 3/4" x 3/4" wood dowels
- 60"
- 80"
- 104"
- Bottoms
- 1x6 @ 5-1/2"
- 1x8 @ 7-1/4"
- 1x10 @ 9-1/4"
- 1-1/4" brad nails
- wood glue
- Small
- Medium
- Large
- 3/4" x 3/4" wood dowels
- 60"
- 80"
- 104"
- Bottoms
- 1x6 @ 5-1/2"
- 1x8 @ 7-1/4"
- 1x10 @ 9-1/4"
- 1-1/4" brad nails
- wood glue
- Small
- Medium
- Large
- 3/4" x 3/4" wood dowels
- 60"
- 80"
- 104"
- Bottoms
- 1x6 @ 5-1/2"
- 1x8 @ 7-1/4"
- 1x8 @ 7-1/4"
- 1x10 @ 9-1/4"
- 1x10 @ 9-1/4"
- 1x12 @ 11-1/4"
- 1-1/4" brad nails
- wood glue
Option 1 - Jigsawed Out Corners - Shopping list for 1 Lantern
Option 2 - Small Feet at Each Corner - Shopping list for 1 Lantern
Option 3 - Double Bases - Shopping list for 1 Lantern
- Option 1 - Jigsawed Out Corners
- Small
- Medium
- Large
- (4) 3/4" x 3/4" wood dowels
- 11"
- 14"
- 18"
- (4) 3/4" x 3/4" wood dowels
- 4"
- 5-3/4"
- 7-3/4"
- Bottom, cut one
- 1x6 @ 5-1/2"
- 1x8 @ 7-1/4"
- 1x10 @ 9-1/4"
- Option 2 - Small Feet at Each Corner
- Small
- Medium
- Large
- (4) 3/4" x 3/4" wood dowels
- 9-1/2"
- 12-1/2"
- 16-1/2"
- (4) 3/4" x 3/4" wood dowels
- 4"
- 5-3/4"
- 7-3/4"
- Bottom, cut one
- 1x6 @ 5-1/2"
- 1x8 @ 7-1/4"
- 1x10 @ 9-1/4"
- (4) 3/4" x 3/4" wood dowels
- 3/4"
- 3/4"
- 3/4"
- Option 3 - Double Bases
- Small
- Medium
- Large
- (4) 3/4" x 3/4" wood dowels
- 9-1/2"
- 12-1/2"
- 16-1/2"
- (4) 3/4" x 3/4" wood dowels
- 4"
- 5-3/4"
- 7-3/4"
- Bottom, cut one
- 1x6 @ 5-1/2"
- 1x8 @ 7-1/4"
- 1x10 @ 9-1/4"
- Second bottom, cut one
- 1x8 @ 7-1/4"
- 1x10 @ 9-1/4"
- 1x12 @ 11-1/4"
- measuring tape
- pencil
- safety glasses
- compound miter saw
- nailer
- sander
Step by step
Step 1
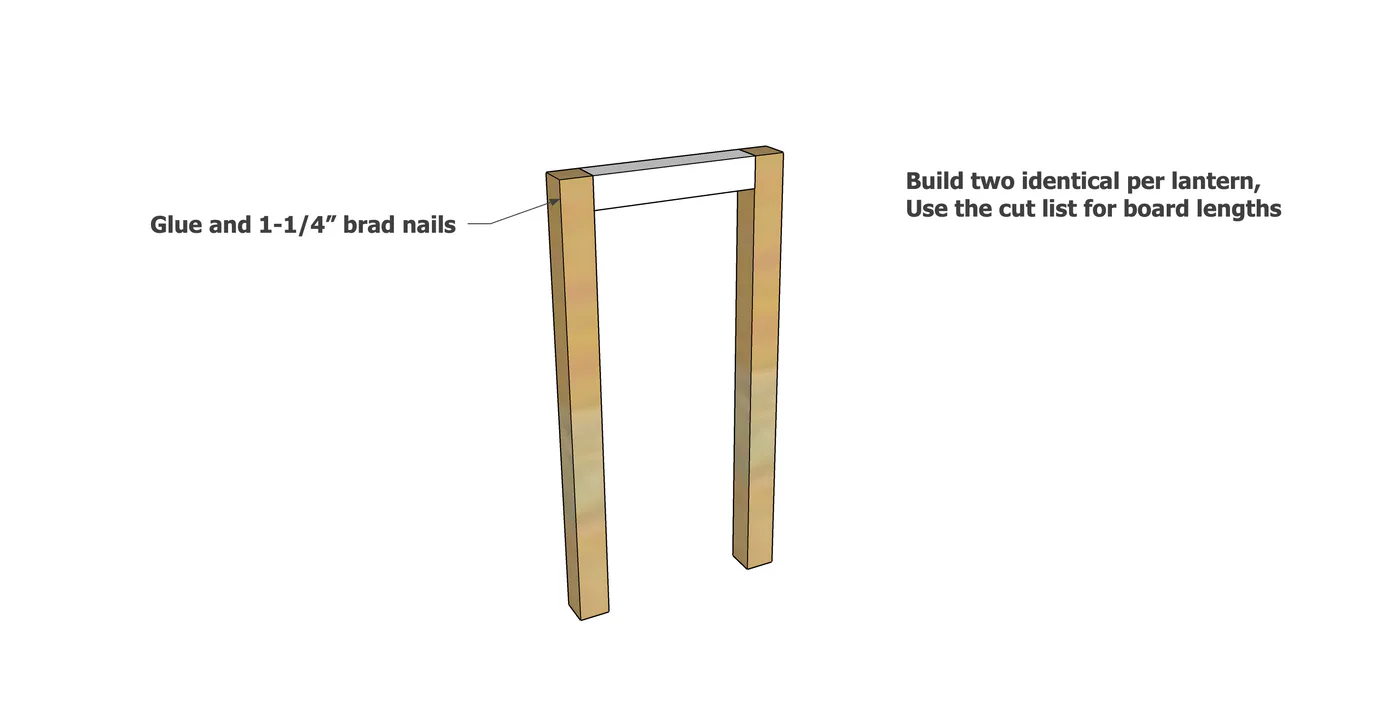
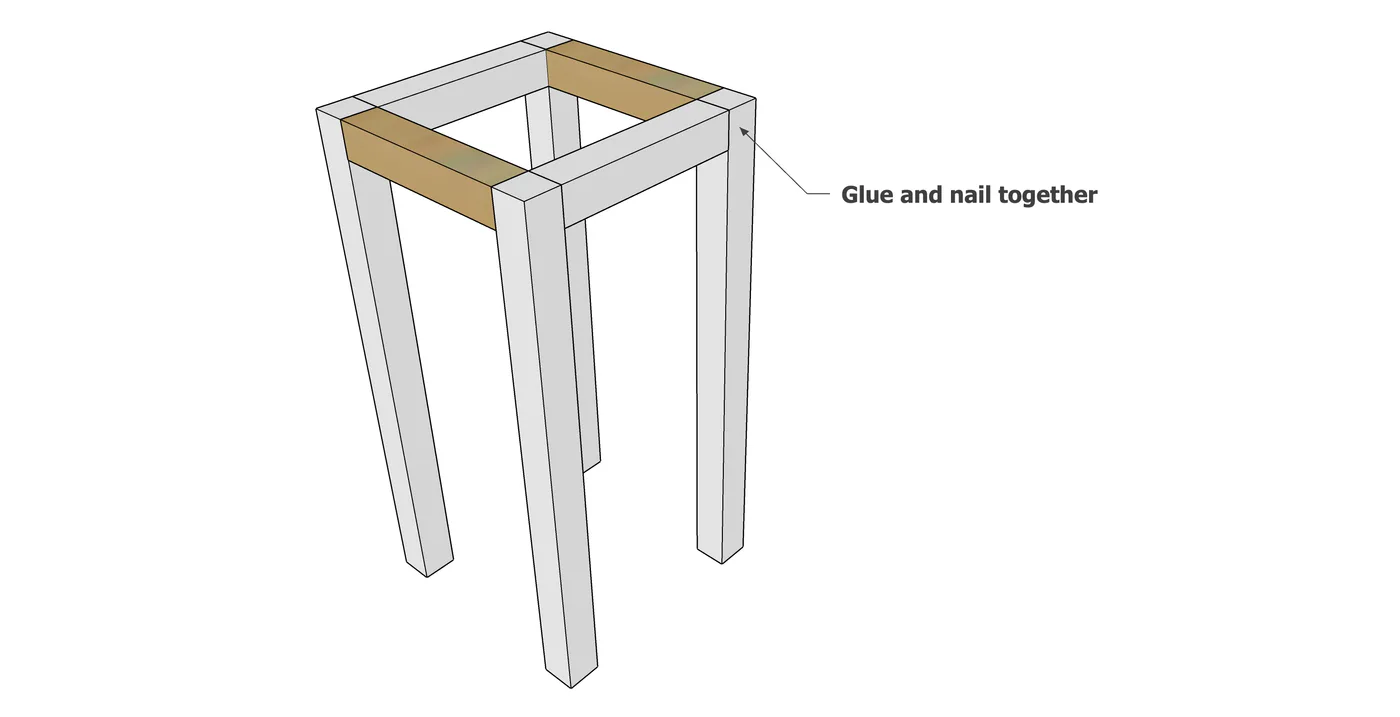
Attach two of the longer 3/4" dowel pieces to one of the shorter 3/4" dowel pieces. Build two identical.
Step 2
Attach the two pieces built in step 1 together with the remaining 3/4" dowel pieces.
Step 3
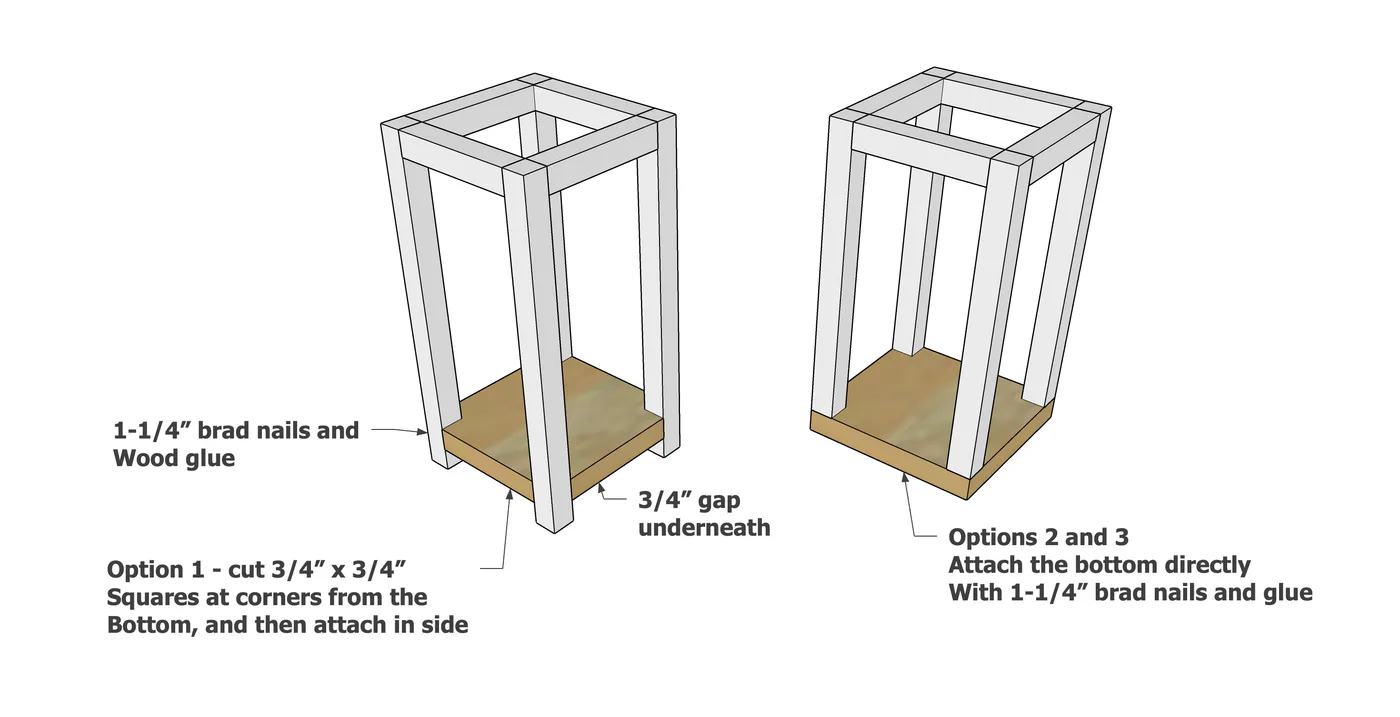
For option 1, cut the corners of the base out with a jigsaw, cutting out a 3/4" x 3/4" space. Attach the base inside the lantern legs with 1-1/4" brad nails and glue. For options 2 and 3, simply attach to the base with brad nails from the bottom.
Step 4
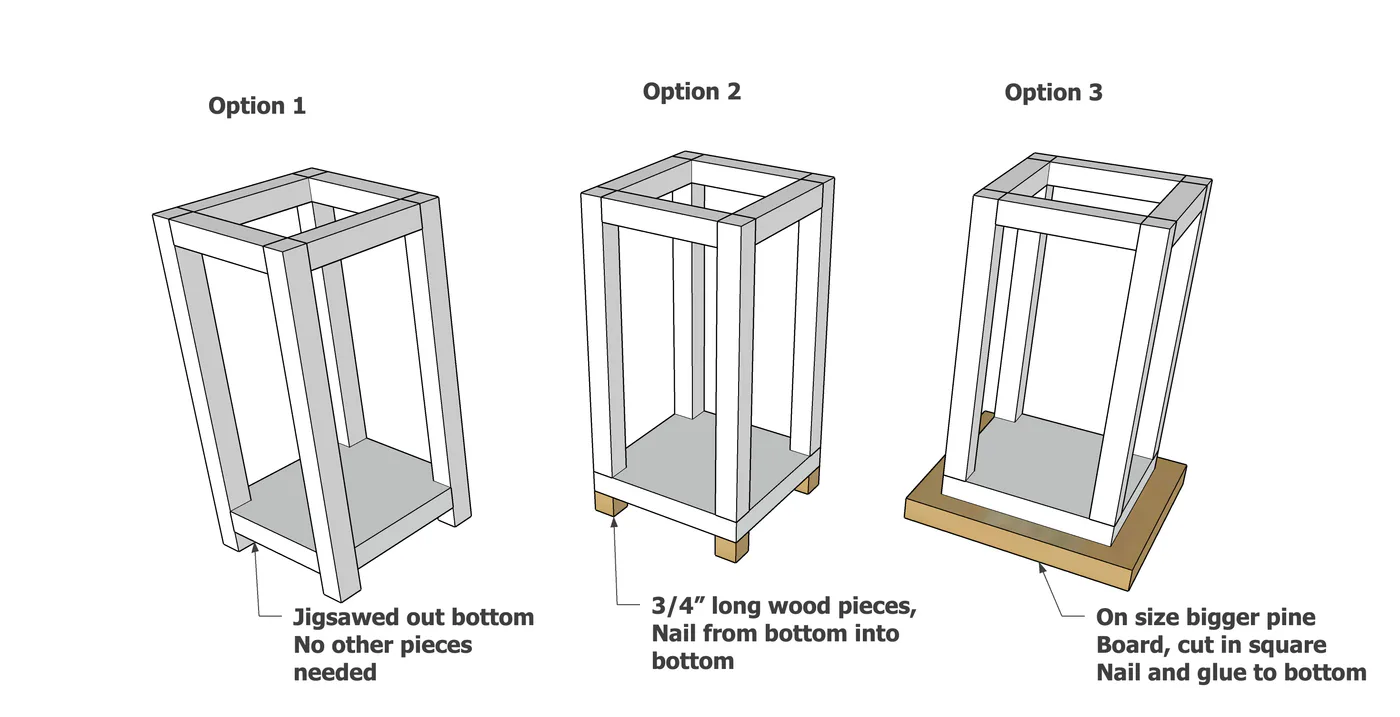
For options 2 and 3, add the feet or second base to the bottom with glue and 1-1/4" brad nails.
Finishing
Sand all surfaces, starting with a medium grit and finishing with fine. Wipe off the dust, fill any holes or gaps with wood filler, and sand smooth once dry. Apply primer if you're painting, then finish with your choice of paint or stain and seal with a durable clear topcoat. For outdoor projects, use exterior-rated primer, paint or stain, and sealer so the piece stands up to the weather.