Wood Christmas Tree Shelf
Decorate and display with a Wood Christmas Tree Shelf! Perfect for Advent Calendar, displaying Christmas Cards, or hanging stockings. Our tree shelf features four shelves and hooks. This is a free project plan with step by step diagrams, video tutorial, shopping list, cut list and lots of brag photos - everything you need to build your own wood Christmas Tree Shelf! Built by Jaime Costiglio.

Dimensions
Use the size-specific shopping and cut lists below.

What you need
- 12 feet of 1x4 or 1x3 boards (I used 1x3s in the video, Jaime used 1x4s)
- 1/4" plywood 6" x 15" or larger (for just one portion, will need more plywood for covering multiple portions)
- 1-1/4" and 3/4" brad nails
- 3 hooks
Hanging kit or screws for hanging to studs in wall
- TRUNK
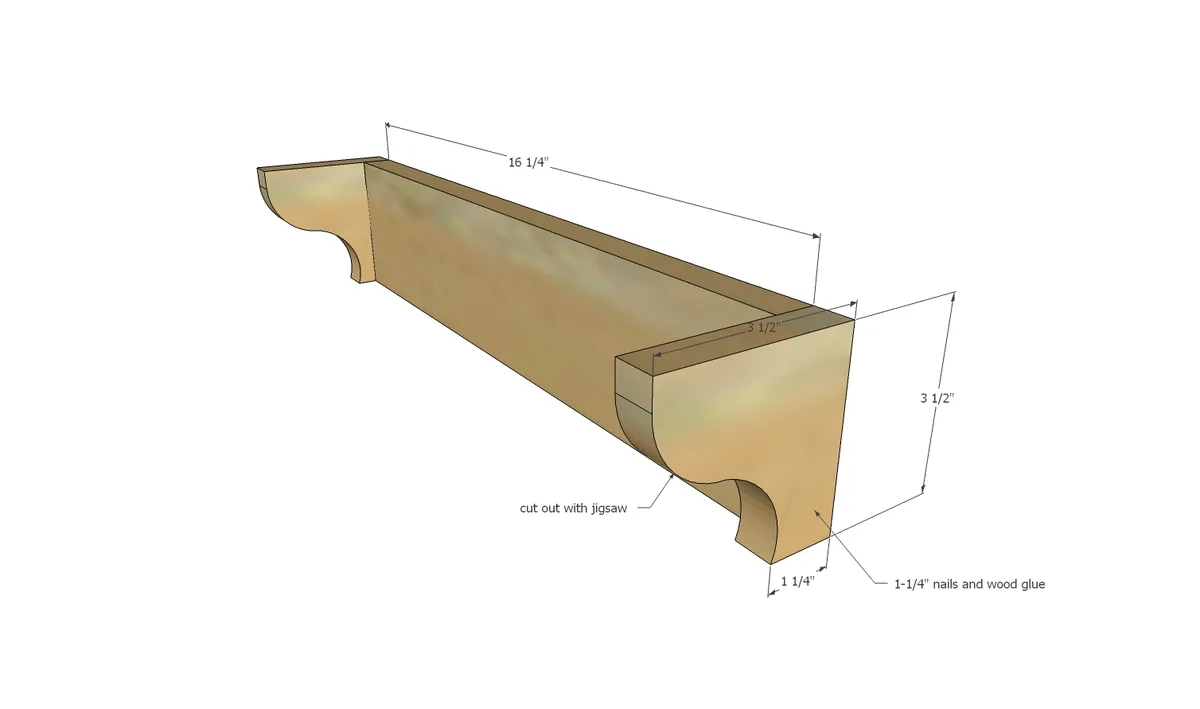
- 1 - 1x4 @ 16-1/4"
- 2 - 1x4 @ 3-1/2" or 1x3 @ 2-1/2"
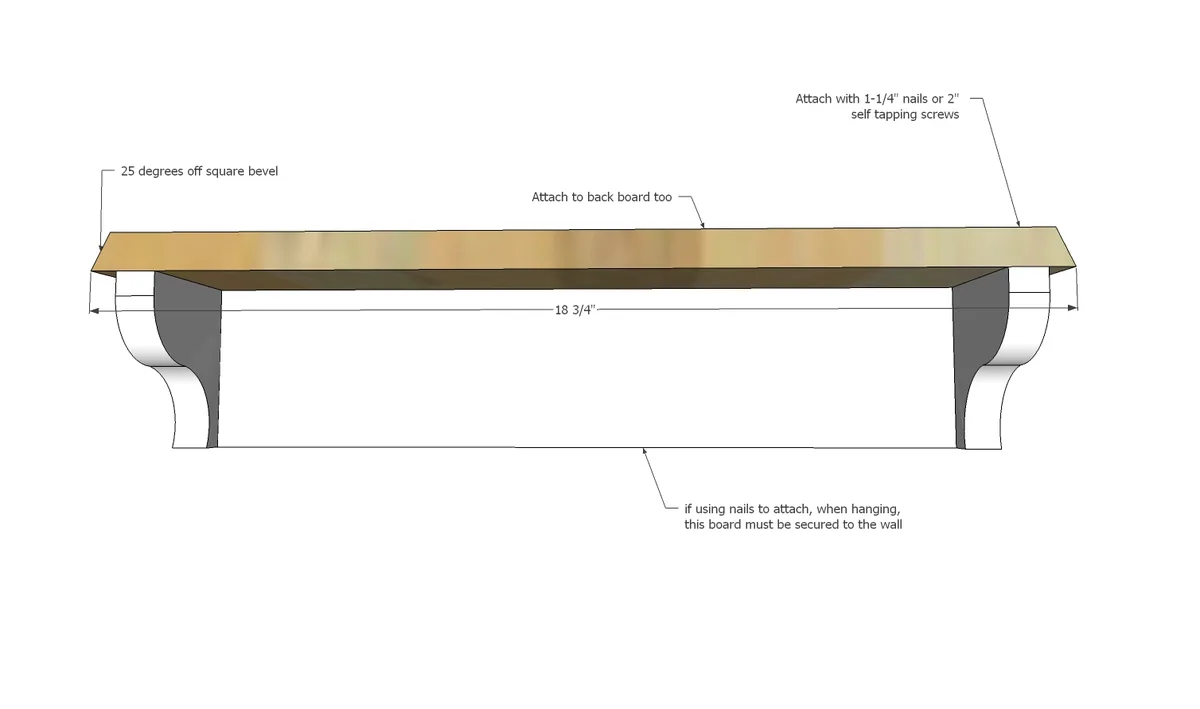
- 1 - 1x4 @ 18-3/4" longest point to longest point both ends cut at 25 degrees bevel
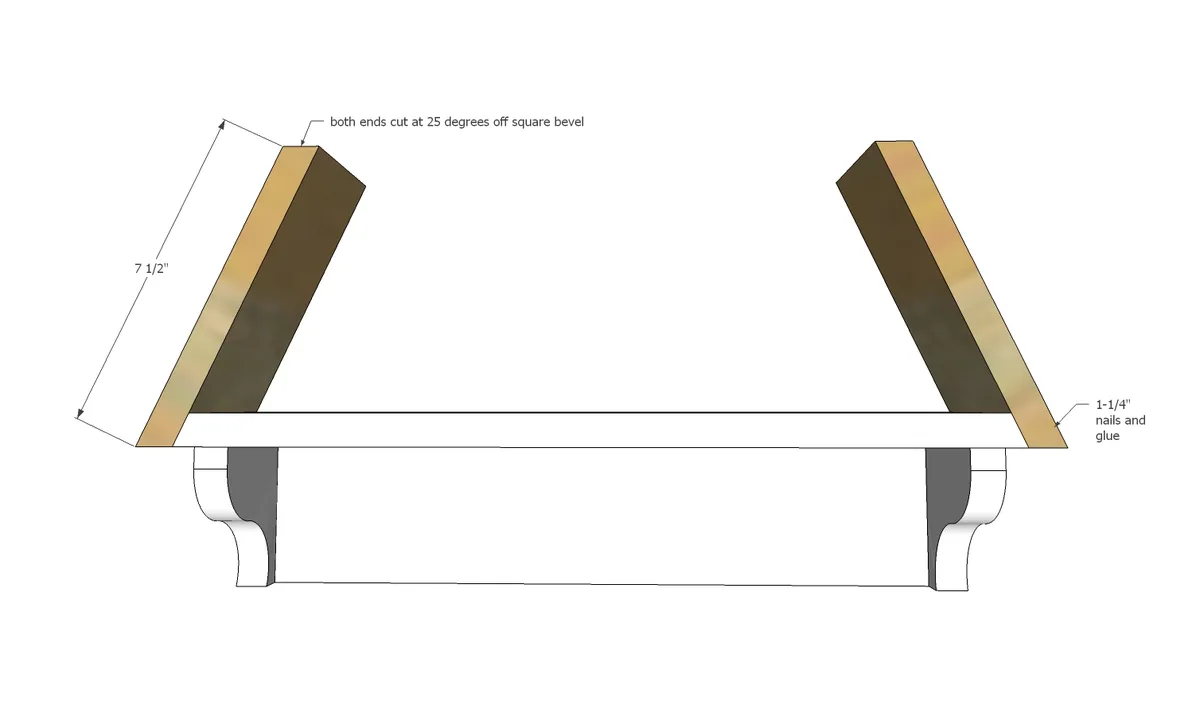
- 6 - 1x4 @ 7-1/2" long point to short point, both ends cut at 25 degrees bevel
- 1 - 1x4 @ 15-1/8" longest point to longest point both ends cut at 25 degrees bevel
- 1 - 1x4 @ 11-3/8" longest point to longest point both ends cut at 25 degrees bevel
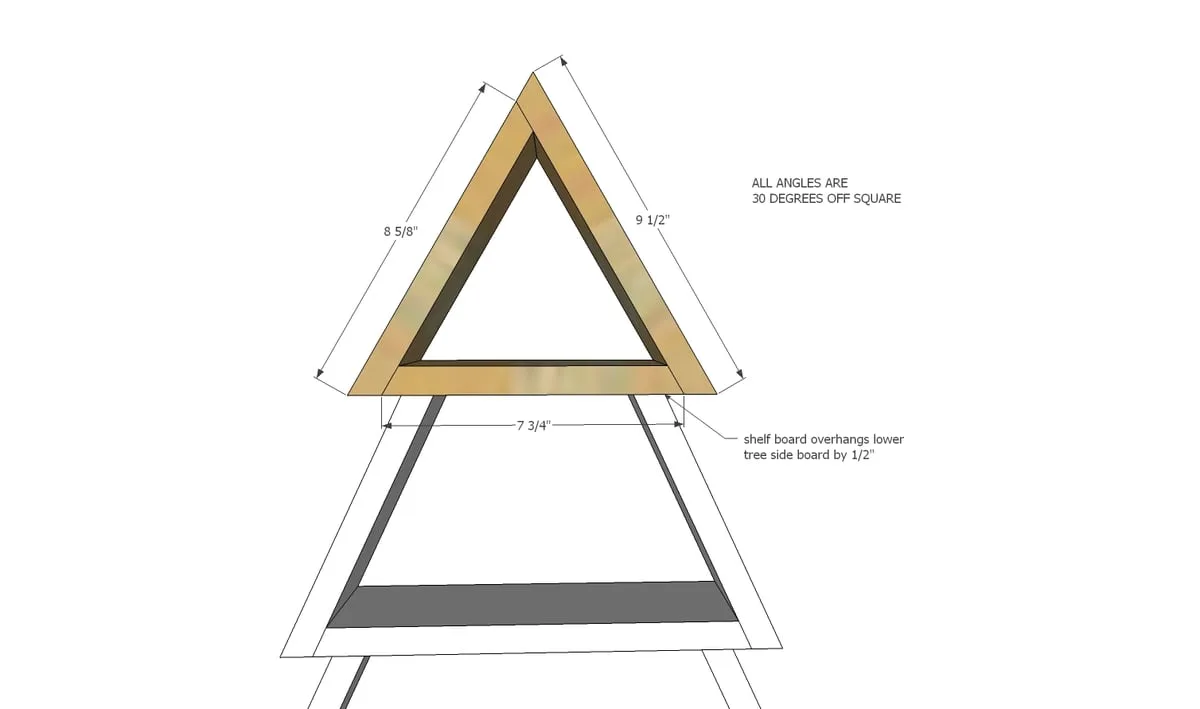
- TREETOP - CHANGE SAW BEVEL TO 30 DEGREES
- 1 - 1x4 @ 7-3/4" long point to long point, both ends cut at 30 degrees bevel
- 1 - 1x4 @ 8-5/8" long point to long point, both ends cut at 30 degrees bevel
- 1 - 1x4 @ 9-1/2" long point to long point, both ends cut at 30 degrees bevel
You can directly substitute 1x3s for 1x4s in the below cut list
MAIN TREE - SAW BEVEL IS 25 DEGREES
Scrap 1/4" plywood for filling in second shelf approximately 6" x 15"
- measuring tape
- square
- pencil
- safety glasses
- hearing protection
- circular saw
- compound miter saw
- nailer
- sander
Step by step
Step 1
Use a jigsaw to cut out the side support pieces in a decorative shape before cutting - once you cut into the small piece, it's hard to clamp down and make the decorative cuts. Attach to back piece. You can use 1-1/4" nails and glue or screws to attach.
Step 2
Use 1-1/4" brad nails and glue to attach bottom shelf to supports and back.
Step 3
Use 1-1/4" brad nails and glue to attach a pair of sides to the bottom shelf.
Step 4
Continue working upward, attaching the shelves and sides, with 1-1/4" brad nails and glue.

First, attach the bottom board to the rest of the project as you did all other shelves.
Then attach the sides to the bottom board to complete the tree. Use 1-1/4" brad nails and glue.
Step 6
Trace out the second to top shelf on to 1/4" thick plywood. Cut out with circular saw. Glue and nail in place with 3/4" brad nails.

Step 7
Attach project to wall, preferably through bottom and back plywood pieces.

Finishing
Sand all surfaces, starting with a medium grit and finishing with fine. Wipe off the dust, fill any holes or gaps with wood filler, and sand smooth once dry. Apply primer if you're painting, then finish with your choice of paint or stain and seal with a durable clear topcoat. For outdoor projects, use exterior-rated primer, paint or stain, and sealer so the piece stands up to the weather.