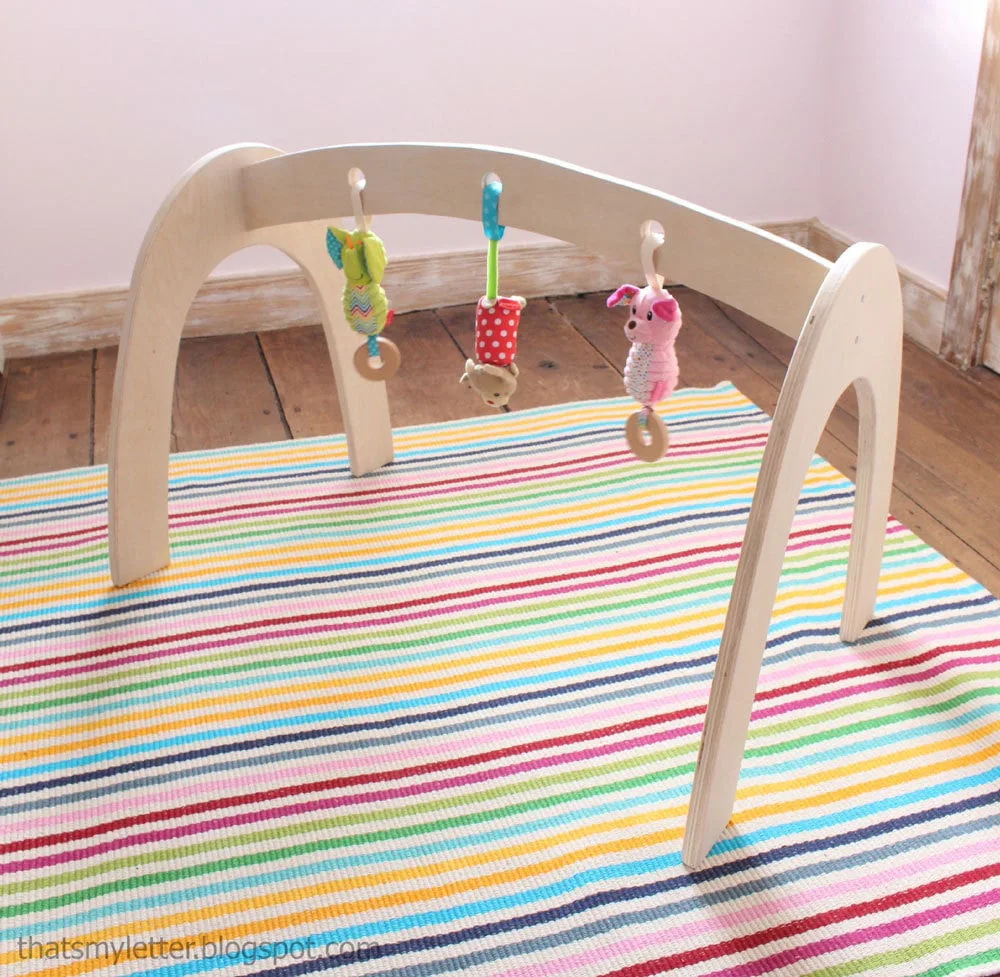
Wood Baby Gym
The final Handmade Holiday Plan for 2014!!!
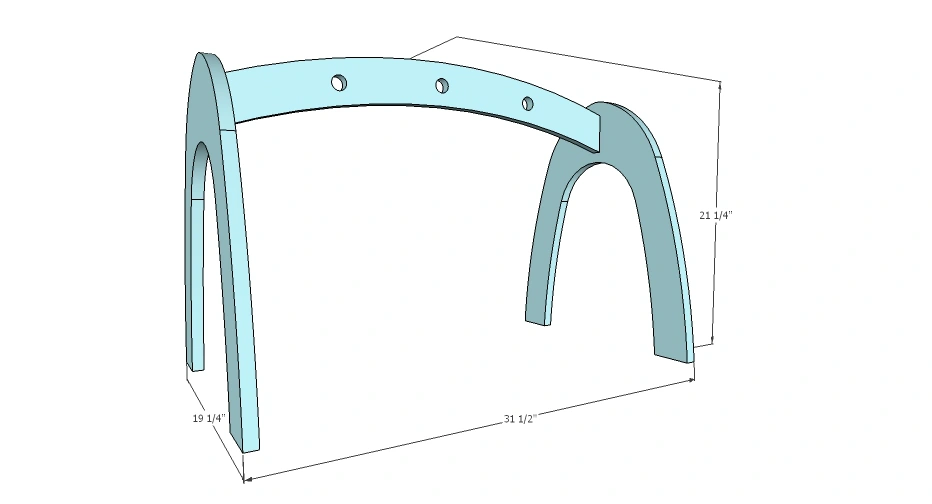
Dimensions
Use the size-specific shopping and cut lists below.
What you need
- 1 - 24" x 48" 3/4" thick plywood 3 baby toys 4 - 2" wood screws
- measuring tape
- square
- pencil
- safety glasses
- hearing protection
- drill
- jigsaw
- sander
- countersink drill bit
Step by step
Step 1
To get all the cuts on the plywood you will need to lay them out like this. Take care when cutting.

Step 2
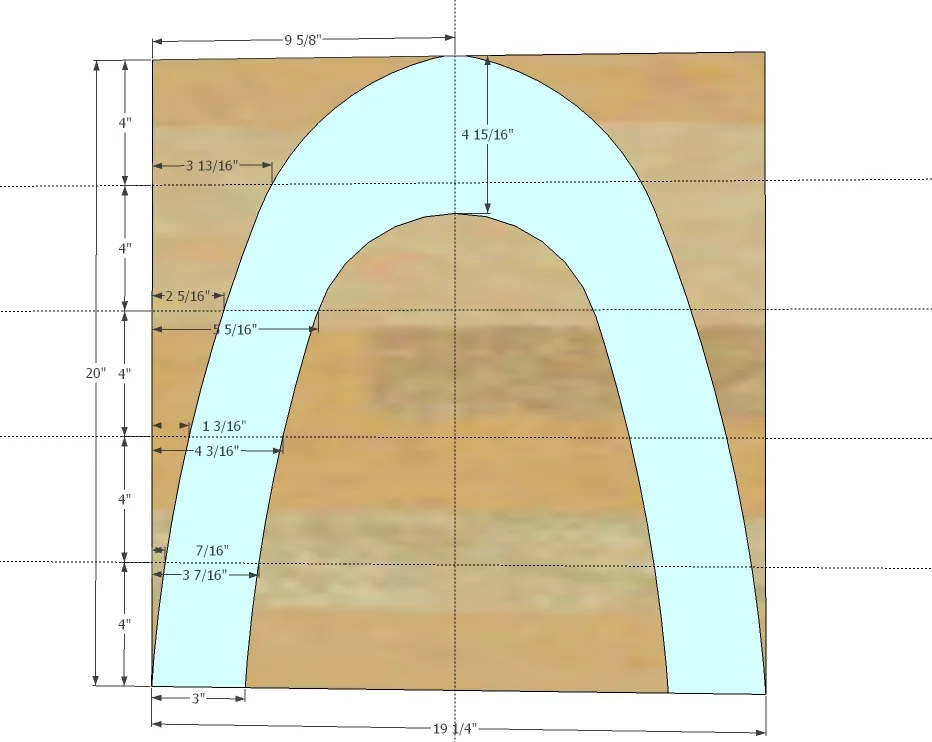
Layout the arch cuts and carefully cut out with a jigsaw. Use a scrolling blade. Once you have one cut use it as a pattern for cutting the second. Clamp the two cut pieces together and sand the edges smooth and even.
Step 3
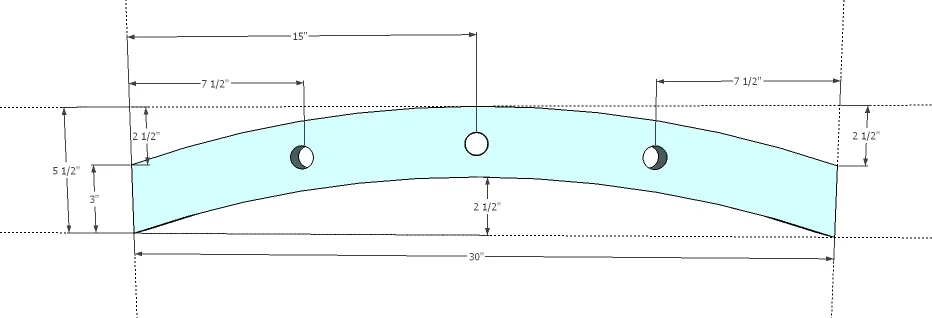
Then layout the final piece and cut out with a jigsaw. Sand well.
Step 4
Attach the center piece to the two outside pieces with 2" screws.

Finishing
Sand all surfaces, starting with a medium grit and finishing with fine. Wipe off the dust, fill any holes or gaps with wood filler, and sand smooth once dry. Apply primer if you're painting, then finish with your choice of paint or stain and seal with a durable clear topcoat. For outdoor projects, use exterior-rated primer, paint or stain, and sealer so the piece stands up to the weather.