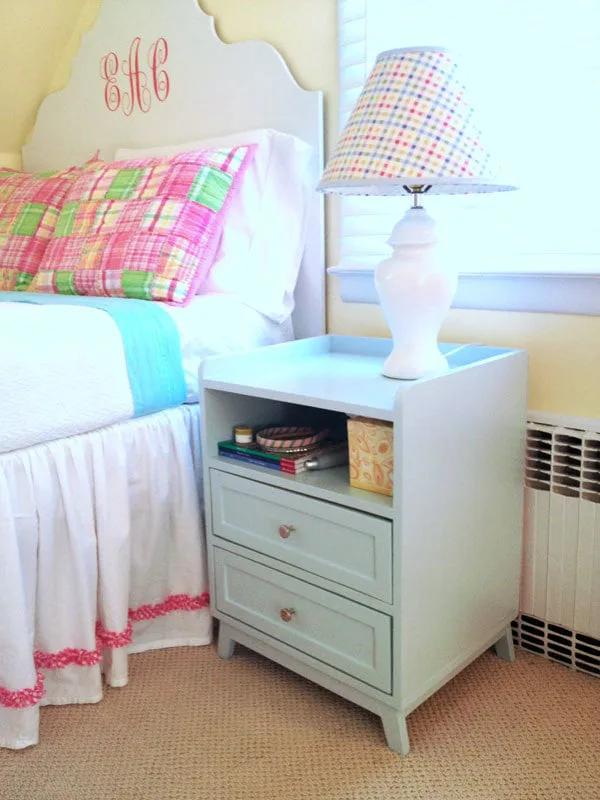
Two Drawer/Shelf Modern Nightstand
Make a modern nightstand inspired by Land of Nod Monarch!!
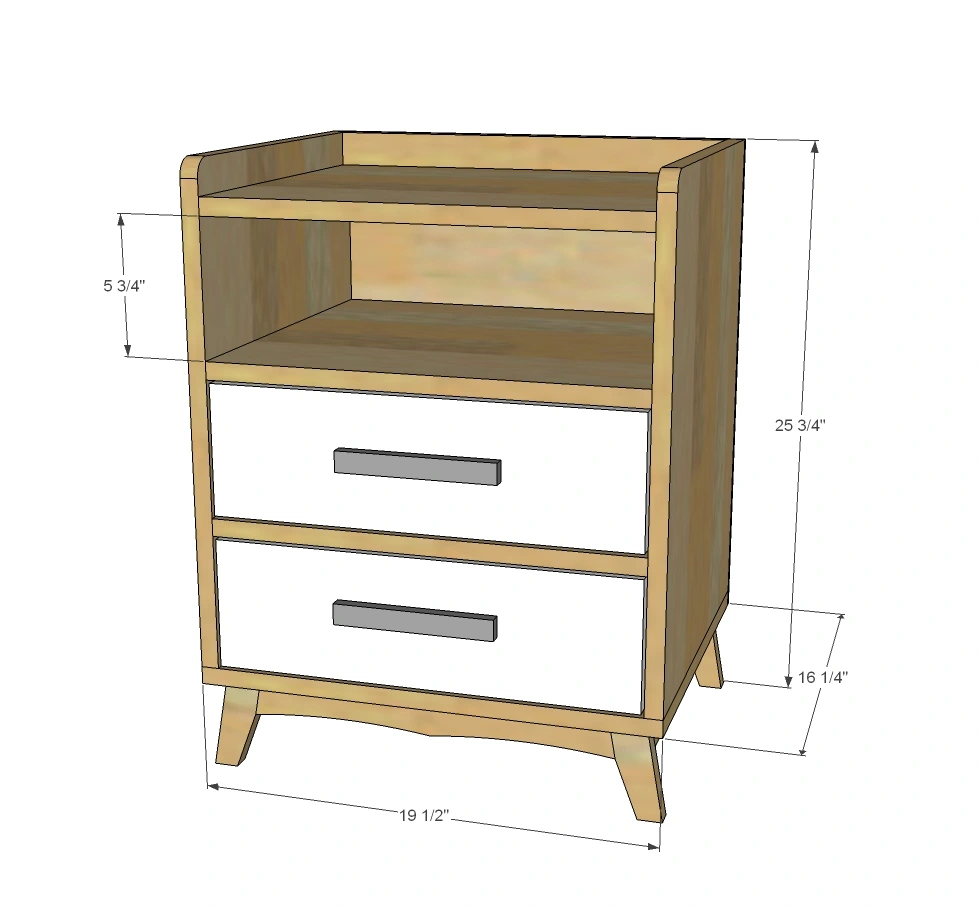
Dimensions
Use the size-specific shopping and cut lists below.
What you need
- ½ sheet (4x4) of ¾” plywood, ripped in direction of grain in 15 ¾” wide pieces
- ½ sheet of ¼” plywood
- 2 – 1x2 @ 8 feet long
- 2 – 1x4 @ 6 feet long
- 1 – 1x6 @ 3 feet long
- 1 ¼” PH screws
- 1 ¼” finish nails
- Drawer hardware
- 2 – 14” white euro style drawer slides, bottom corner mount
- BASE
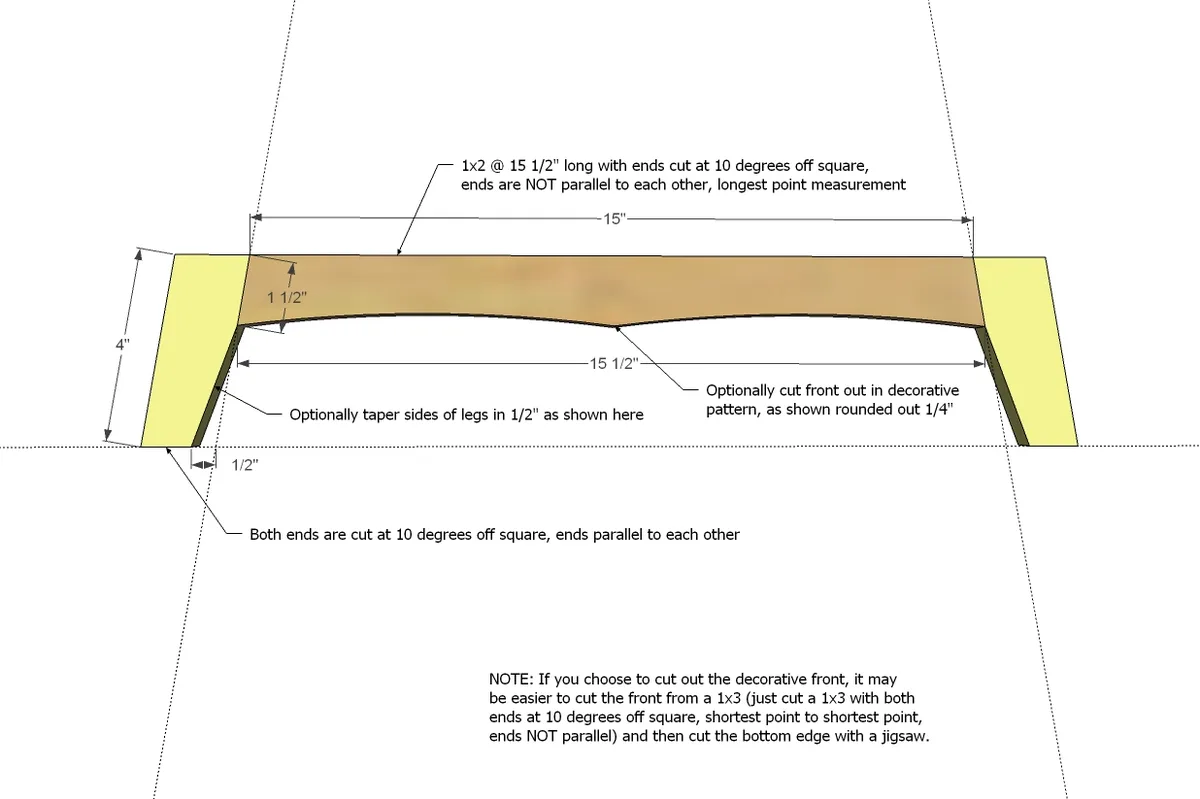
- 4 – 1x2 @ 4” (both ends cut at 10 degrees off square, ends ARE parallel to each other)
- 2 – 1x2 @ 15” (both ends cut at 10 degrees off square, ends NOT parallel to each other)
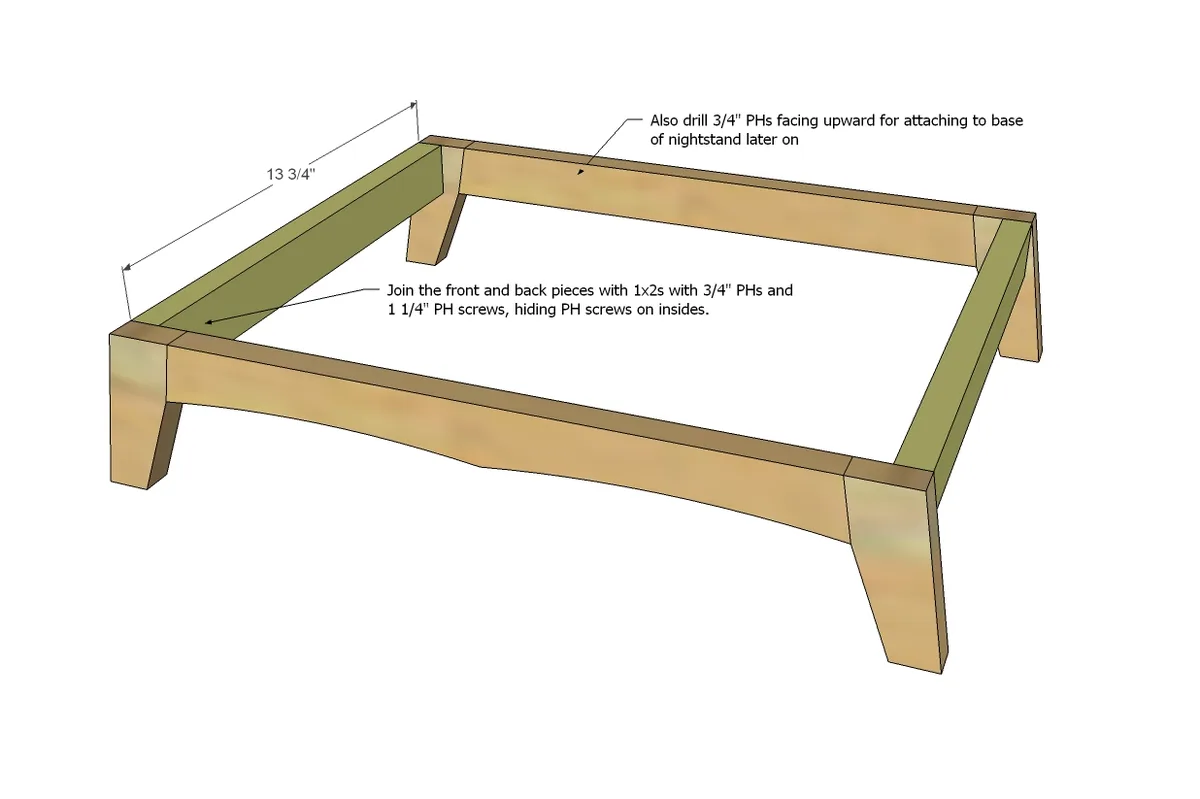
- 2 – 1x2 @ 13 ¾”
- BOX
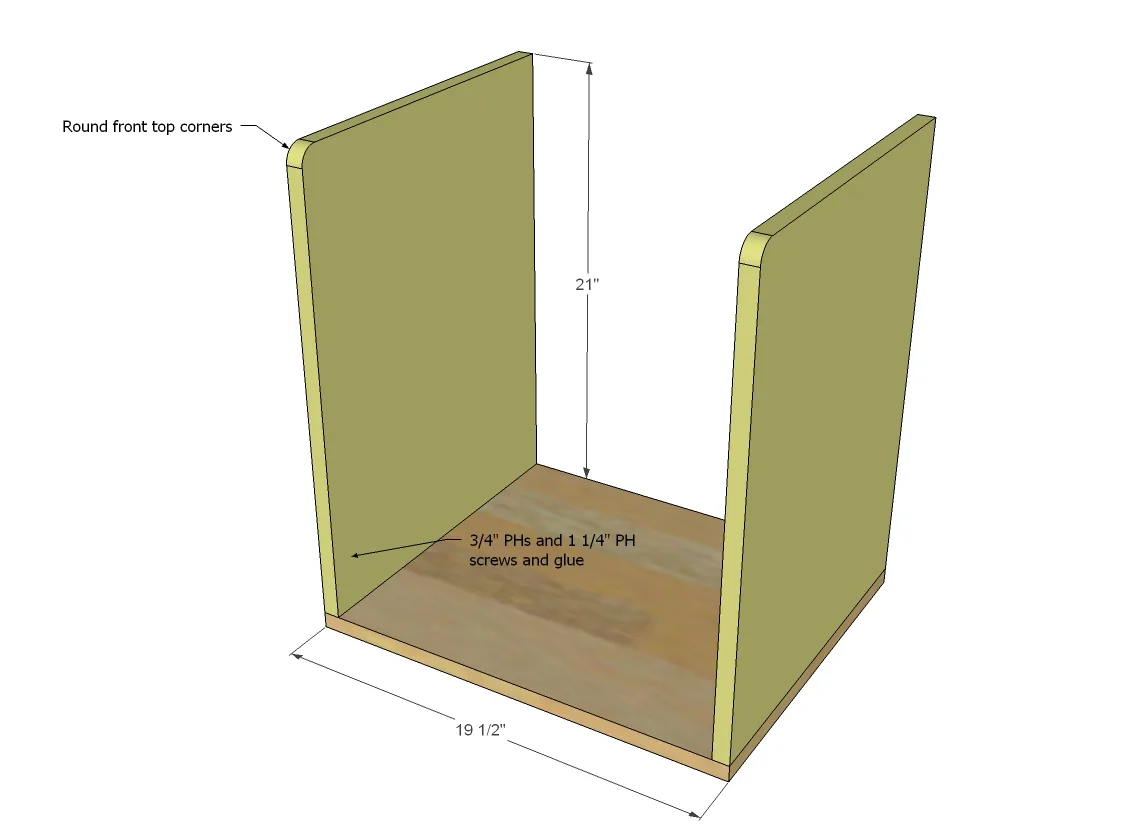
- 1 – ¾” plywood 15 3/4” x 19 ½”
- 2 – ¾” plywood 15 ¾” x 21”
- 2 – 1x2 @ 18”
- 2 – ¾” plywood @ 15 ¾” x 18”
- 1 – ¼” plywood @ 19 ½” x 21 ¾”
- DRAWERS
- 4 – 1x4 @ 14 ¾”
- 4 – 1x4 @ 15 ½”
- 2 – ¼” plywood @ 17” x 14 ¾”
- 2 – 1x6 @ 17 ¾”*
Plan assumes your 1x6 boards are 5 ½” wide
- measuring tape
- square
- pencil
- safety glasses
- hearing protection
- kreg-jig
- circular saw
- compound miter saw
- nailer
- sander
Step by step
Step 1
Drill ¾” PHs facing upwards as well in front/back aprons for later attaching to base of cabinet.
Step 2
Don’t forget to drill the ¾” PHs facing upward to attach to base of cabinet later on.
Step 3
Now we just build a box.
Step 4
Trim between drawers. Remember, this plan is sized for 1x6 that measure 5 1/2" wide.
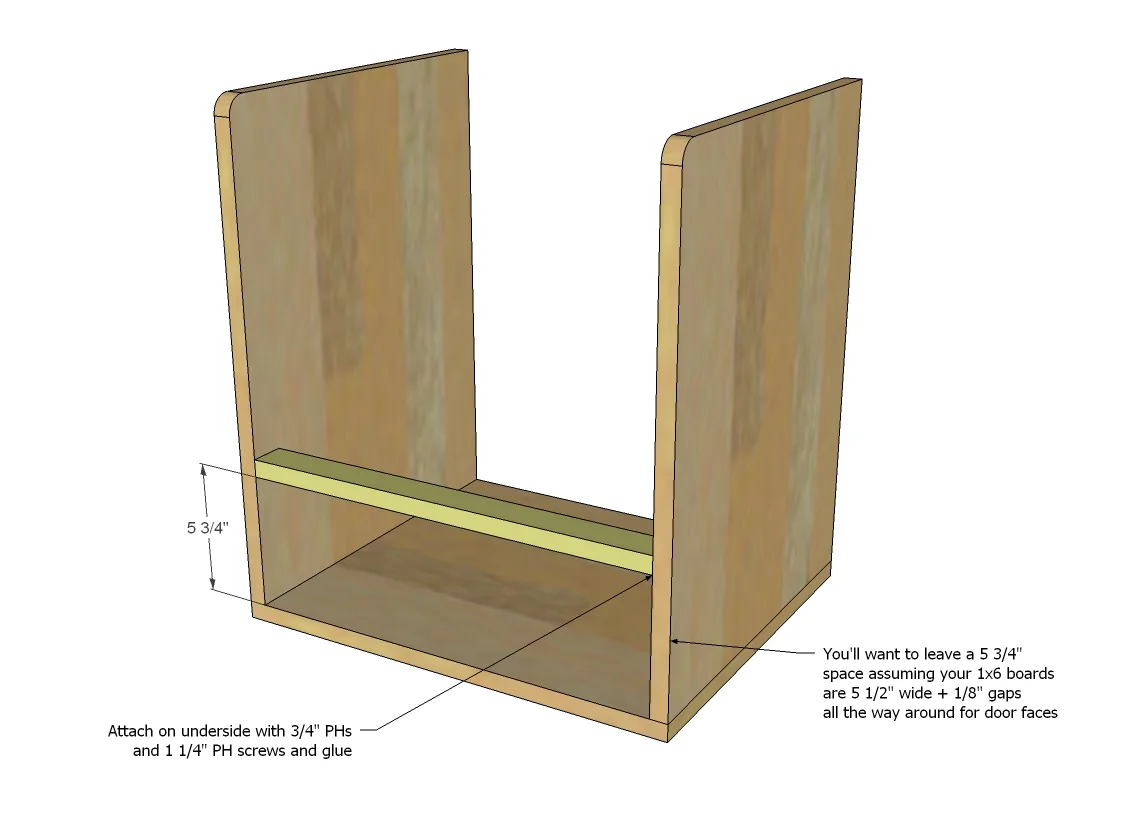
Step 5
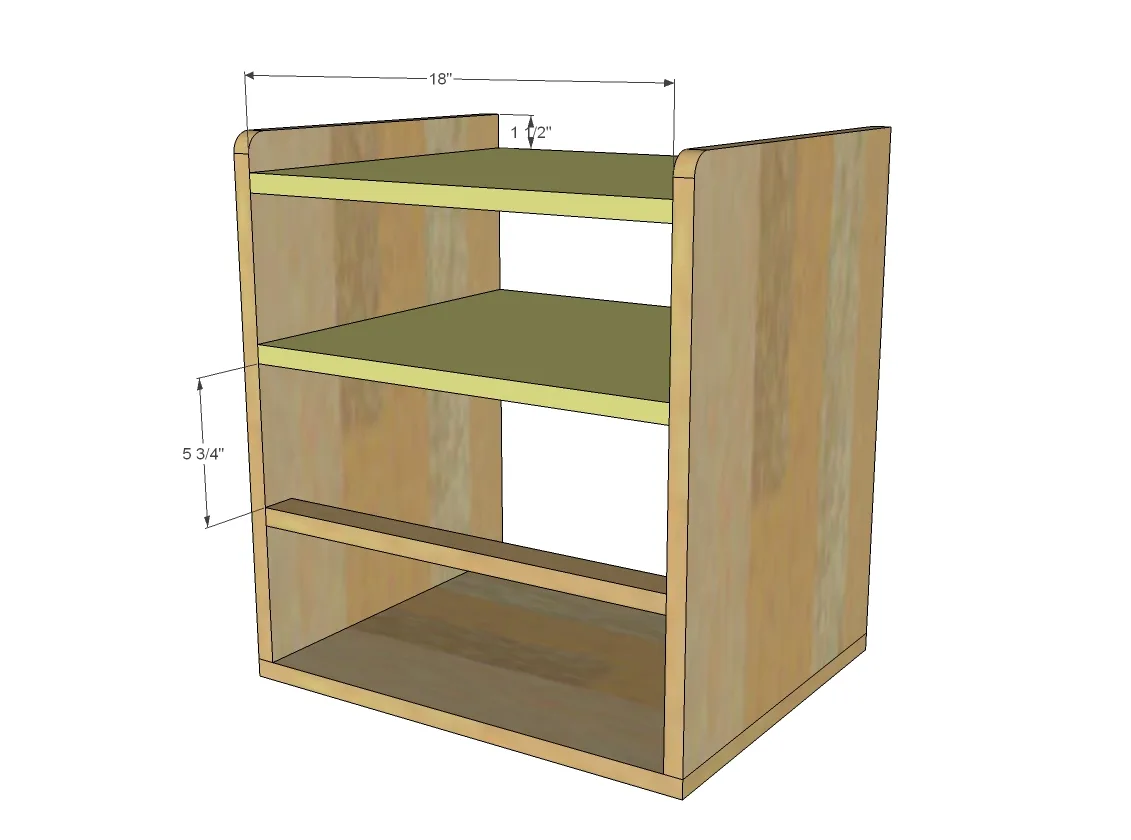
Step 6
Back trim gets added.
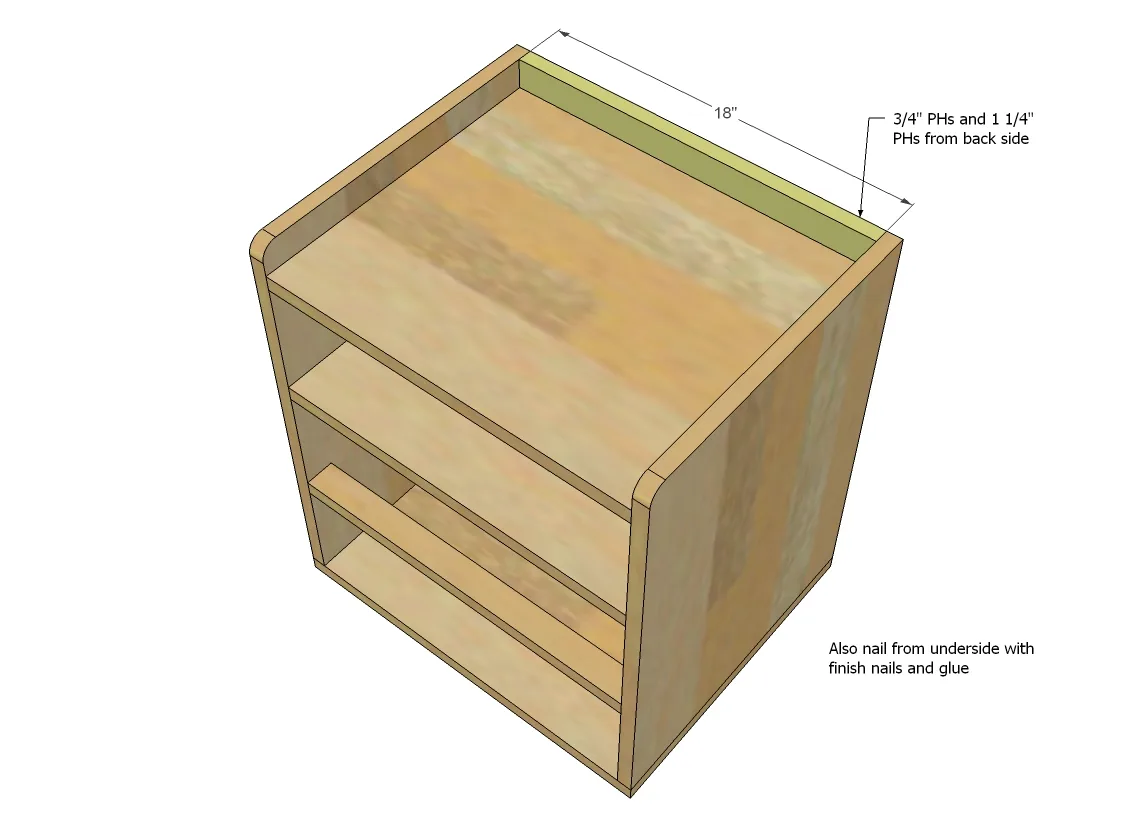
Step 7
Now build two drawers.
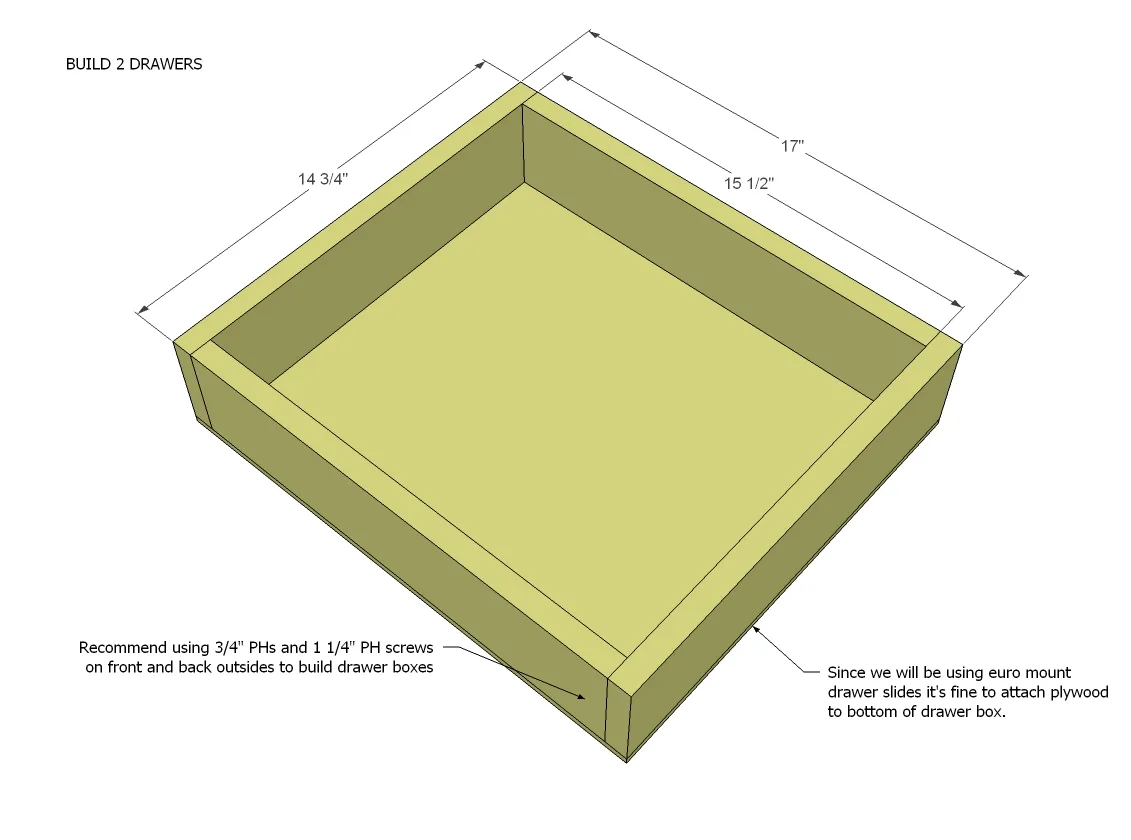
Step 8
Insert drawers with metal slides.
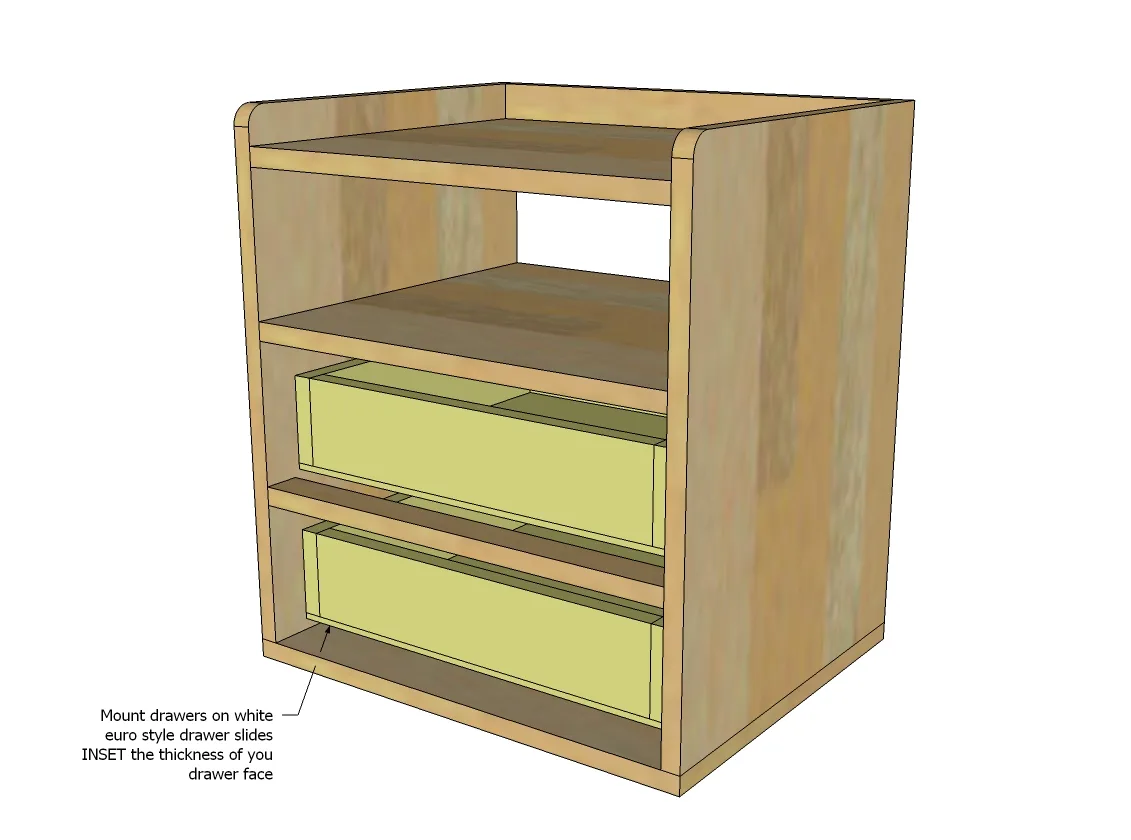
Step 9
And add drawer faces.
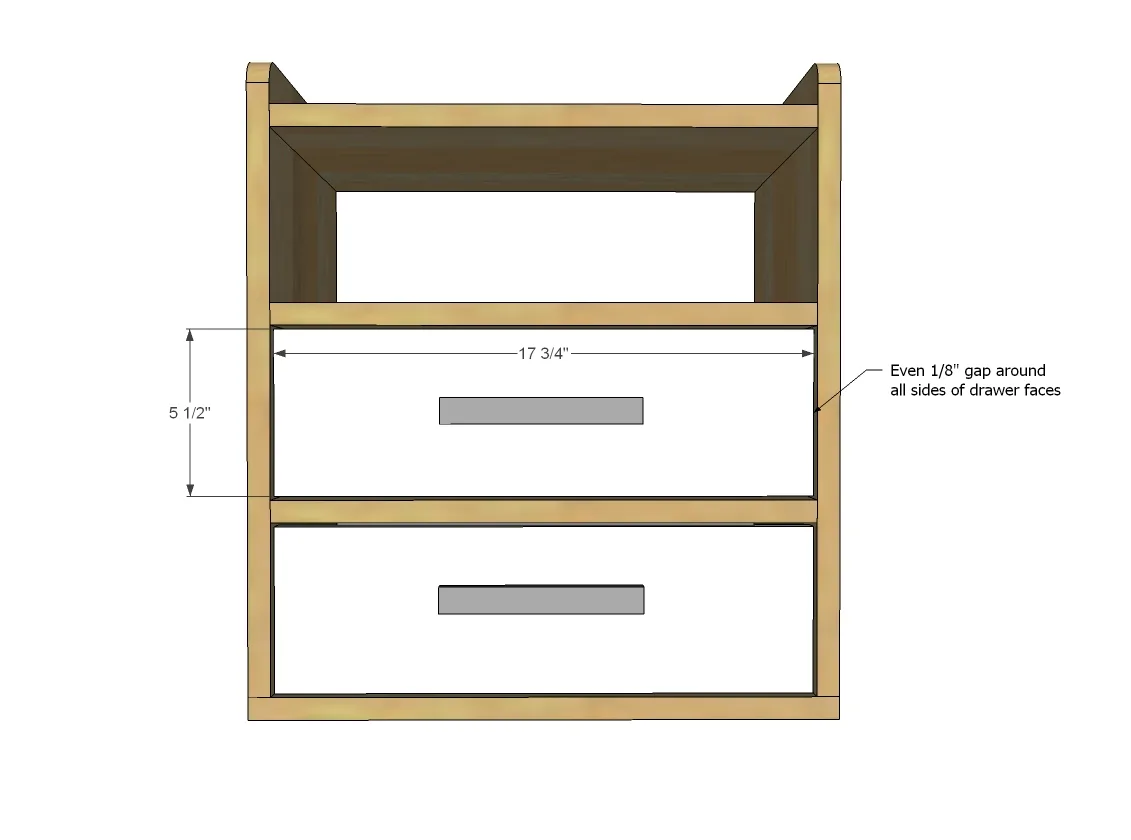
Step 10
Finally attach bottom!
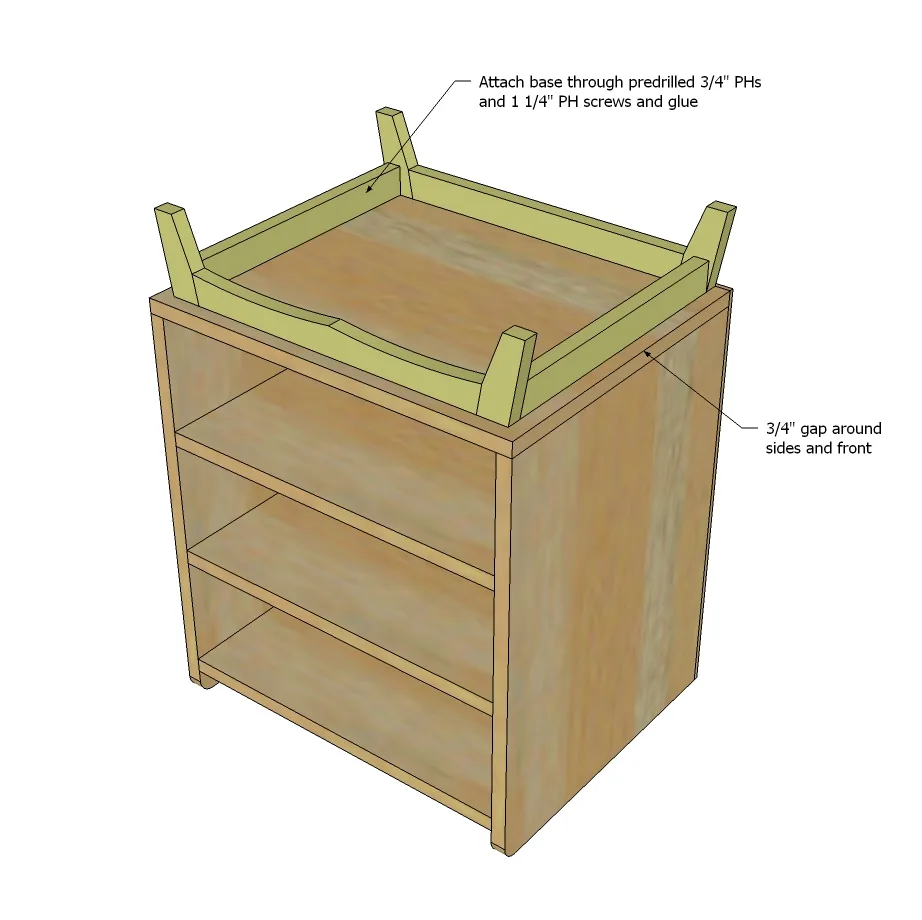
Step 11
And then the back.
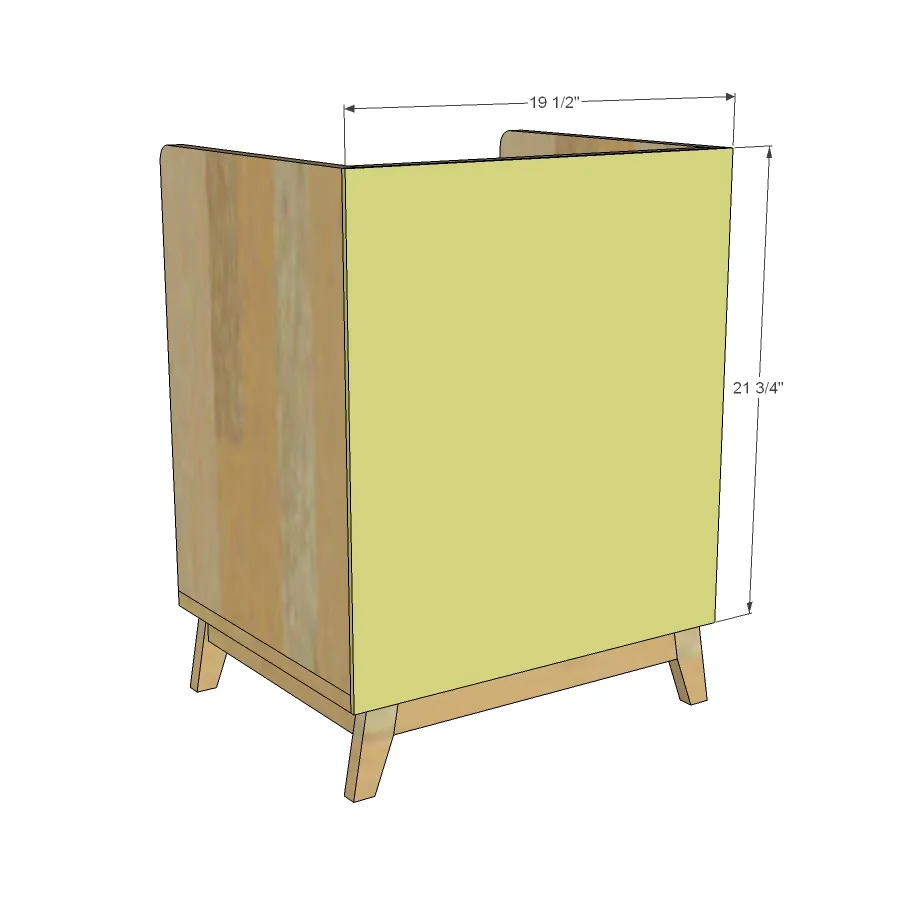
Step 12
Jaime put together a step by step post with lots of building tips and tricks that you must check out.
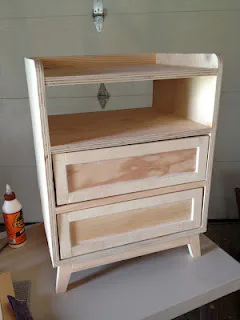
Step 13
And Jaime was kind enough to share her step by step finish tutorial as well!
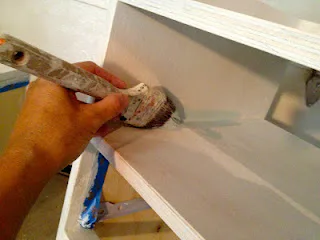
Finishing
Sand all surfaces, starting with a medium grit and finishing with fine. Wipe off the dust, fill any holes or gaps with wood filler, and sand smooth once dry. Apply primer if you're painting, then finish with your choice of paint or stain and seal with a durable clear topcoat. For outdoor projects, use exterior-rated primer, paint or stain, and sealer so the piece stands up to the weather.