Tabletop Lazy Susan
This gorgeous solid wood tabletop lazy susan in a modern octagon shape is perfect for serving. This is a DIY project with full instructions and shopping and cut lists. Built by Jaime Costiglio for Handbuilt Holiday.

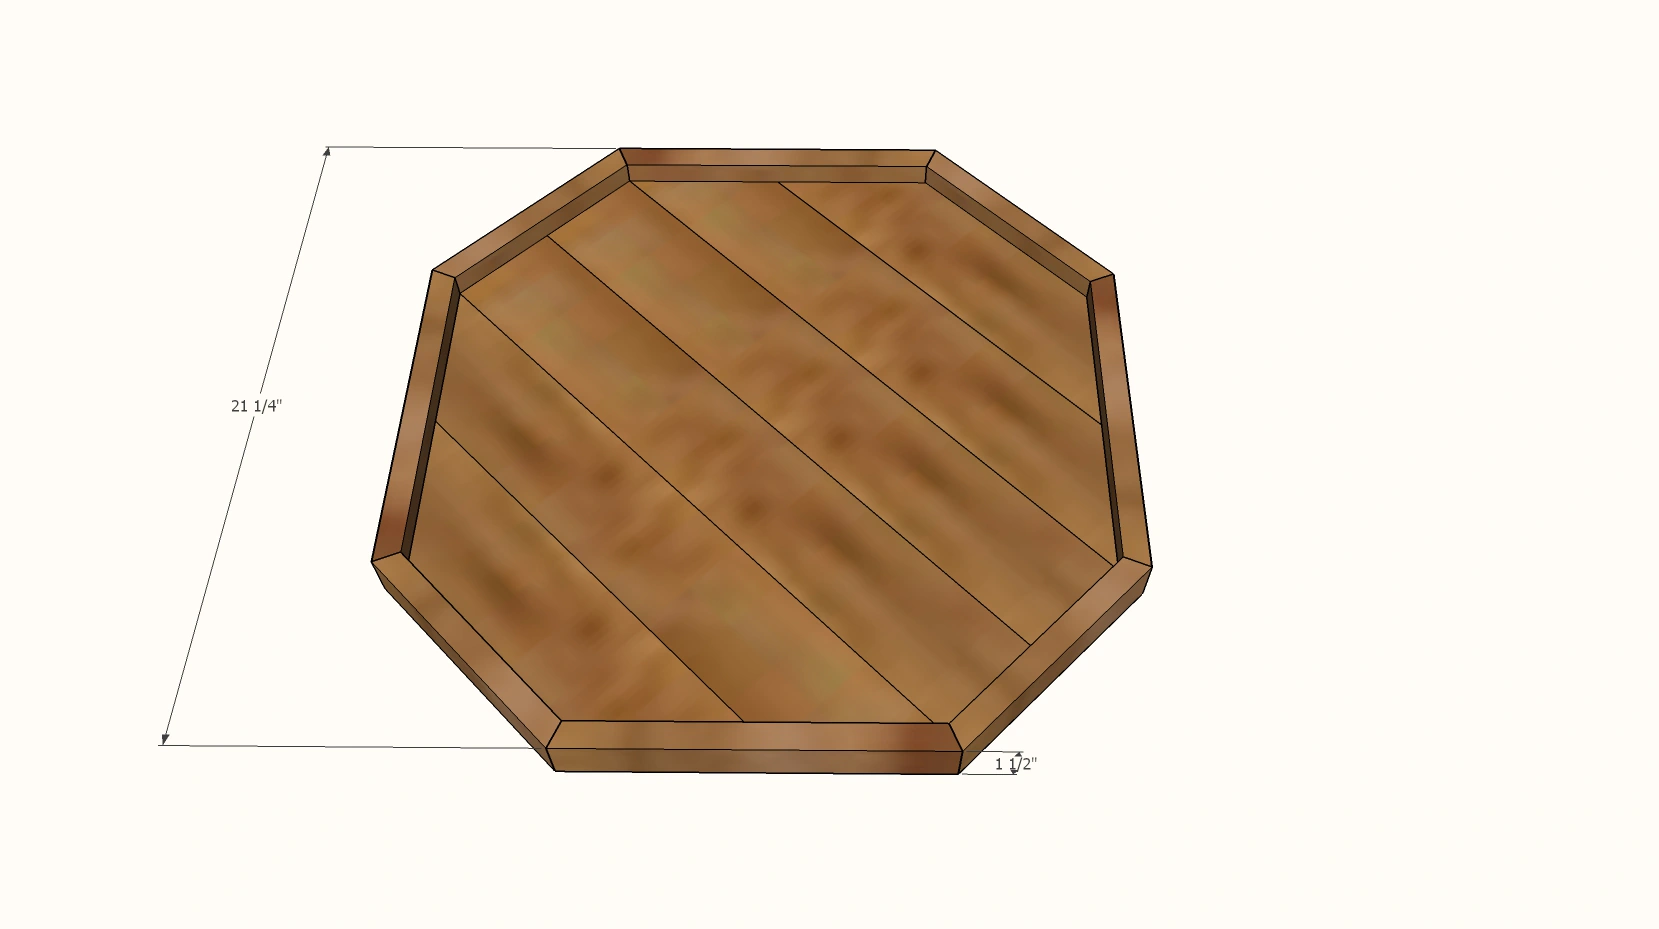
Dimensions
Use the size-specific shopping and cut lists below.
What you need
- 1 - 1x4 @ 10 feet long (can use scraps in smaller sections)
- 1 - 1x2 @ 8 feet long (can use scraps in smaller sections)
- 12" lazy susan turntable hardware ( see Jaime's post )
- 1-1/4" brad nails
- wood glue
- 2 - 1x4 @ 21"
- 2 - 1x4 @ 21" - long point to long point measurement, both ends cut at 45 degree angle, ends NOT parallel
* 2 - 1x4 @ 14" - long point to long point measurement, both ends cut at 45 degree angle, ends NOT parallel
* 4 - 1x2 @ 7" - short point to short point measurement, both ends cut at 22-1/2 degree bevels, ends NOT parallel
* 4 - 1x2 @ 9-7/8" - short point to short point measurement, both ends cut at 22-1/2 degree bevels, ends NOT parallel
* Should be measured and cut to fit
- measuring tape
- pencil
- safety glasses
- hearing protection
- drill
- compound miter saw
- nailer
- sander
Step by step
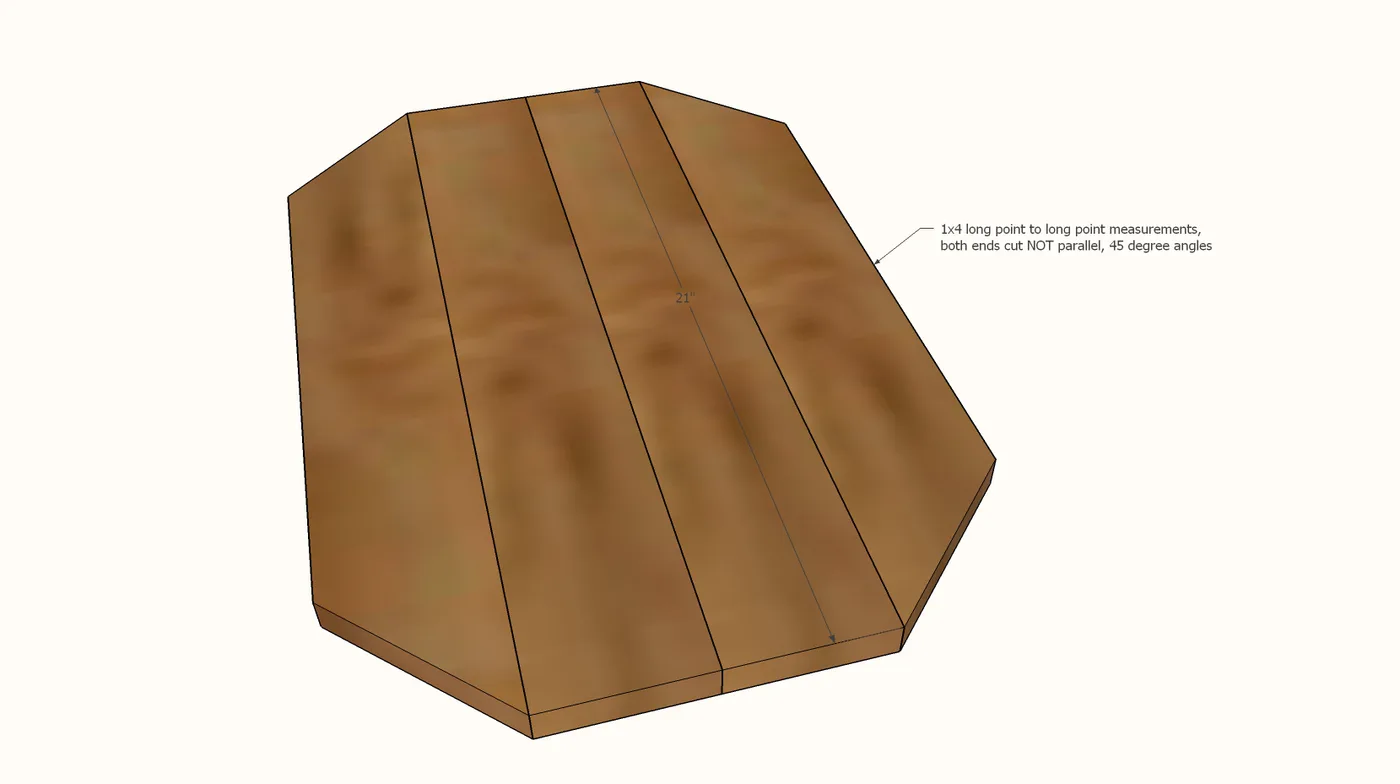
Cut two 1x4s with a miter saw to 21" length.
Set miter saw to a 45 degree angle. Cut two 1x4s 21" long, both ends cut at 45 degrees, long point to long point measurement, ends NOT parallel. Apply glue on edges to be joined. Clamp pieces together and allow glue to dry.
Step 2
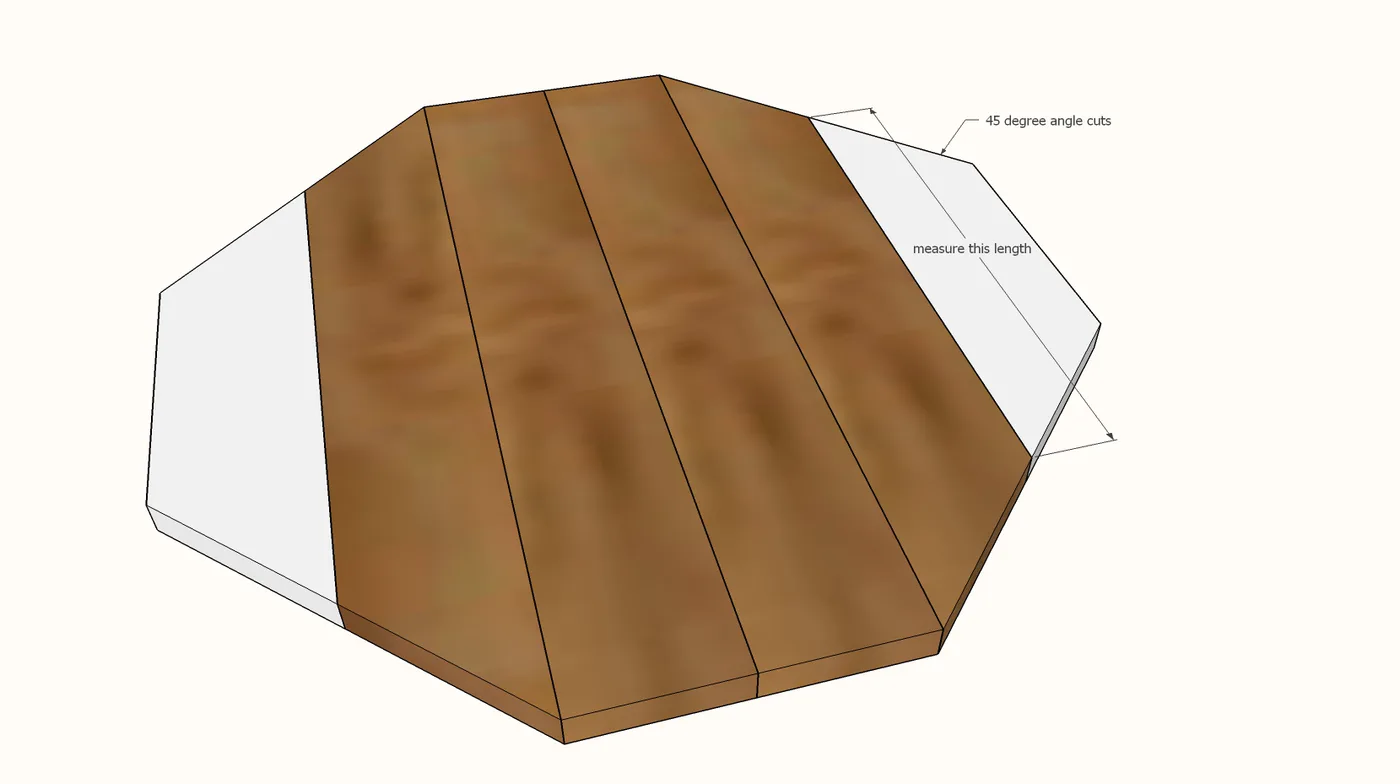
While glue is drying from step 1, measure the short point to short point of the outermost pieces on the project, as shown in diagram. Use the miter saw to cut two 1x4s to this length, long point to long point measurement, both ends cut at 45 degrees, ends NOT parallel. Apply glue and clamp to the project and let dry.
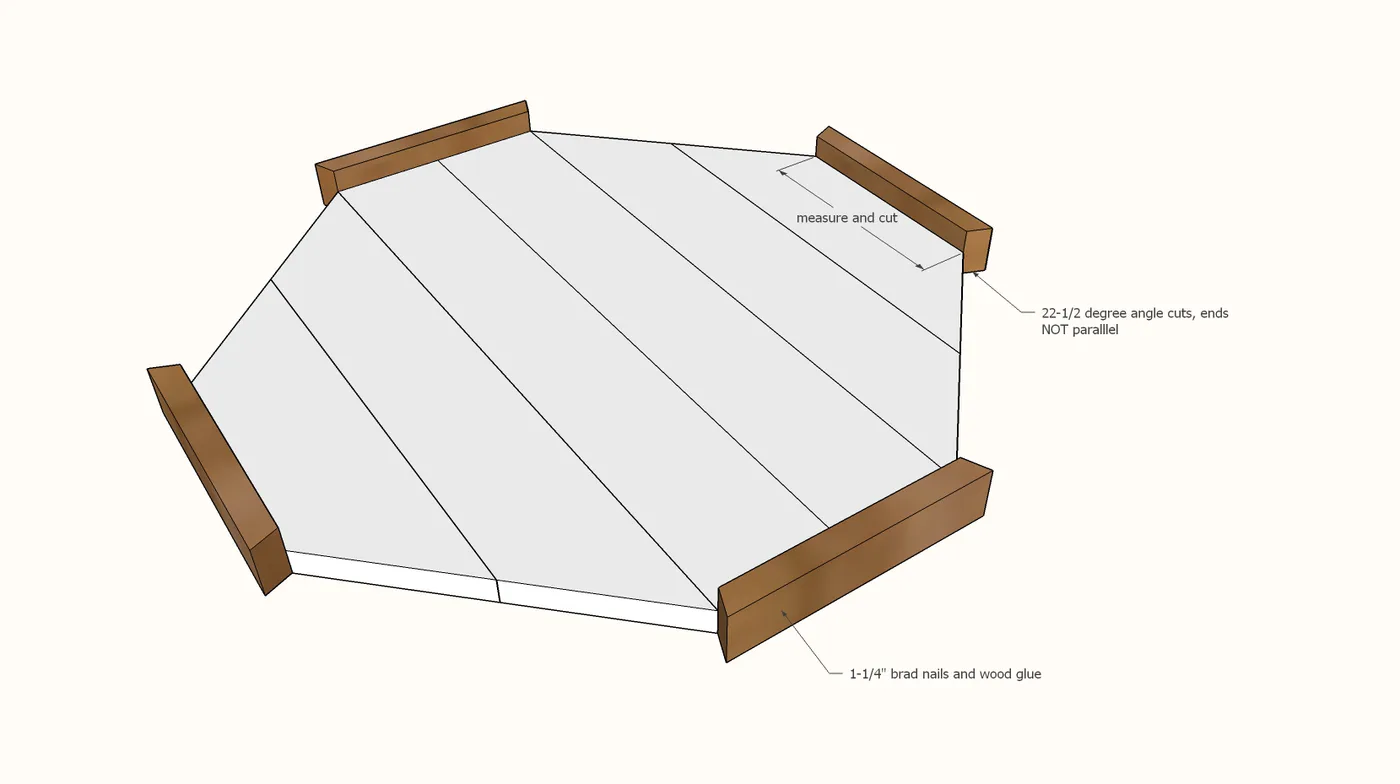
While glue is drying, cut out the 1x2 trim pieces.
Start by taking a measurement of the four shorter edges. This will be your short point to short point measurement for the trim pieces. Set the miter saw to a 22-1/2 degree bevel. Cut the 1x2 pieces and and glue and use 1-1/4" brad nails to attach.
Step 4
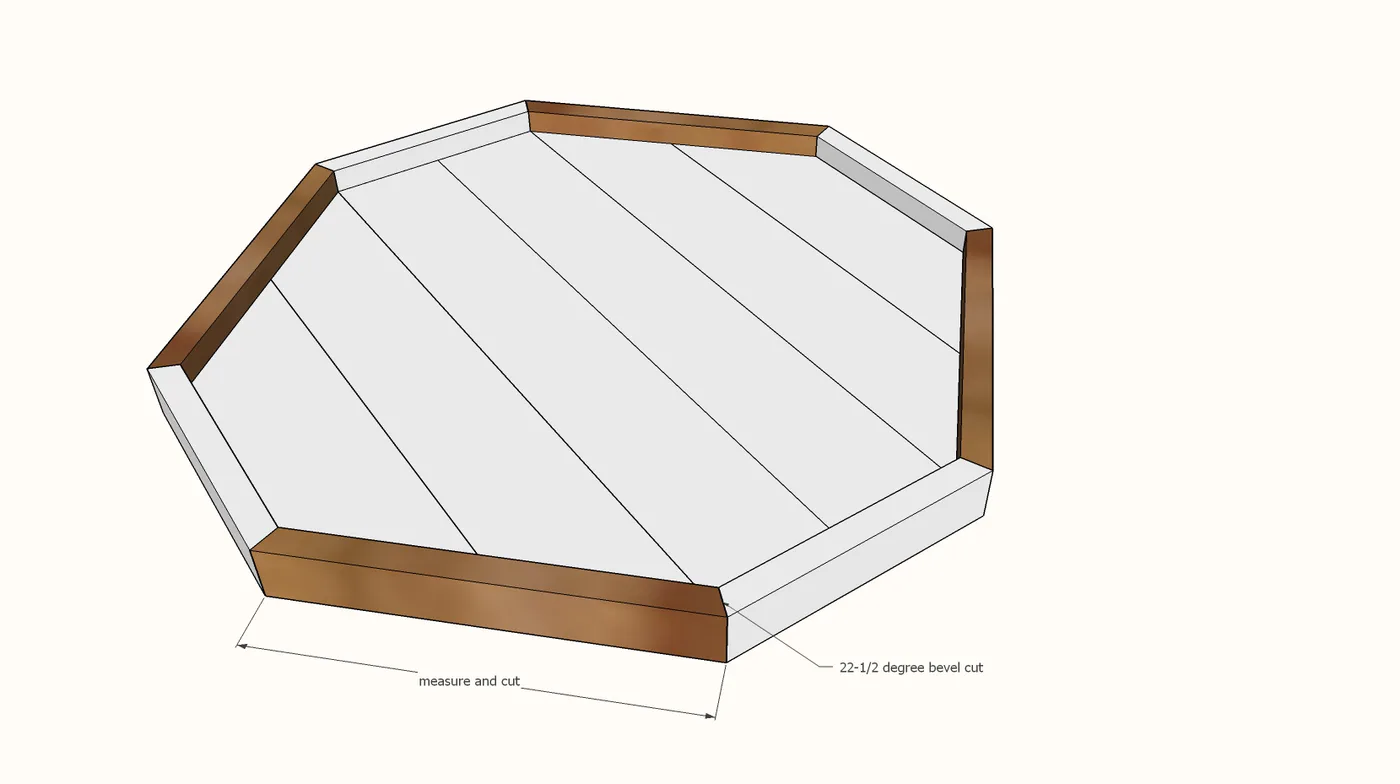
Now measure the final pieces and cut to fit. Note that each piece will most likely be slightly different from the others, so measure and fit each pieces. Nail and glue to the project.
Jaime also added additional 1x4 supports underneath.
Then attached the lazy susan turntable to the bottom. You can read more about how she did this here.

Finishing
Sand all surfaces, starting with a medium grit and finishing with fine. Wipe off the dust, fill any holes or gaps with wood filler, and sand smooth once dry. Apply primer if you're painting, then finish with your choice of paint or stain and seal with a durable clear topcoat. For outdoor projects, use exterior-rated primer, paint or stain, and sealer so the piece stands up to the weather.