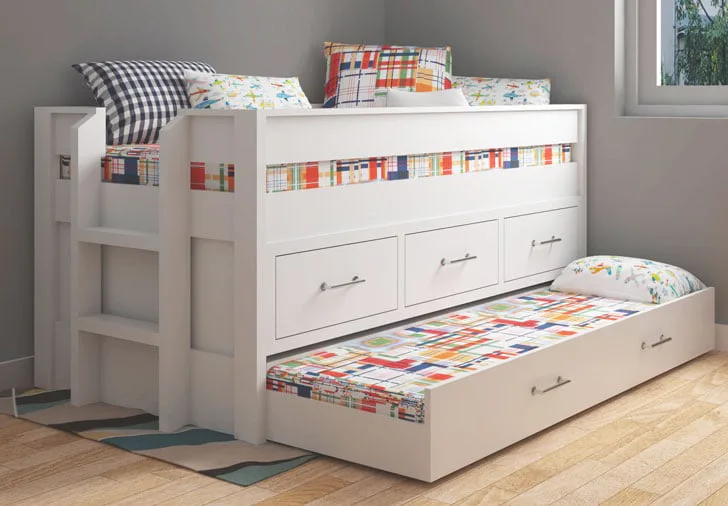
Sweet Peak Garden Bunk Bed Shutters and Window Boxes
Add charm to your Sweat Pea Garden Bunk Bed with real working arched shutters and overflowing window boxes!

Dimensions
Use the size-specific shopping and cut lists below.

What you need
Shopping List included with main Sweet Pea Bunk Bed Plans
- Shutters
- (8) 1x4’s @ 13” arched to match window shape with design cut-outs.
- Window Boxes
- (4) 1x4’s @ 11 ½”, window box fronts
- (2) 1x4’s @ 10”, window box bottom and back pieces
- (4) 1x4’s @ 3 ½” with a 10 degree cut. Measurement is on the short side of the board.
- measuring tape
- square
- pencil
- safety glasses
- hearing protection
- drill
- jigsaw
- sander
Step by step
Step 1
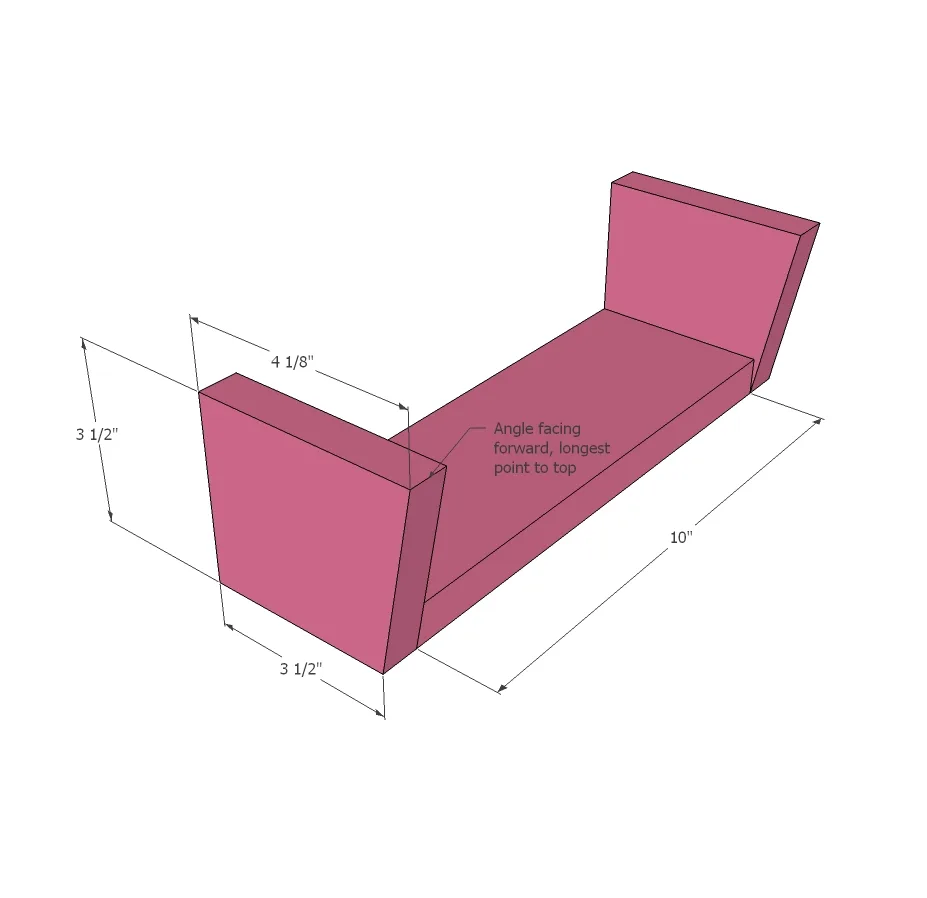
Beginning with the bottom of the box measuring 1x4x10”, attach the two window box sides using glue and a nailgun. The angled end of the side should be facing the front of the window box, with the longer edge on top.
Step 2
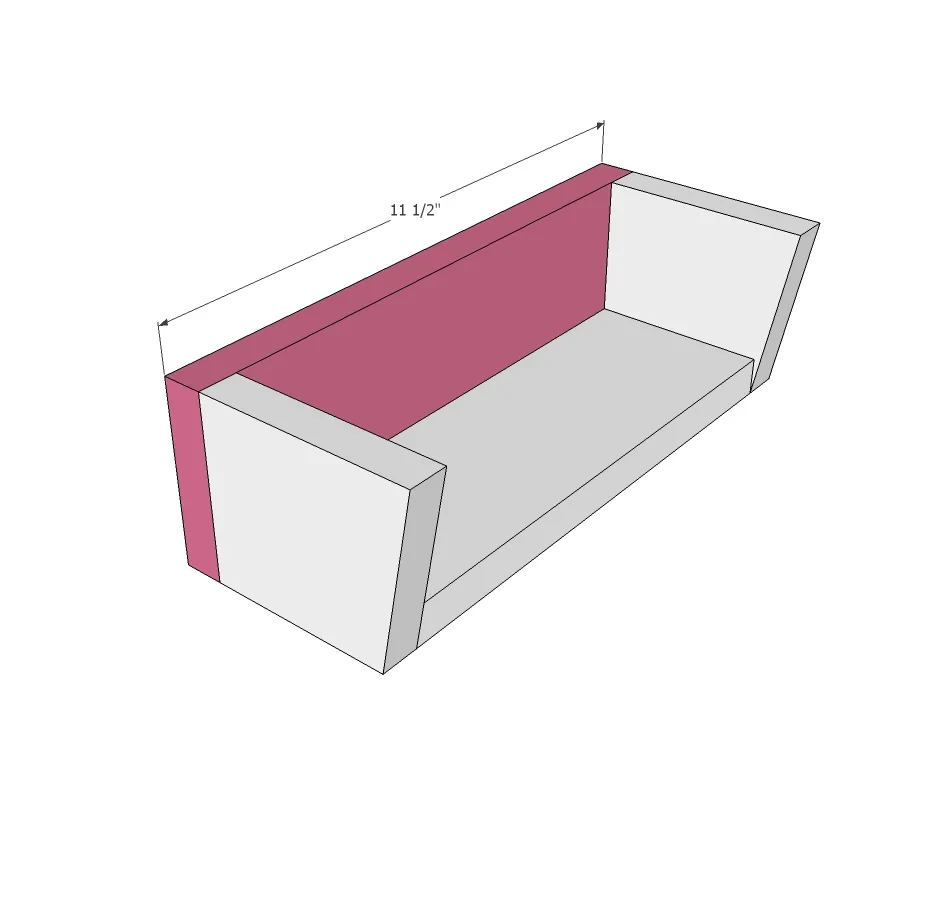
Now slide the other 1x4x11 1/2” window box rear piece between the two end pieces, using wood glue and nails to secure to the sides and bottom board.
Step 3
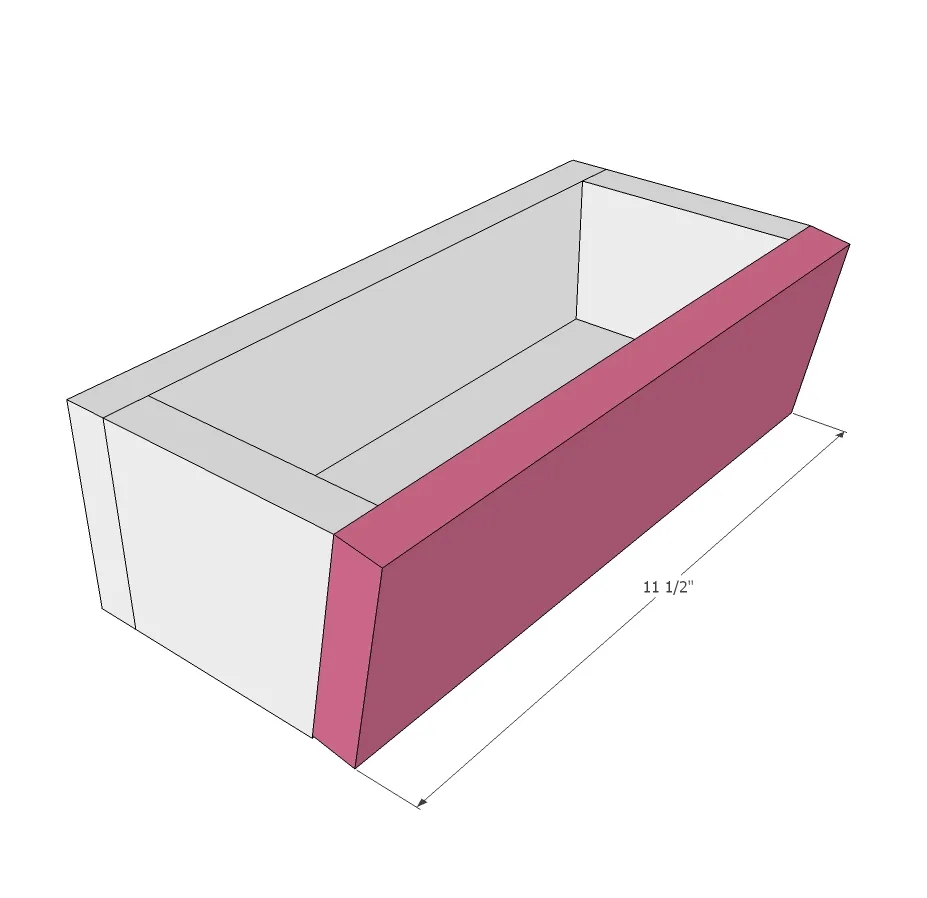
The front piece is ready to go on next. It measures 1x4x11 ½”. Glue and nail into place keeping the top edge flush with the sides. Since the bottom of the front piece slants inward, it may be necessary to sand the bottom board a little for a tight fit.
Step 4
If you did this right you ended up with two cute little window boxes! Center them under the lower windows and attach them to the wall using wood glue and a nailer.

Step 5

Step 6
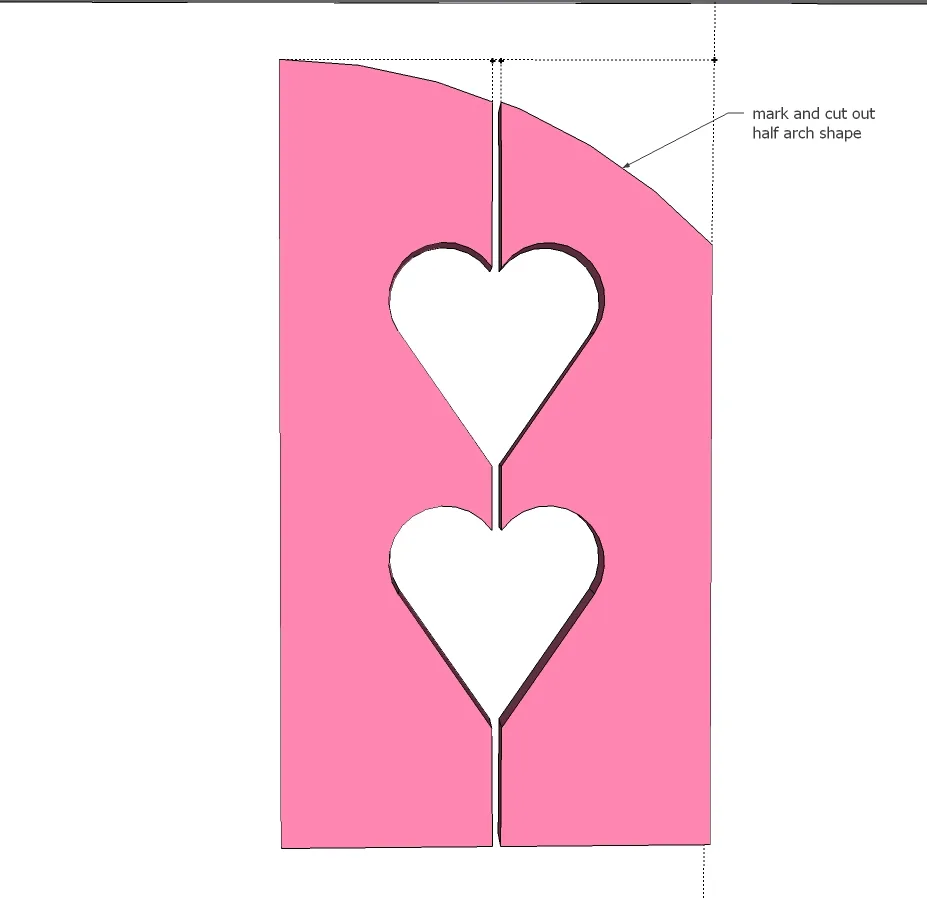
Next lay your 13” boards on a flat surface, grouping them into pairs and aligning them so that they are flush. Cut a heart shape (or any design) roughly 3” high out of a piece of paper and use it as a template to trace onto the boards. I placed the first heart 2” up from the base of the shutter boards and the second heart was placed 1” above the first. Center your design between the two boards in each pair and trace your pattern onto the wood. Using a jigsaw, cut out the lines to reveal your design. Sand all edges smooth.

Step 7
With the inside design finished, you will want to lay your boards together, placing the paper window template on top. Line up the bottom and outside edges of the template flush with each pair of boards. Trace the arch that will span across each pair of boards. Cut out the half- arch pattern from each set with the jigsaw and sand the edges smooth. Glue each pair of boards together to make one shutter. Secure each set with clamps till the glue dries and wipe away any drips.
Step 8
Install shutters on either side of the windows using small decorative hinges and screws, shimming them at least 1/8” above the window sill so they won’t scrape as they are opened and closed.

Finishing
Sand all surfaces, starting with a medium grit and finishing with fine. Wipe off the dust, fill any holes or gaps with wood filler, and sand smooth once dry. Apply primer if you're painting, then finish with your choice of paint or stain and seal with a durable clear topcoat. For outdoor projects, use exterior-rated primer, paint or stain, and sealer so the piece stands up to the weather.