Scrap Wood Pumpkin Riser
Turn those leftover wood scraps into something festive! This DIY pumpkin riser is simple to make and adds the perfect rustic touch to your fall decor. Whether you use it for centerpieces, candles, treats or seasonal accents, it’s a cozy little project that makes the most of what you already have on hand.

Dimensions
Use the size-specific shopping and cut lists below.

What you need
- 4 feet of 2x4 boards
- 26" of 1x2 boards
- 14.5" of 2x2 boards
- 2" screws or 1-1/4" brad nails
- wood glue
- sanding paper
- 4 - 2x4 @ 12"
- 1 - 2x2 @ 14-1/2"
- 2 - 1x2 @ 13"
- measuring tape
- pencil
- safety glasses
- hearing protection
- kreg-jig
- drill
- circular saw
- jigsaw
- sander
Step by step
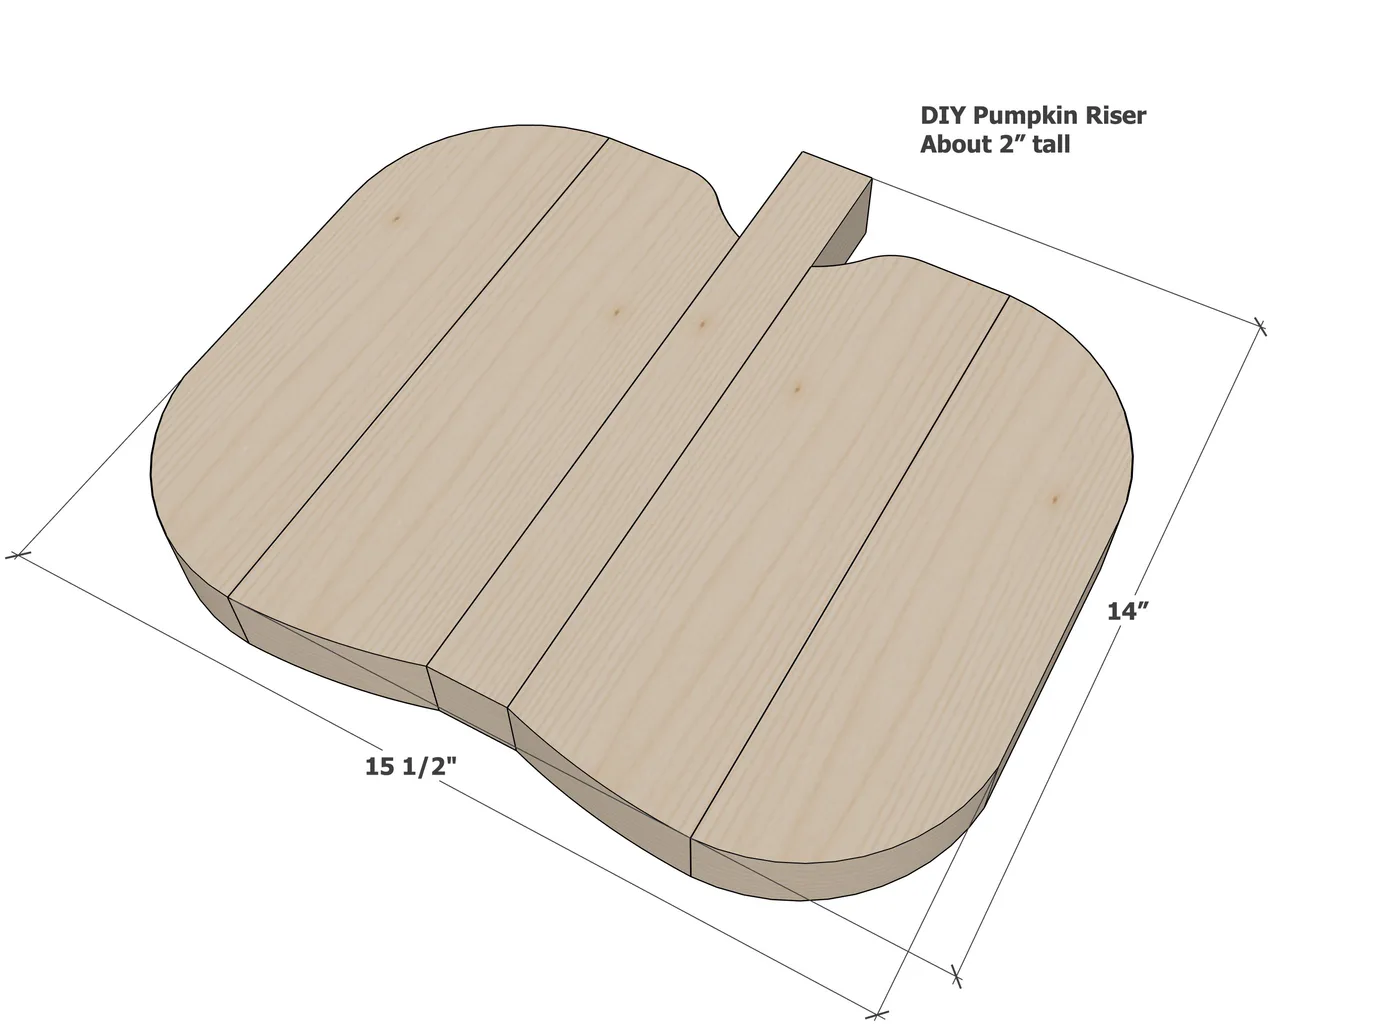
Layout the boards as shown, place the 1x2s on the back
Attach the 1x2s to the back side of the 2x boards with 2" screws and glue (you could also use 1-1/4" or longer brad nails)

Trace out a desired pumpkin shape and carefully cut out with a jigsaw.
Sand rough edges for a smooth finish.
Finishing
Sand all surfaces, starting with a medium grit and finishing with fine. Wipe off the dust, fill any holes or gaps with wood filler, and sand smooth once dry. Apply primer if you're painting, then finish with your choice of paint or stain and seal with a durable clear topcoat. For outdoor projects, use exterior-rated primer, paint or stain, and sealer so the piece stands up to the weather.