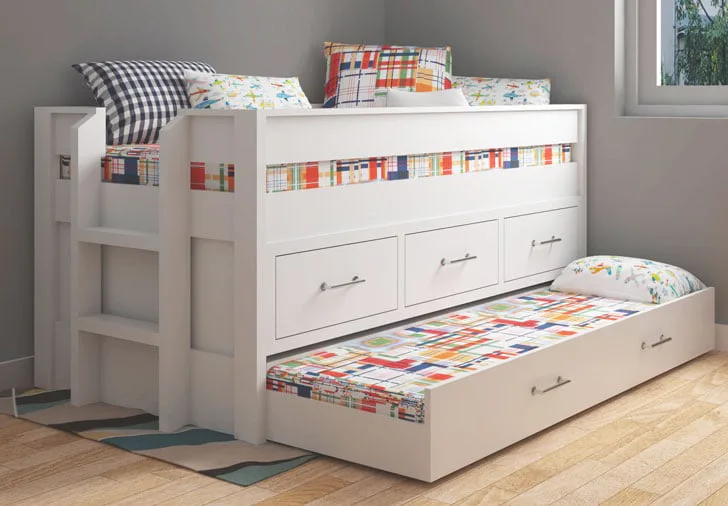
Rustic Modern Bunk Bed
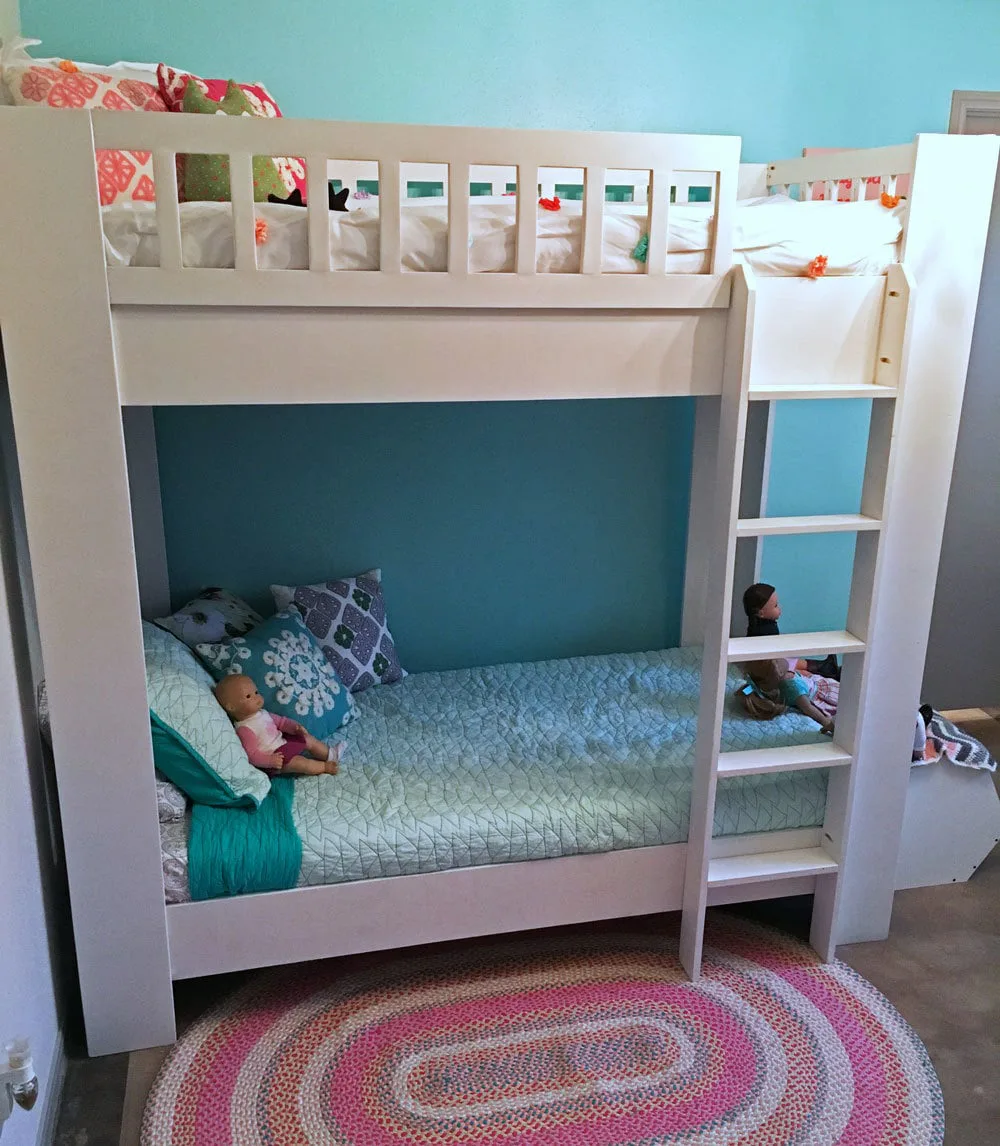
Build your own bunk beds! This rustic modern bunk bed features wide planking and clean lines. We love it stained or painted any color of your choice. include step by step diagrams, shopping list and cut list.
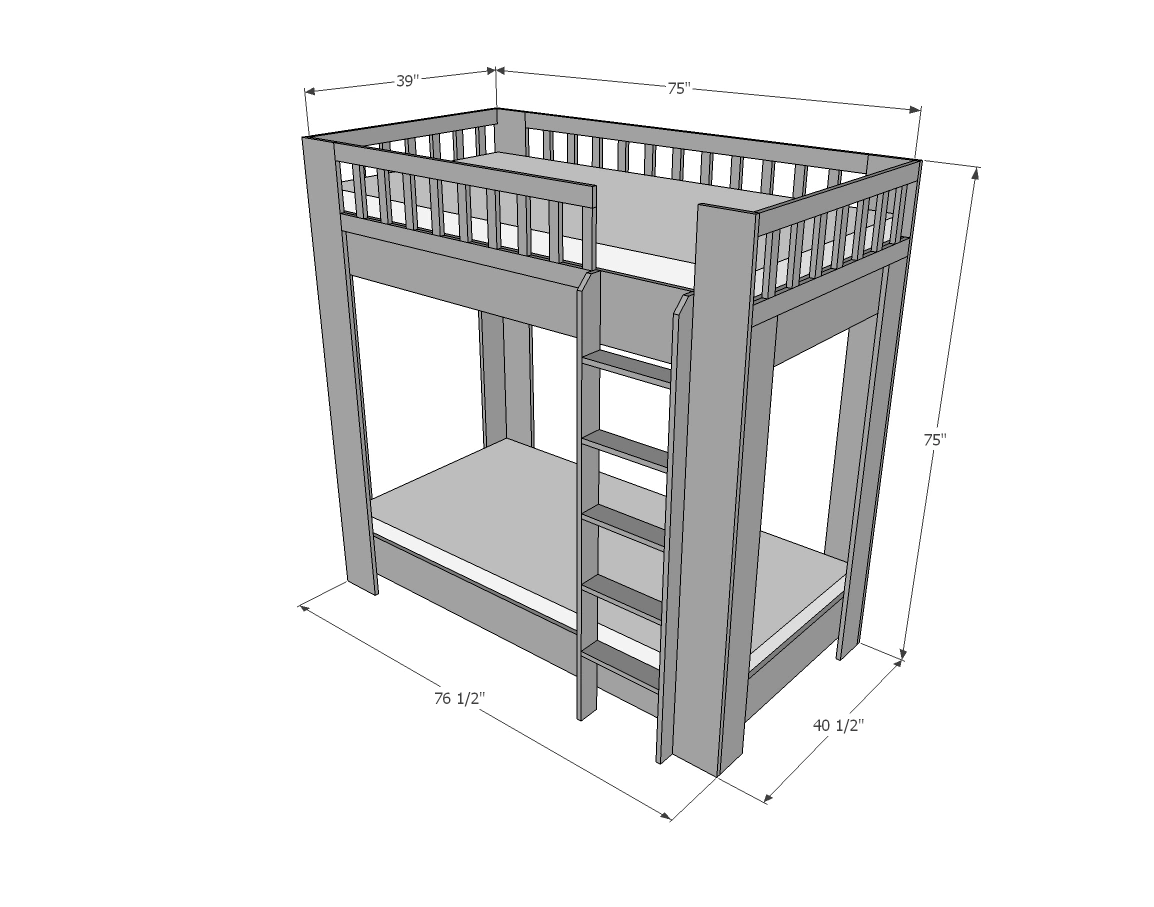
Dimensions
Use the size-specific shopping and cut lists below.
What you need
- 7 - 1x8 @ 8 feet long
- 3 - 1x10 @ 8 feet long
- 4 - 1x6 @ 6 feet long
- 4 - 1x3 @ 8 feet long
- 3 - 1x2 @ 8 feet long
- 3 - 1x4 @ 8 feet long
- 4 - 2x2 @ 8 feet long
- Does not include boards for mattress slats
- 2 - 1x8 @ 75" - bottom bunk side rails
- 2 - 1x8 @ 37-1/2" - bottom bunk end rails
- 2 - 1x10 @ 75" - top bunk side rails
- 2 - 1x10 @ 37-1/2" - top bunk end rails
- 4 - 1x6 @ 62-1/2" - end legs
- 4 - 1x8 @ 75" - side legs
- RAILING
- 4 - 1x3 @ 39"
- 2 - 1x3 @ 62"
- 2 - 1x3 @ 47-1/4"
- 34 - 1x2 @ 7-1/2"
- LADDER
- 2 - 1x4 @ 65"
- 5 - 1x4 @ 13-1/4"
- 4 - 2x2 @ 73-1/2"
- 1x boards or plywood scraps 3/4" thick @ 37-1/2" long
MAIN BED STRUCTURE
SLAT SYSTEM
- measuring tape
- square
- pencil
- safety glasses
- hearing protection
- kreg-jig
- drill
- compound miter saw
- sander
Step by step
Step 1
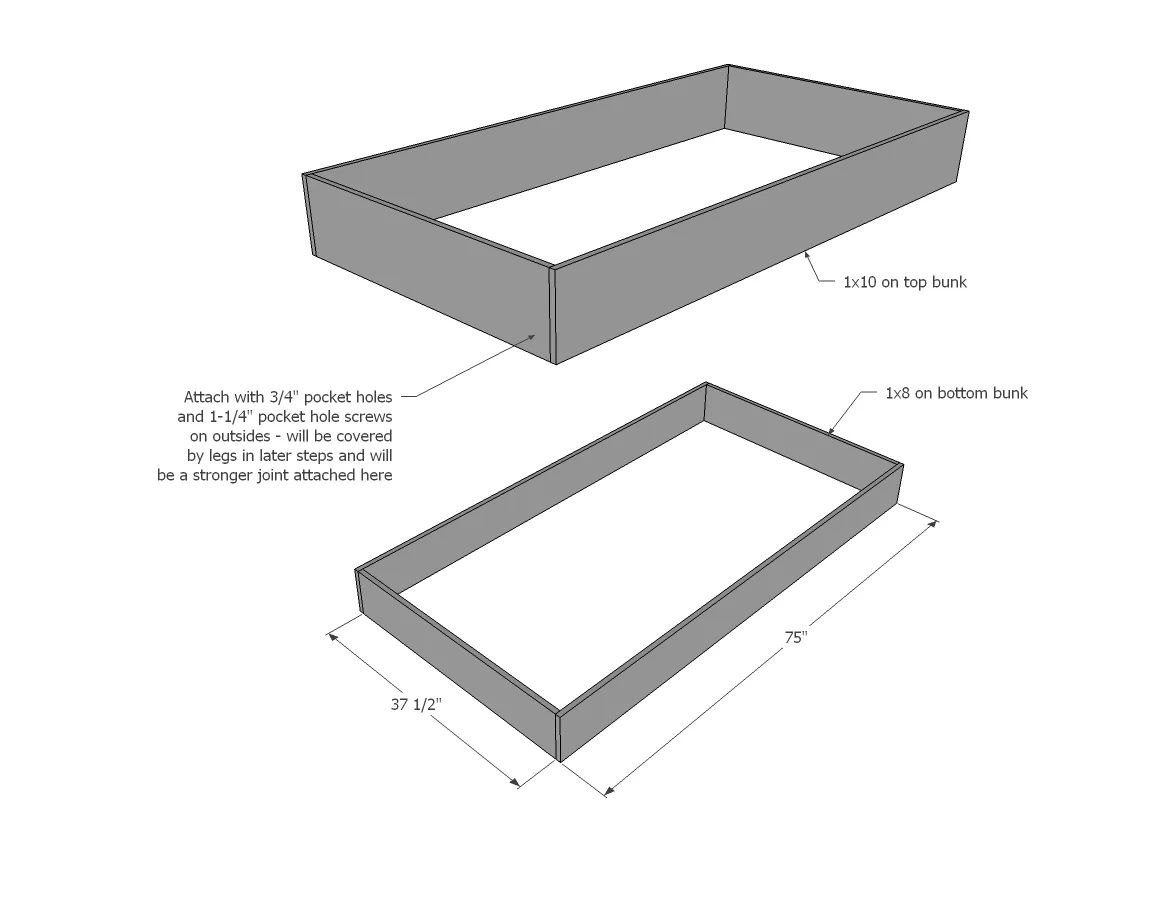
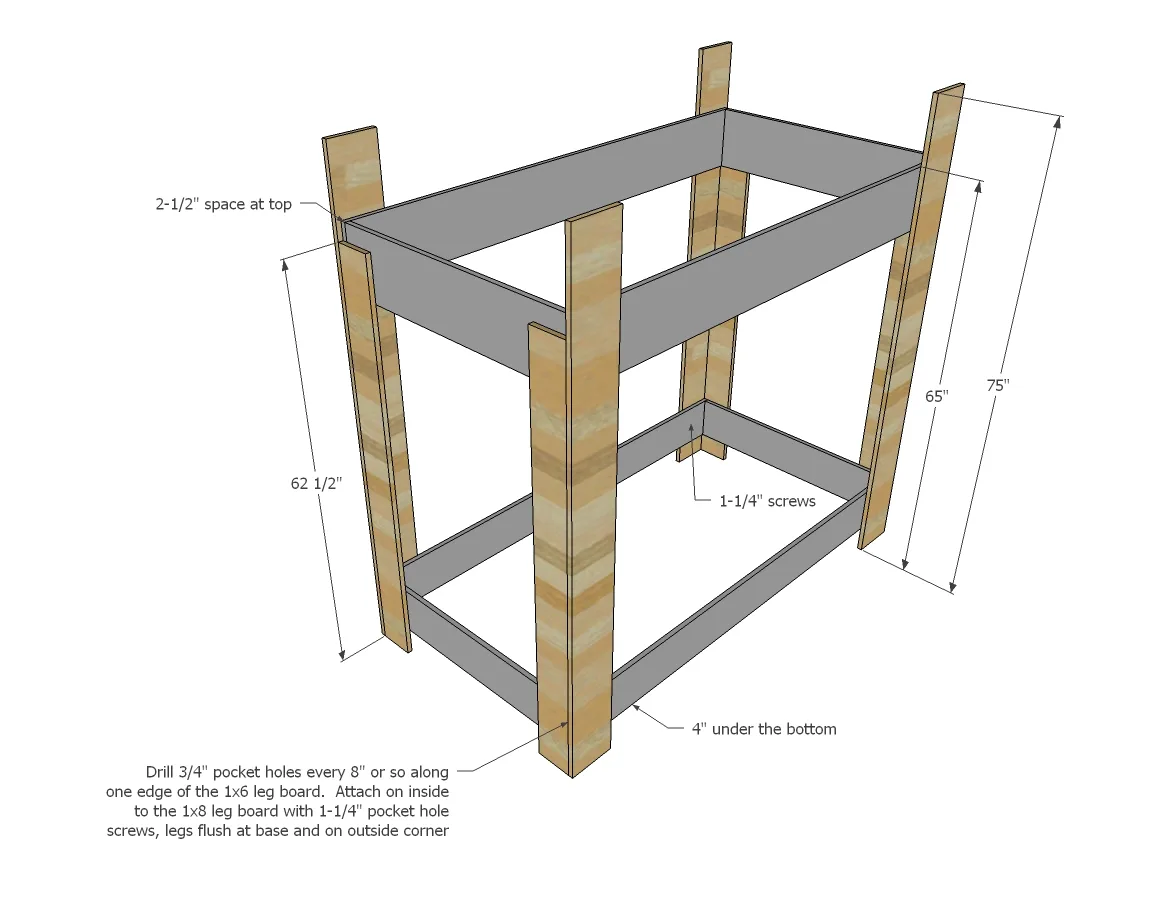
Build the two boxes for the mattress platforms. Place pocket holes on outside - they will be covered by the legs in next step and it is a stronger joint this way. Use glue at all joints.
Step 2
Drill 3/4" pocket holes along one edge of the 1x6 boards. You may want to hide them discreetly where the beds will sit, and can finish where the pocket holes are visible with 1-1/4" nails and glue. Then attach the beds to the legs from insides with screws. I'd prefer glue as well, if the bed is not to be disassembled.
Step 3
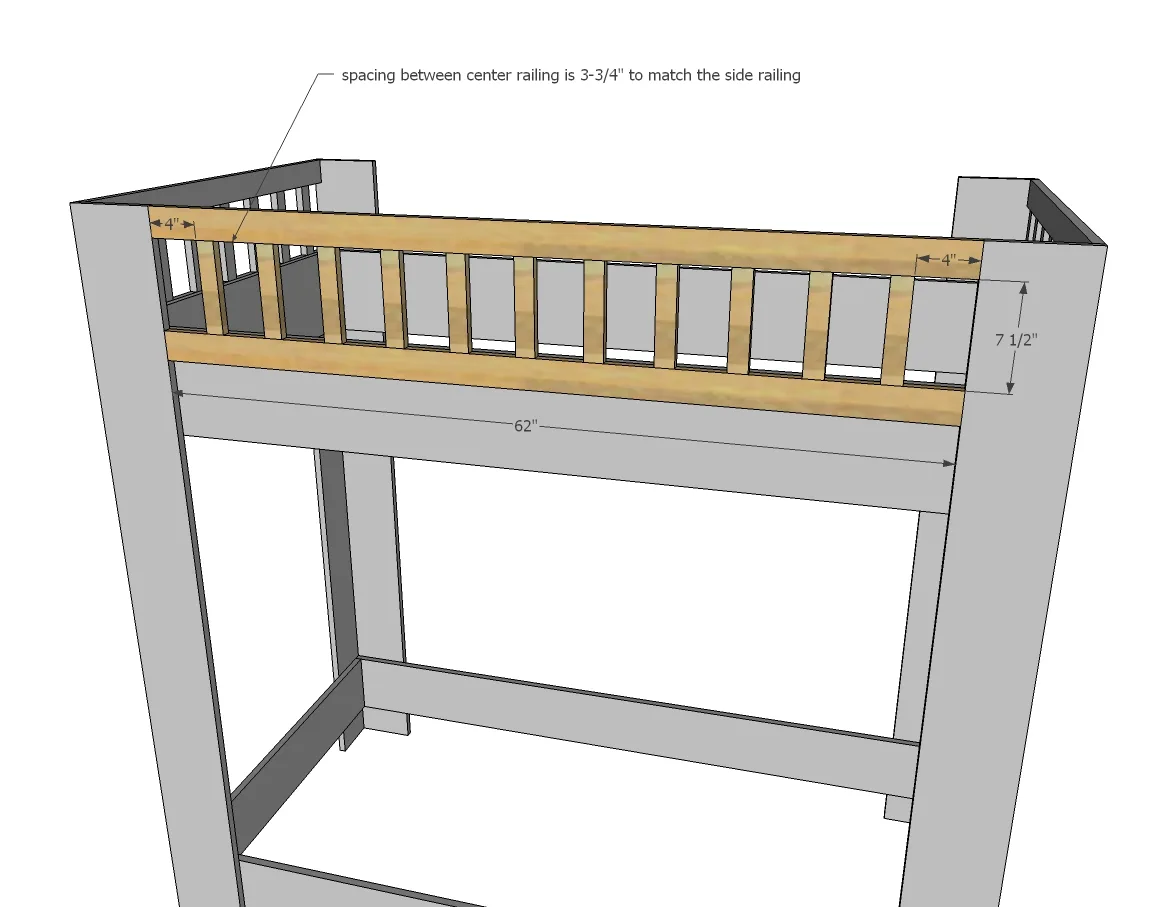
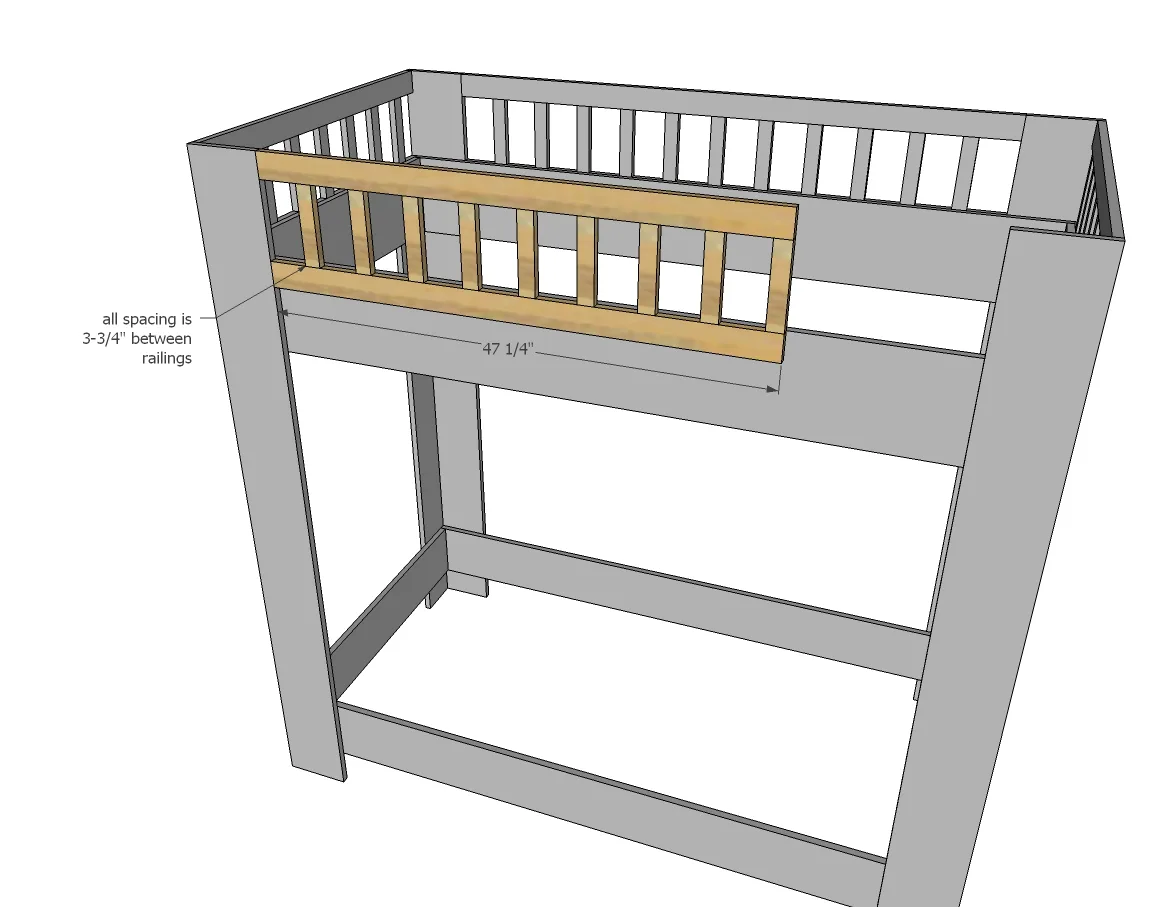
Build the end railing with 3/4" pocket holes and 1-1/4" pocket hole screws. TIP: Cut a couple of 3-3/4" blocks to use as spacer for placing railing. Attach to the ends of the bed. Again, prefer glue if possible to use.

Step 4
Repeat steps to build the bunk bed back guardrail.
Step 5
Step 6
Build the ladder with 3/4" pocket holes on underside or rungs. Attach to bed with screws.

Step 7
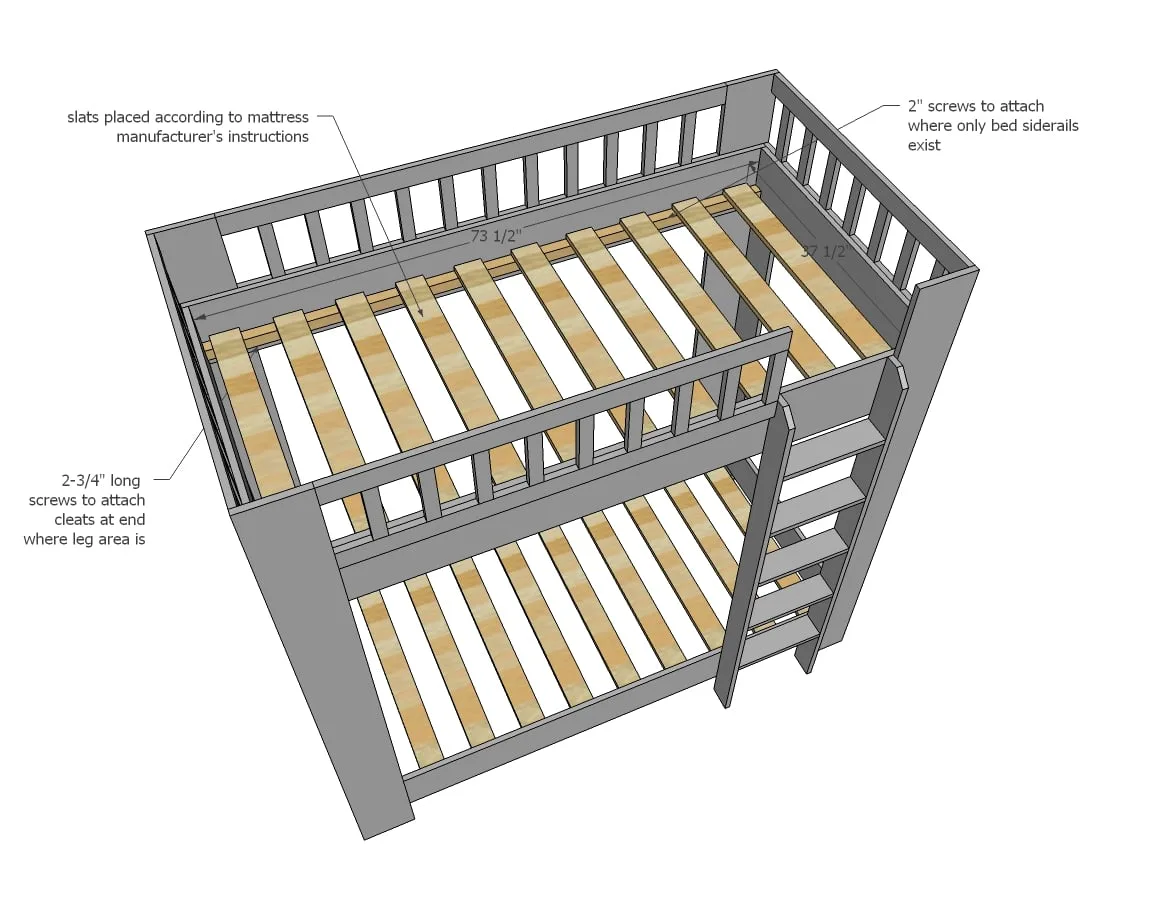
Screw cleats to insides of beds. Place at height desired for mattresses (recommend lower on top bunk and higher on bottom bunk. Screw slats on top of cleats to keep in place. 2x slats can be used for increased strength.
Finishing
Sand all surfaces, starting with a medium grit and finishing with fine. Wipe off the dust, fill any holes or gaps with wood filler, and sand smooth once dry. Apply primer if you're painting, then finish with your choice of paint or stain and seal with a durable clear topcoat. For outdoor projects, use exterior-rated primer, paint or stain, and sealer so the piece stands up to the weather.