Rolling Potting Island
DIY Potting Island – Build a simple, sturdy potting bench perfect for outdoor gardening tasks. This design features a slatted cedar wood top for working, a lower slatted shelf for storage, and convenient hooks for hanging tools. The clean, minimal style keeps everything organized without the clutter. Designed to be beginner-friendly, this project uses basic lumber and standard tools, making it an easy weekend build. The compact size fits nicely against a house or garden wall, while still offering plenty of workspace. Add casters and roll it out to create a working island. Perfect for potting plants, organizing supplies, or even doubling as an outdoor serving station. Plans include: • Step-by-step instructions • Cut list • Shopping list • Easy-to-follow diagrams.

Dimensions
Use the size-specific shopping and cut lists below.

What you need
- 1 - 4x4 @ 12 feet long
- 4 - 2x4 @ 8 feet long
- 6 - 1x6 cedar boards 10 feet long OR 9 cedar fence pickets 6 feet long
- 4 - caster wheels (if desired)
- 3" or longer self tapping exterior deck screws
- 2" self tapping exterior deck screws (for attaching top)
- exterior wood glue
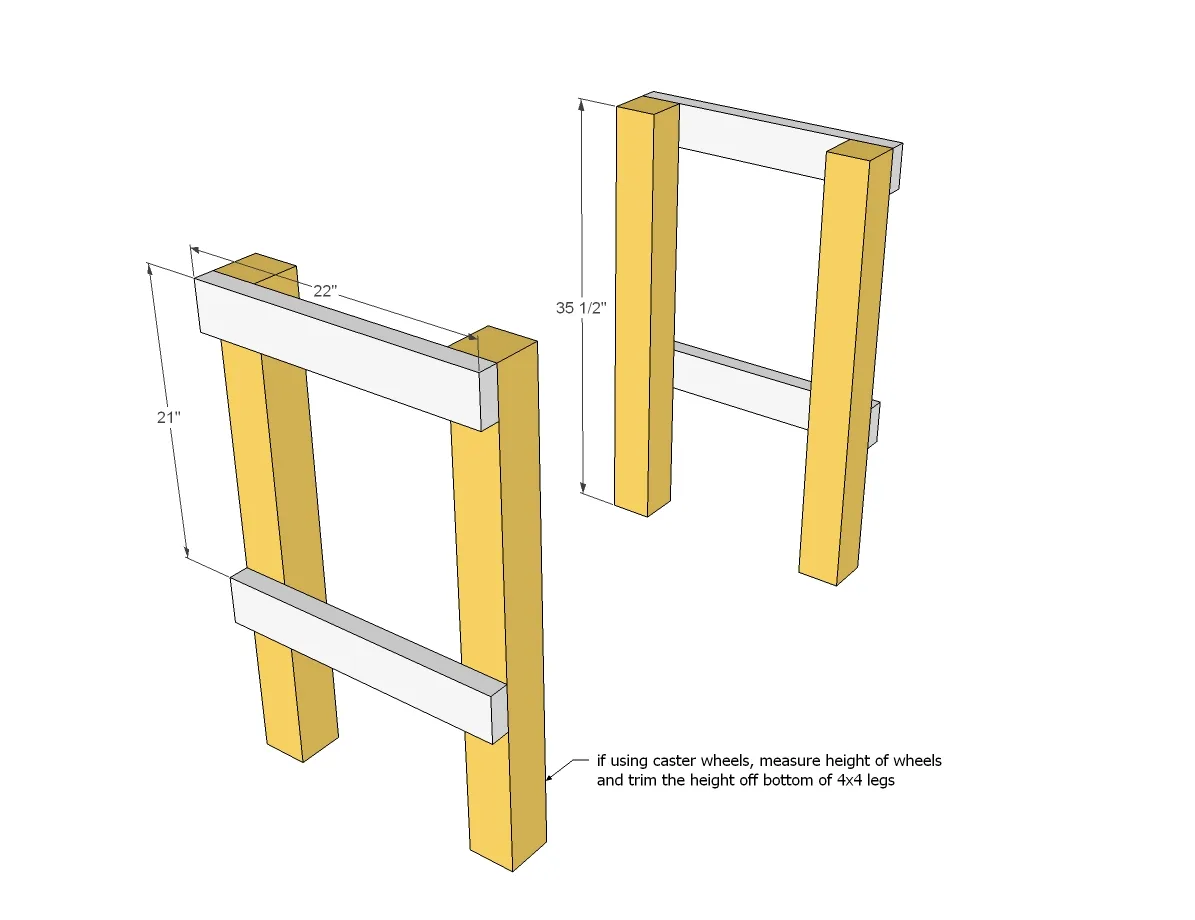
- 4 - 4x4 @ 35-1/2" - cut shorter per wheel height if using (legs)
- 8 - 2x4 @ 22" (sides and top supports)
- 4 - 2x4 @ 48" (front and back)
- 1 - 2x4 @ 45" (bottom support)
- 8 - 1x6 cedar boards or fence pickets @ 26" (bottom shelf)
- 5 - 1x6 cedar boards or fence pickets @ 50" (top shelf)
- measuring tape
- square
- pencil
- safety glasses
- hearing protection
- drill
- circular saw
- jigsaw
- sander
- countersink drill bit
Step by step
Step 1
Test a few of your screws to make sure you don't need to predrill all the holes. I find self tapping screws pretty forgiving (though more expensive). Layout the 4x4 legs and attach the 2x4s to the top and at the bottom shelf location. To keep things pretty - I love how Susan made a screw pattern here.
Step 2
Now things will start to take shape! Attach 2x4s to both the 4x4s and the side 2x4s for extra support.

Step 3
You'll need something to attach the top boards too - so attach more 2x4s inside the top.
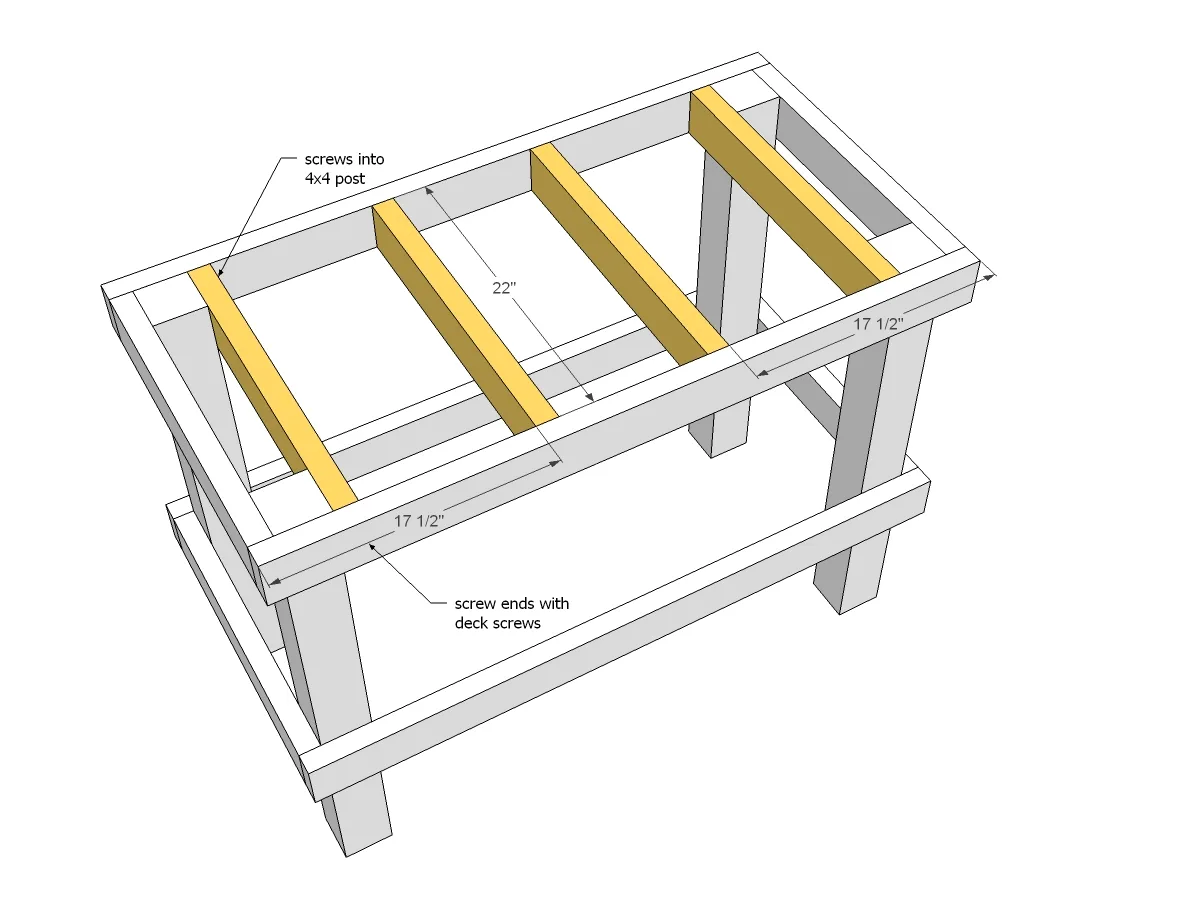
Step 4
The same needs to be done for the bottom shelf - but we'll go the other way since the bottom shelf boards are run the other way.

Step 5
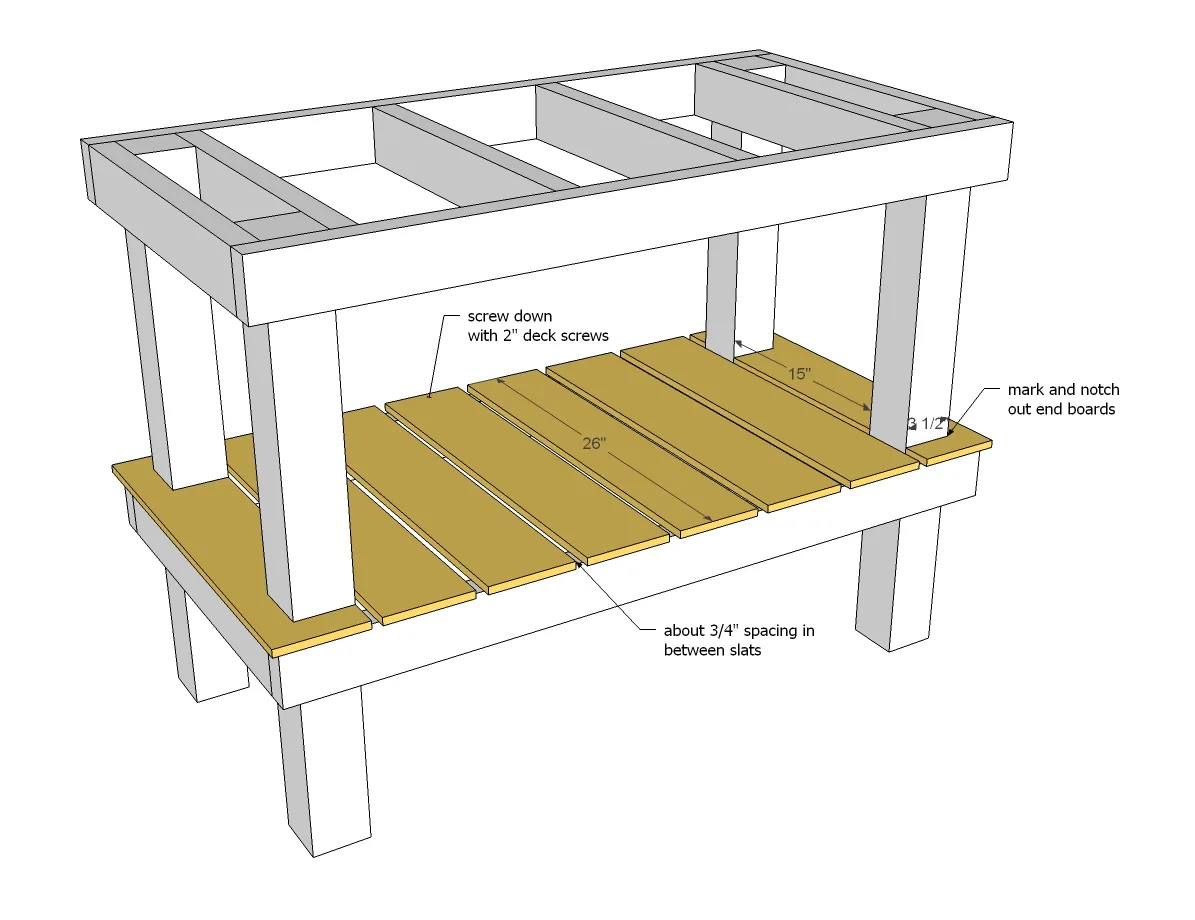
Step 6
Attach top shelf boards with the shorter screws to the supports - if the supports were placed to plans, the dotted lines show the location of the center of the studs.

Attach wheels to bottom of legs if using.
For more details - please visit Susan at Between Naps on the Porch. Thank you Susan!

Finishing
Sand all surfaces, starting with a medium grit and finishing with fine. Wipe off the dust, fill any holes or gaps with wood filler, and sand smooth once dry. Apply primer if you're painting, then finish with your choice of paint or stain and seal with a durable clear topcoat. For outdoor projects, use exterior-rated primer, paint or stain, and sealer so the piece stands up to the weather.