Roll Out Pantry
If you have a narrow open space in your kitchen, maybe next to your fridge, you can make this space useful. In this tutorial, we'll walk you through how to build a roll out pantry shelf that can slide in the wasted space. with step by step diagrams.

Dimensions
Use the size-specific shopping and cut lists below.

What you need
- 1x boards in desired width (about 4 boards, each 8 feet long)
- 1x4s for 4" gap
- 1x6s for 6" gap
- 1x8s for 8" gap
- 1x10s for 10" gap
- 1x12s for 12" gap
- 3/4" diameter wood dowels, 36" long each, one per shelf
- One full sheet of 1/4" thick plywood
- 4 fixed caster wheels, 2-3" in height with screws
- 1-1/4" pocket hole screws (recommended) or 2" self tapping wood construction screws (about 25 for 1x4, 1x6, 1x8 widths, about 40 for 1x10, 1x12 widths)
- 5/8" brad nails or staples for attaching the back
- 1-1/4" brad nails or 2" wood trim screws for attaching the wood dowels (two screws per dowel)
- 2 - 1x boards @ desired height minus height of caster wheels - sides
- 6 - 1x boards @ desired depth minus 2" - shelves (can have more or less shelves)
- 6 - 3/4" wood dowels @ same length as shelves (if more or less shelves, adjust number of dowels to match)
- 1/4" plywood for back is cut to fit
- measuring tape
- square
- pencil
- safety glasses
- kreg-jig
- drill
- compound miter saw
- nailer
- sander
Step by step
Figure the measurement for the sides and the shelves and cut using a compound miter saw.
Attach the shelves to the sides using a Kreg Jig on the 3/4" setting and 1-1/4" pocket holes (recommended for strength).

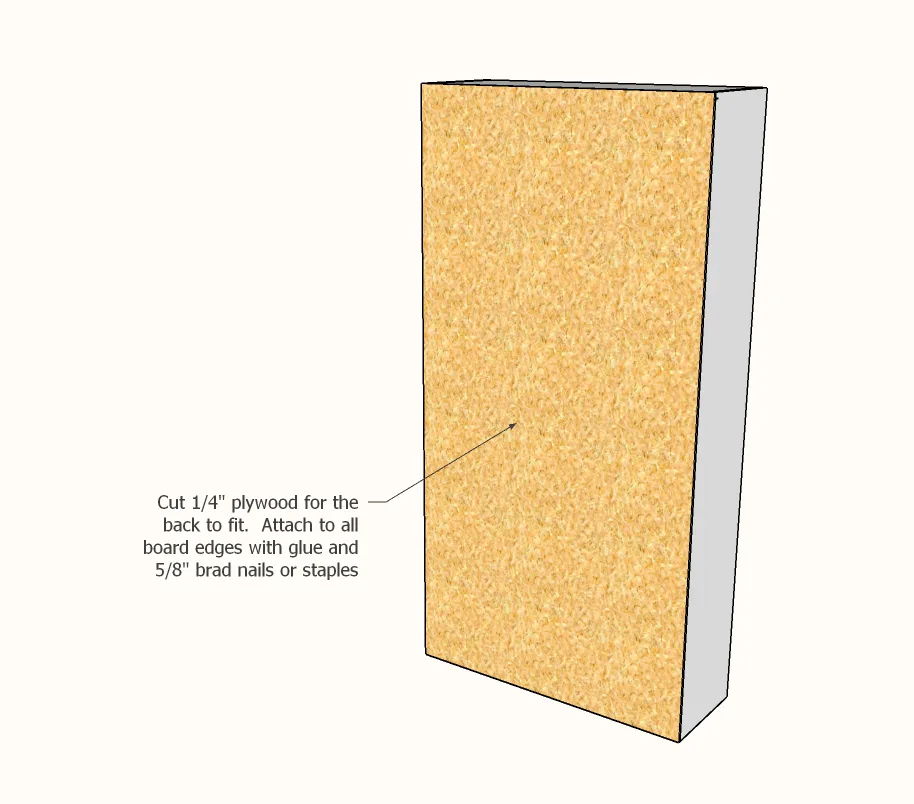
Measure and cut the back 1/4" plywood to fit.
Nail and glue to all back edges of 1x boards.
Step 3
Attach dowels to inside of sides.
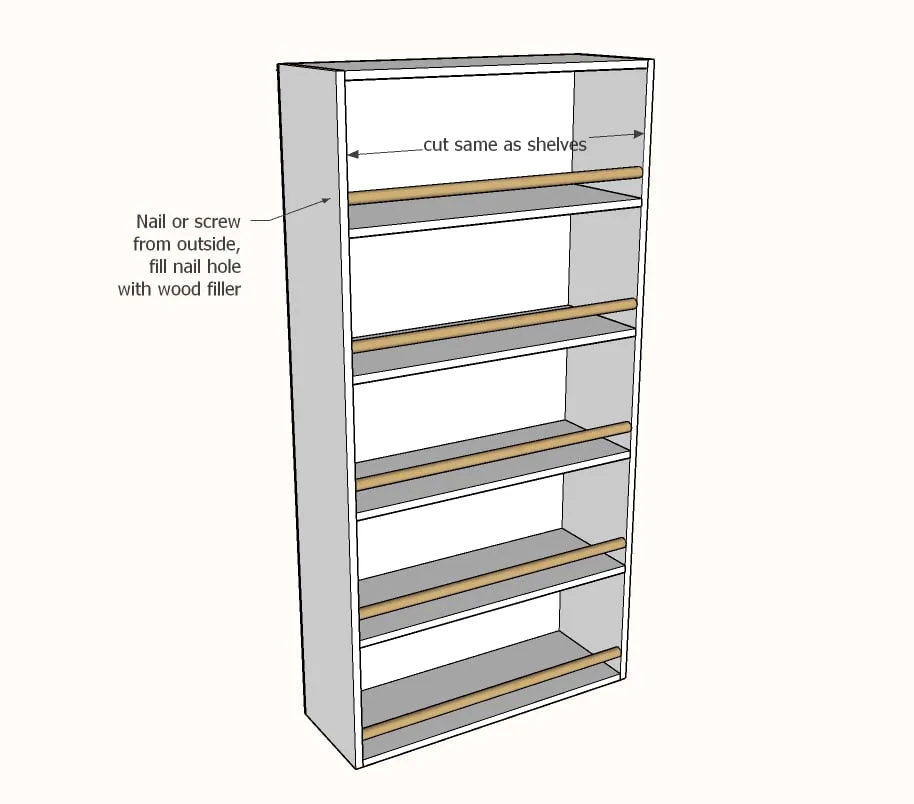
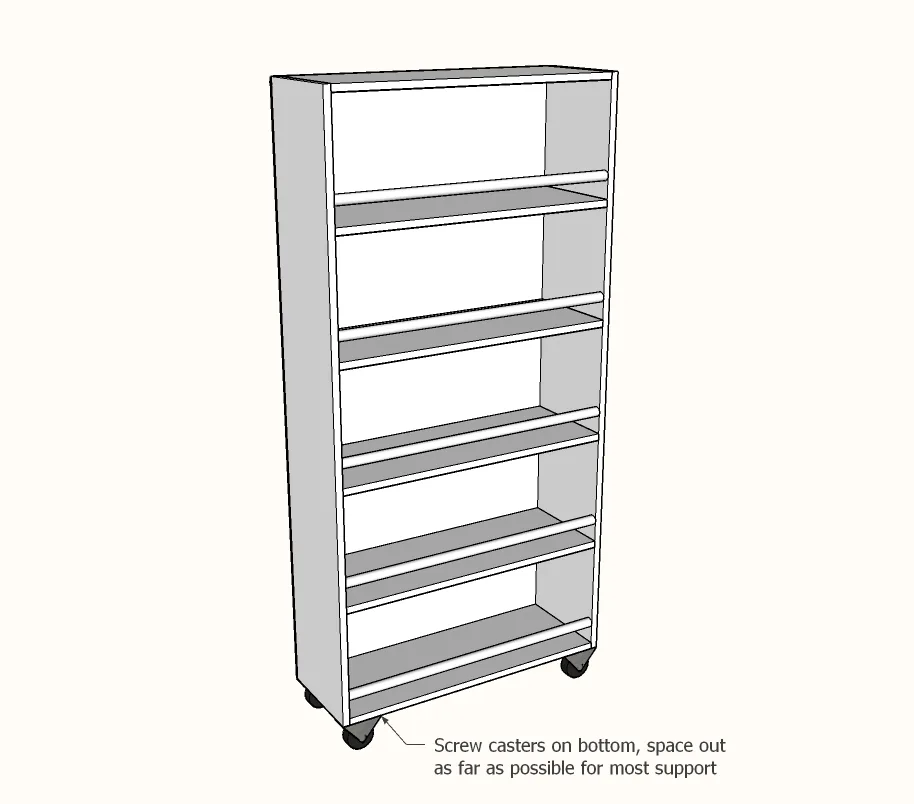
Attach caster wheels to base of shelf.
Add handle as desired.
Finishing
Sand all surfaces, starting with a medium grit and finishing with fine. Wipe off the dust, fill any holes or gaps with wood filler, and sand smooth once dry. Apply primer if you're painting, then finish with your choice of paint or stain and seal with a durable clear topcoat. For outdoor projects, use exterior-rated primer, paint or stain, and sealer so the piece stands up to the weather.