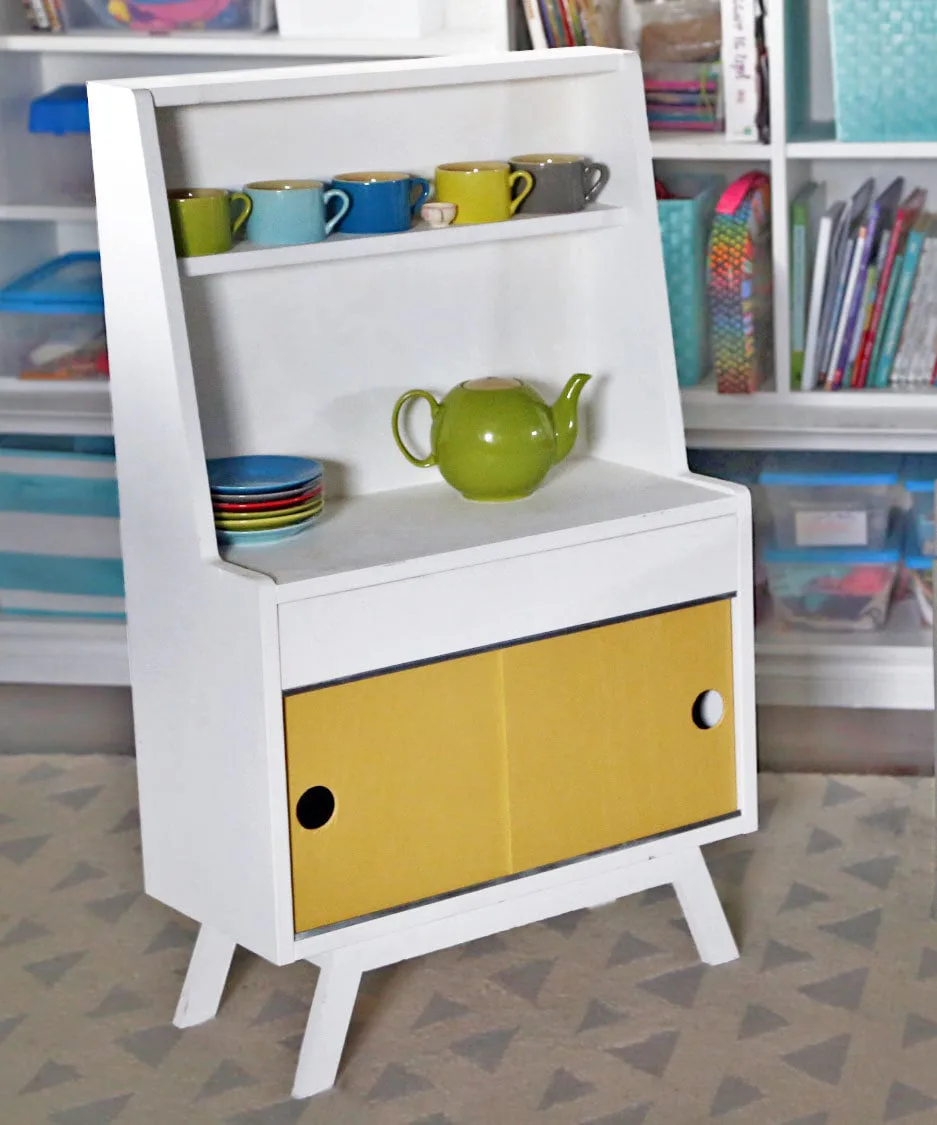
Retro Wood Toy Pretend Play Kitchen Dish Hutch
DIY retro play kitchen dish hutch for kids! Free.
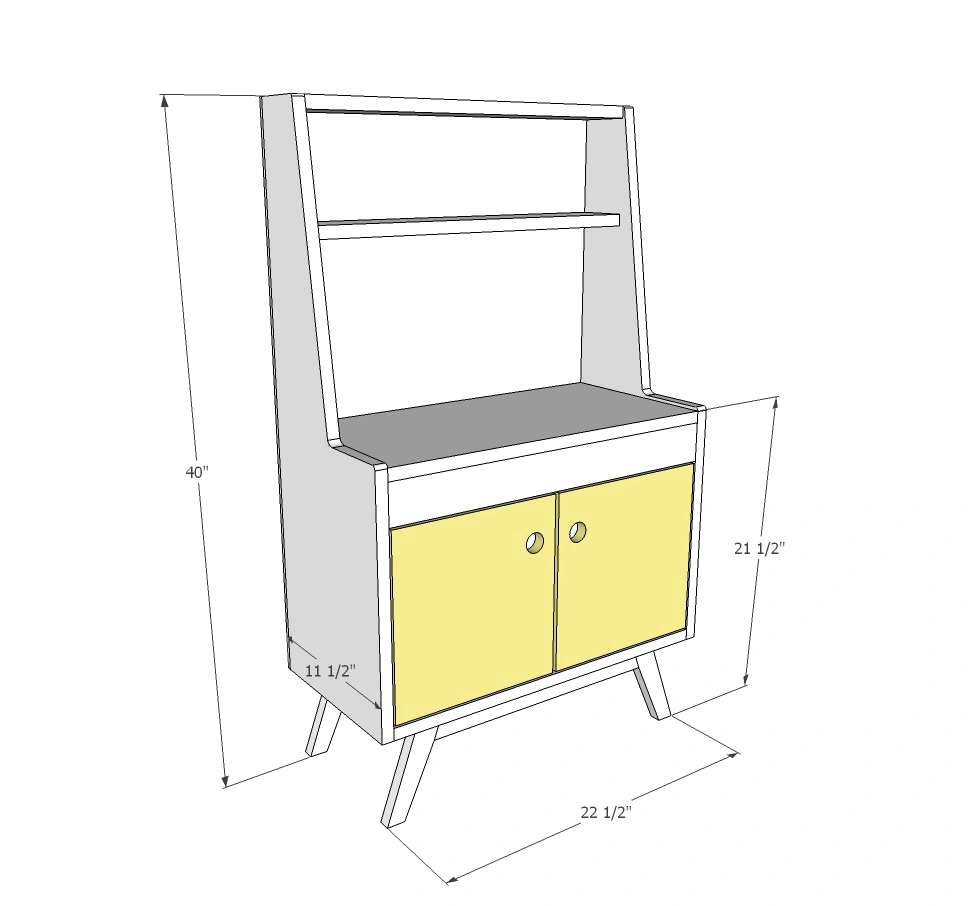
Dimensions
Use the size-specific shopping and cut lists below.
What you need
- 1 - 1x12 @ 12 feet (can be cut into two six foot long pieces for easier transport) OR if using 1/4" plywood doors, you will only need 10 feet (can be cut into five foot long pieces)
- 1 - 1x4 @ 4 feet long
- 1 - 1x3 @ 2 feet long
- 1 - 1/4" plwyood @ 24" x 48"
- 1 - 1x2 @ 8 feet long
Hinges if using 1x12 doors or drywall end cap channel if using sliding 1/4" plywood doors
- 2 - 1x12 @ 34" - sides
- 2 - 1x12 @ 22-1/2" - main shelves
- 2 - 1x4 @ 22-1/2" - hutch shelves
- 1 - 1x3 @ 22-1/2" - front apron
- 1 - 1/4" plywood @ 24" x 34" - back
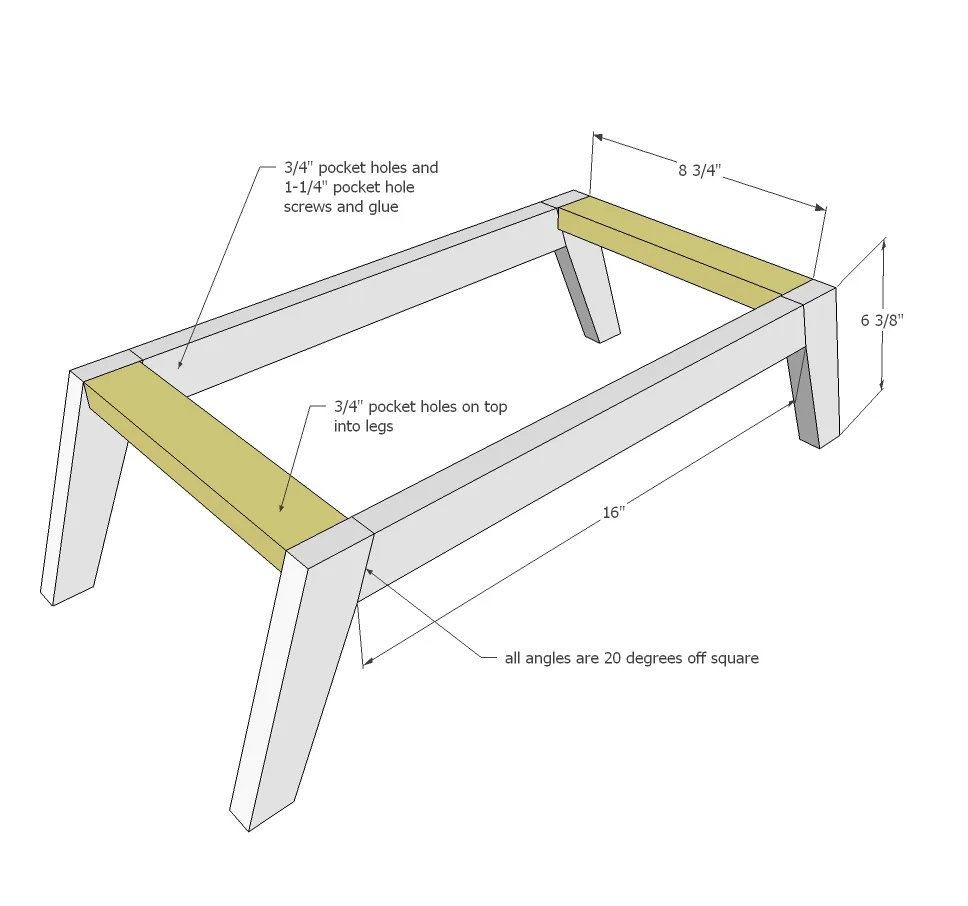
- 2 - 1x2 @ 8-3/4" - base tie in pieces
- 4 - 1x2 @ 6-3/8" both ends cut parallel 20 degrees off square
- 2 - 1x2 @ 16" both ends cut NOT parallel at 20 degrees off square, long point to long point measurement
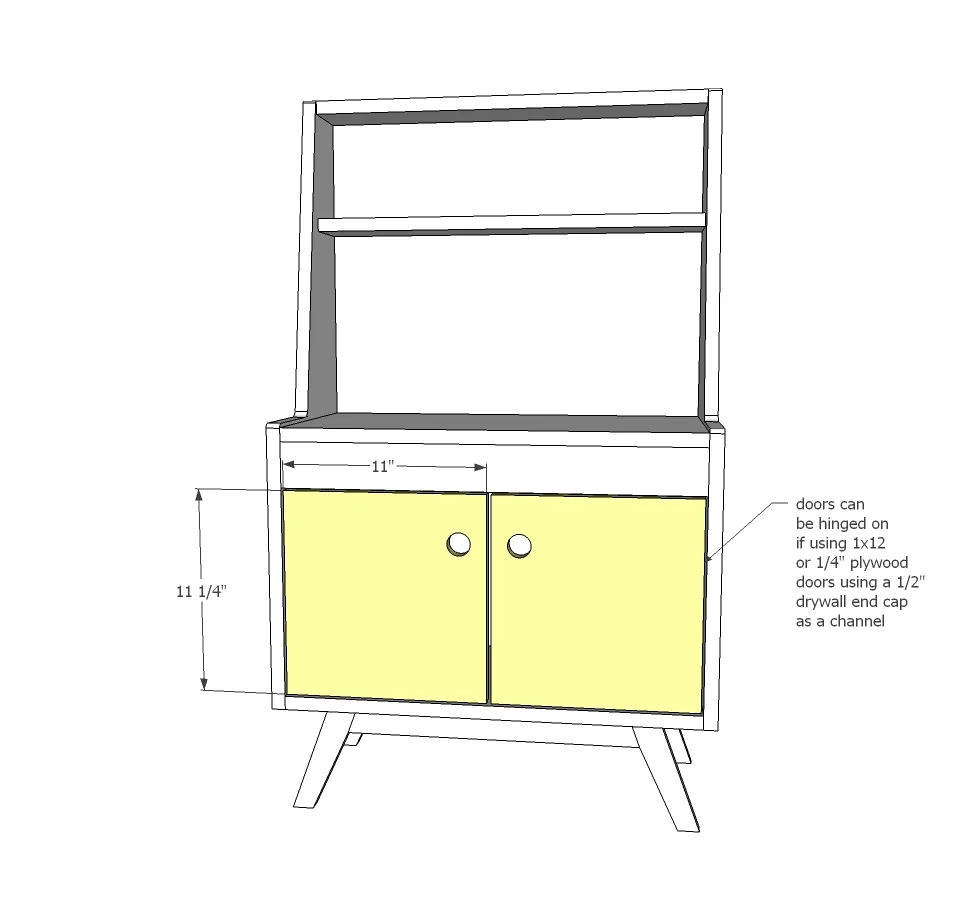
Doors are either 2 - 1x12 @ 11" hinges on or 1/4" plywood pieces cut 11-1/4" x 11-1/4" (they should overlap) in the channel
- measuring tape
- square
- pencil
- safety glasses
- hearing protection
- kreg-jig
- drill
- circular saw
- jigsaw
- compound miter saw
- nailer
- sander
Step by step
Step 1
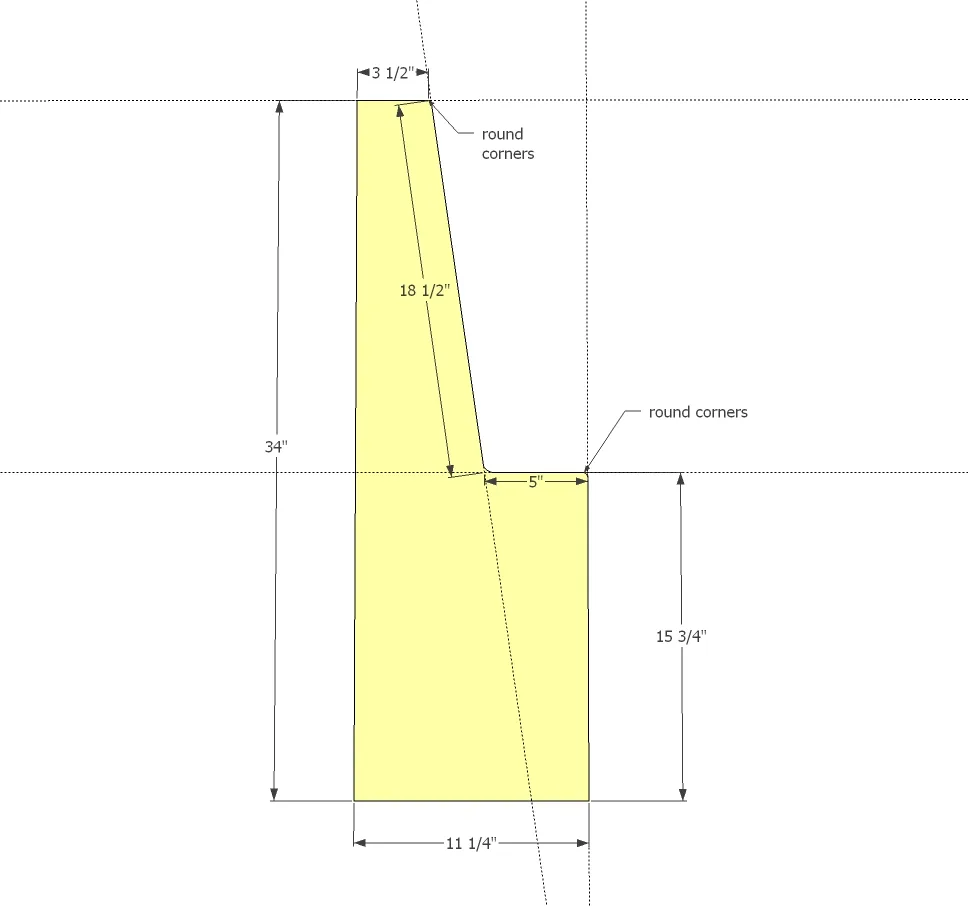
Mark the sides as shown in the diagram. Then carefully cut out with a jigsaw. Round inside and outside corners for that retro look. Sand edges smooth. The two sides should be identical.
Step 2
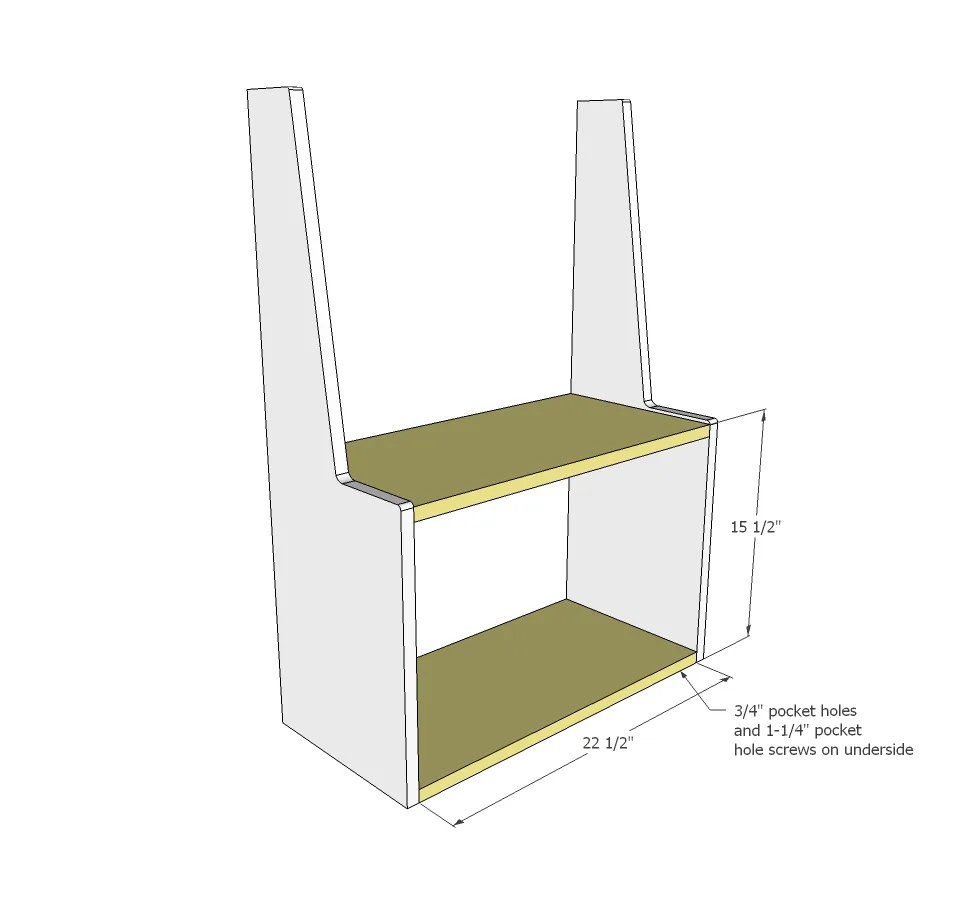
Drill three 3/4" pocket holes on each end of the 1x12 shelf boards. Attach to legs, with pocket holes on the bottom, with 1-1/4" pocket hole screws and wood glue.
Step 3
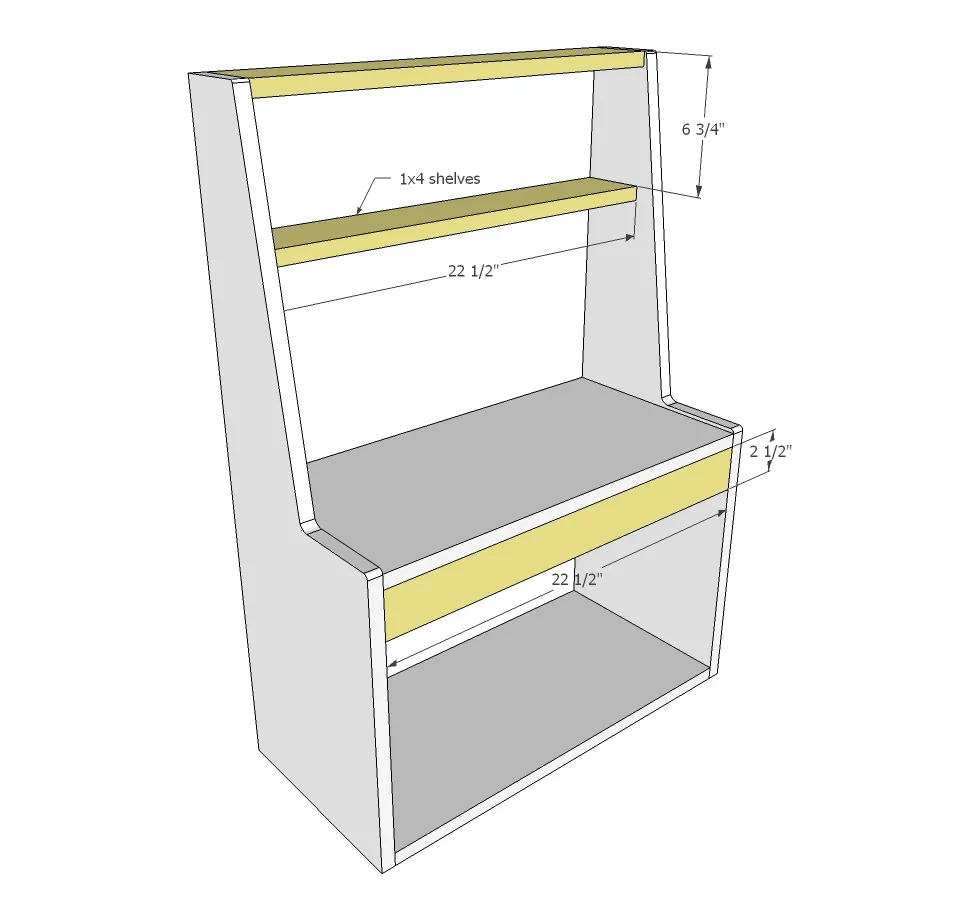
Repeat steps for the smaller 1x4 shelves and 1x3 apron. Also attach top to apron with either 1-1/4" nails and glue, or pocket holes facing upward on 1x3 apron.
Step 4
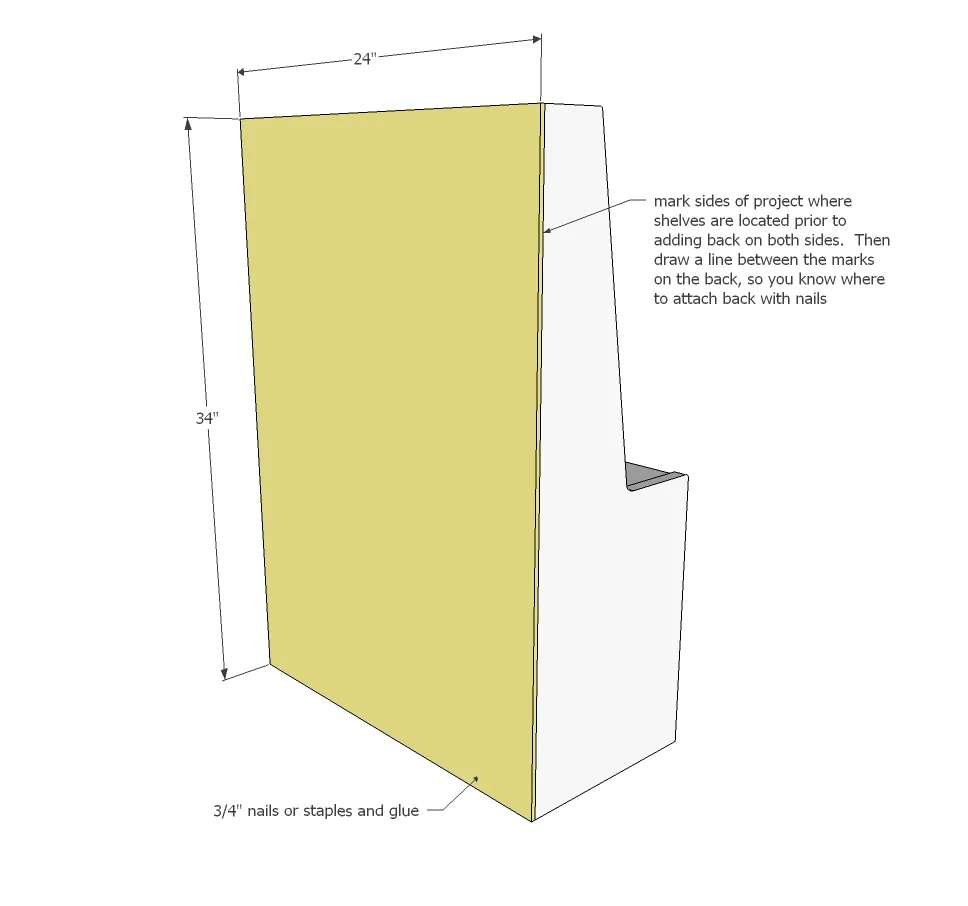
Mark sides at location of all shelves on back, in the center of the shelves. Place back on with glue. Then draw lines between marks to guide you in nailing the back on. Use 3/4" nails to attach.
Step 5
Step 6
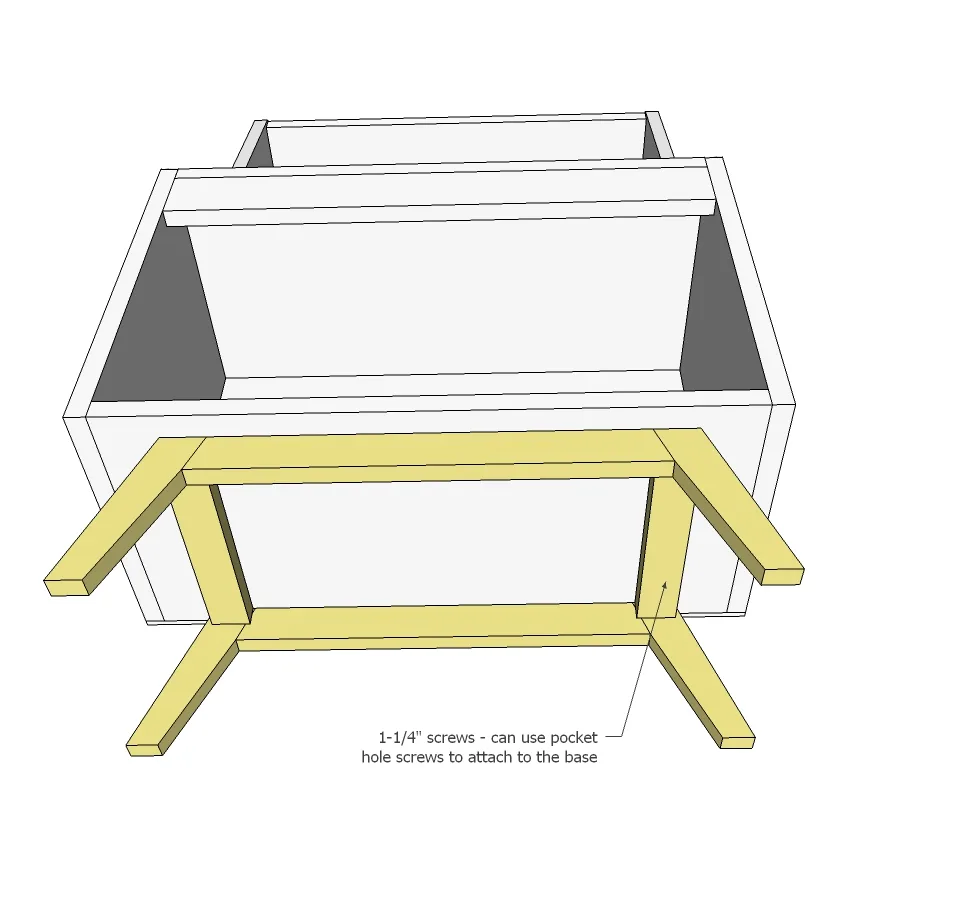
Attach base to bottom of kitchen with 1-1/4" screws and wood glue.
Step 7
The doors can either be hinges on if using 1x12s, or attach metal drywall channels to the top and bottom, screwing through the center of the channel into the wood to secure. Make sure the doors slide easily, and overlap to prevent the doors from hitting each other.
Finishing
Sand all surfaces, starting with a medium grit and finishing with fine. Wipe off the dust, fill any holes or gaps with wood filler, and sand smooth once dry. Apply primer if you're painting, then finish with your choice of paint or stain and seal with a durable clear topcoat. For outdoor projects, use exterior-rated primer, paint or stain, and sealer so the piece stands up to the weather.