Reclaimed Wood Console Table
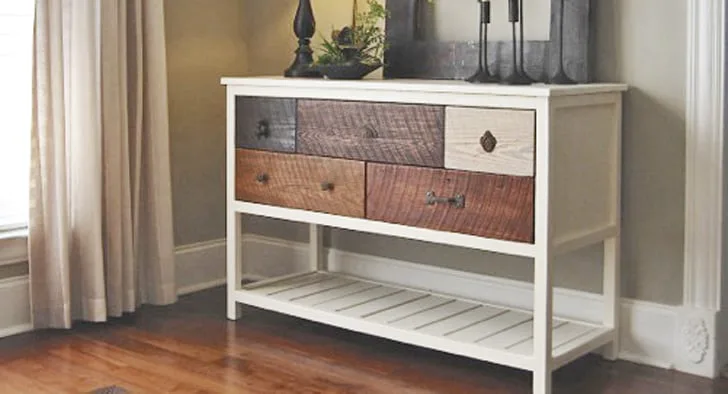
Free console plans with reclaimed wood drawer faces - DIY.
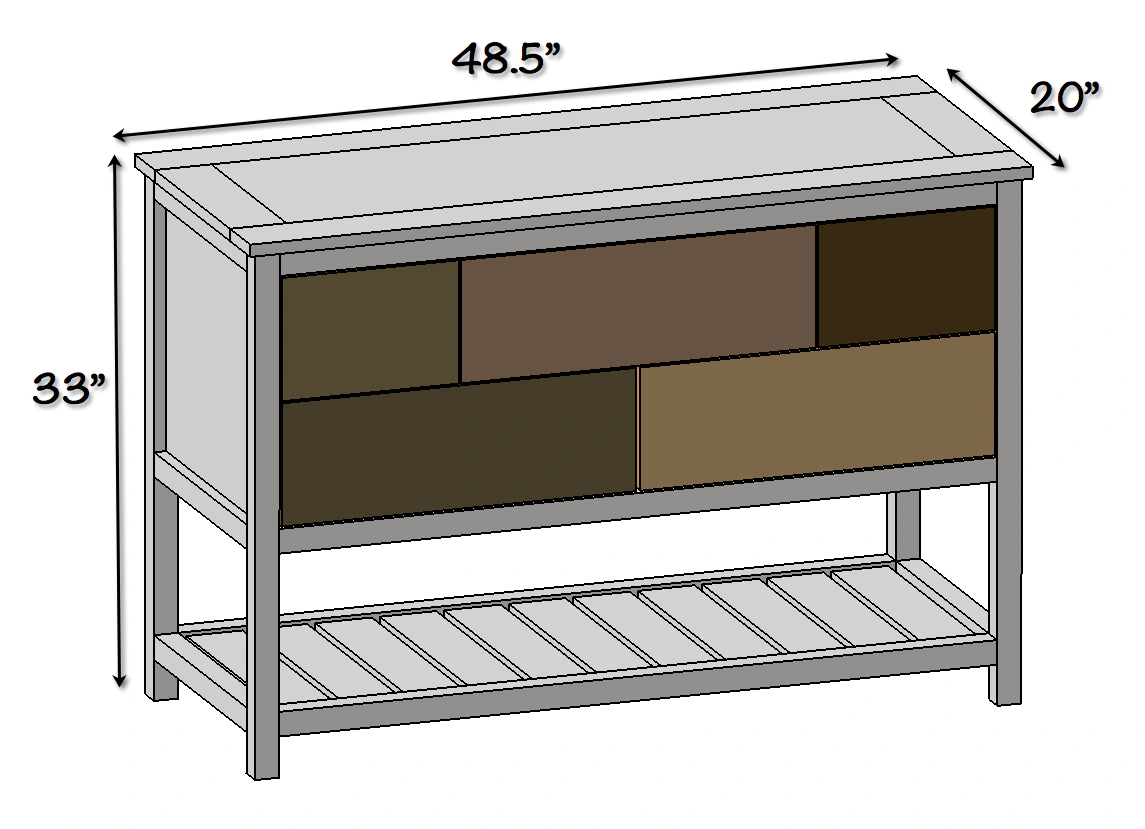
Dimensions
Use the size-specific shopping and cut lists below.
What you need
- Level
- Square
- Pencil
- Level
- Eye Protection
- Hearing Protection
- Kreg K5 and/or R3 Pocket Hole Jig
- Clamp
- Drill
- Miter Saw
- Circular Saw and/or Table Saw
- Nailer
- Sander
- 1x 1 x 8 x 8' (Drawer fronts; I used reclaimed wood)
- 6x 2 x 2 x 8'
- 4x 1 x 4 x 8'
- 3x 1 x 6 x 8'
- 1/4" Plywood (4' x 4')
- 1/4" Plywood (2' x 4')
- 3/4" Plywood (4' x 4')
- 5x Vintage Drawer Hardware
- 2x Drawer Slides (Pair)
- 2" Pocket Hole Screws
- 1-1/4" Pocket Hole Screws
- 1-1/4" Brad Nails
- 2" Wood Screws
Tools Required:
Materials:
- measuring tape
- square
- pencil
- safety glasses
- hearing protection
- kreg-jig
- drill
- circular saw
- nailer
Step by step
Step 1
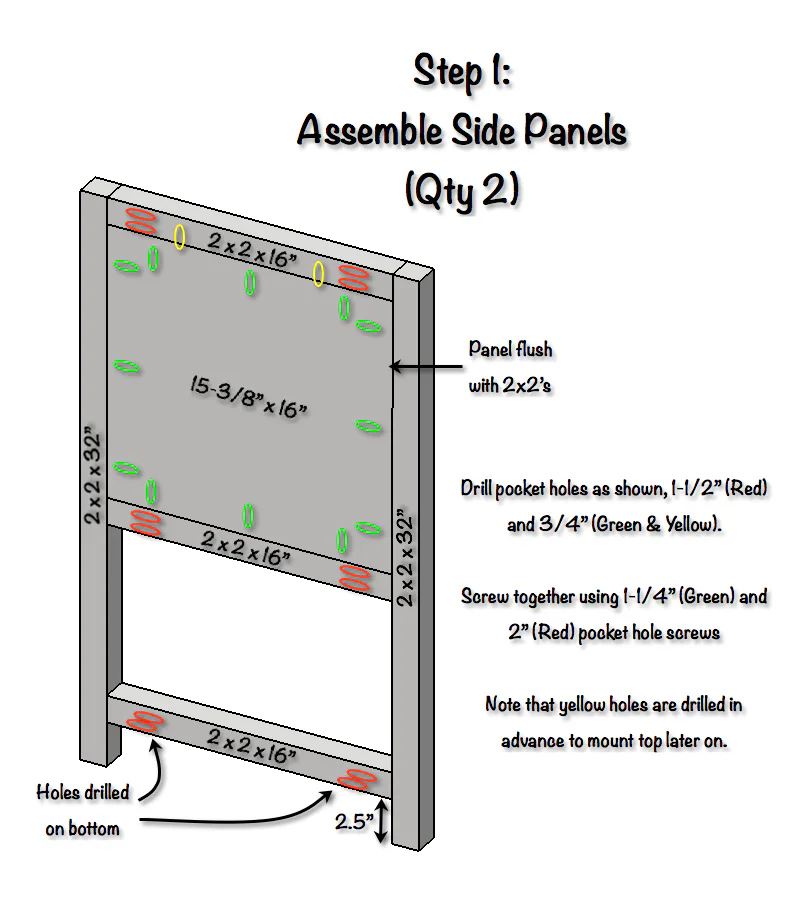
Step 2
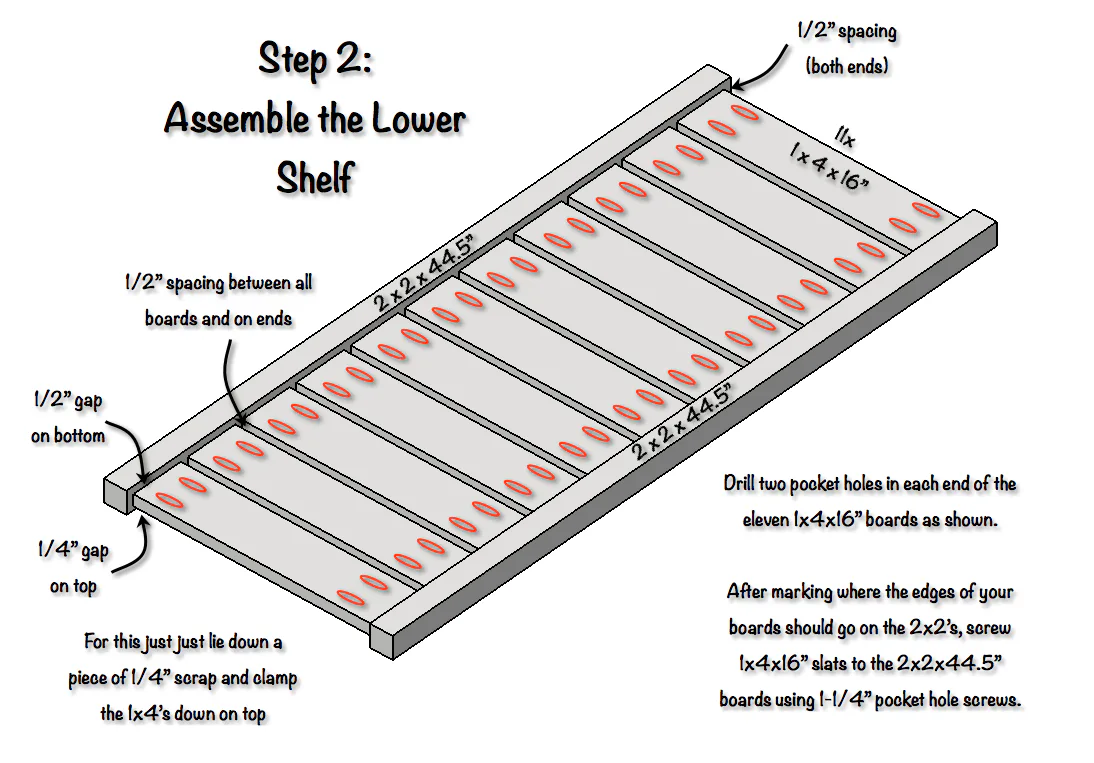
Step 3
Be careful here. Base is somewhat unstable in this state.

Step 4
I recommended staining these drawers after assembling.
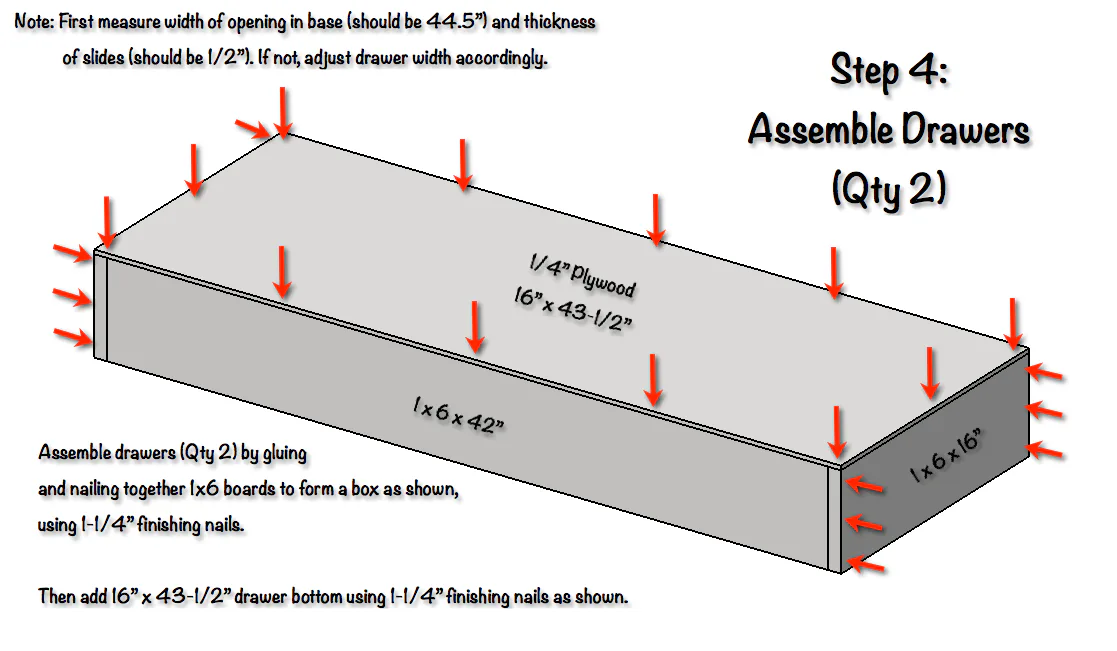
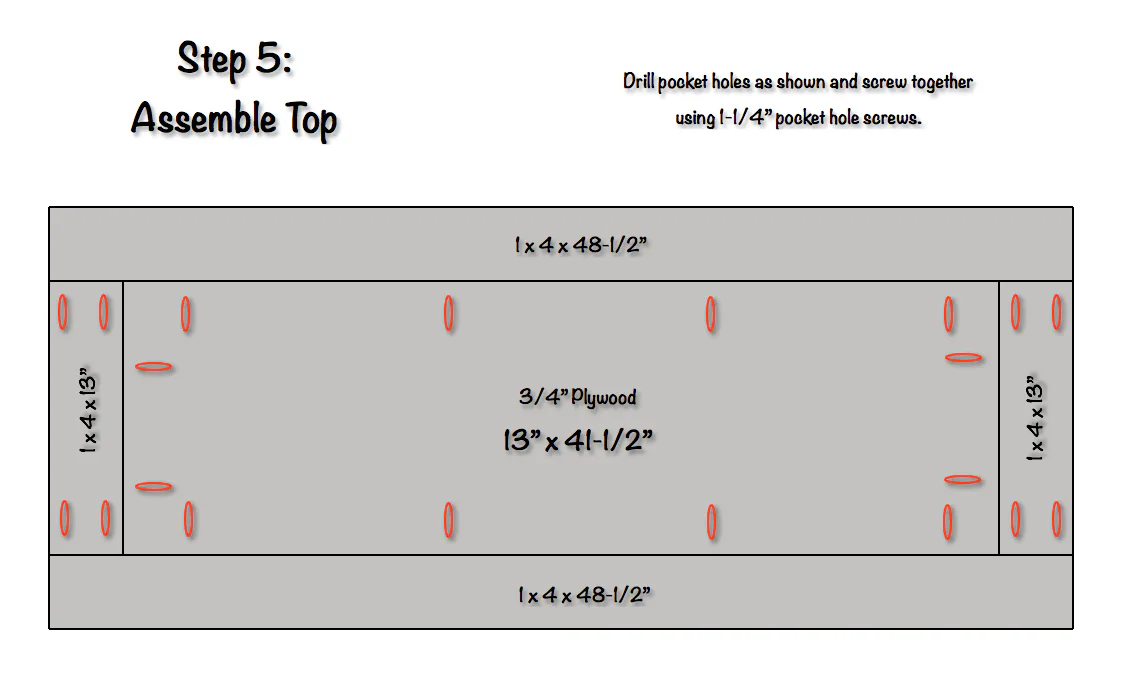
Step 5
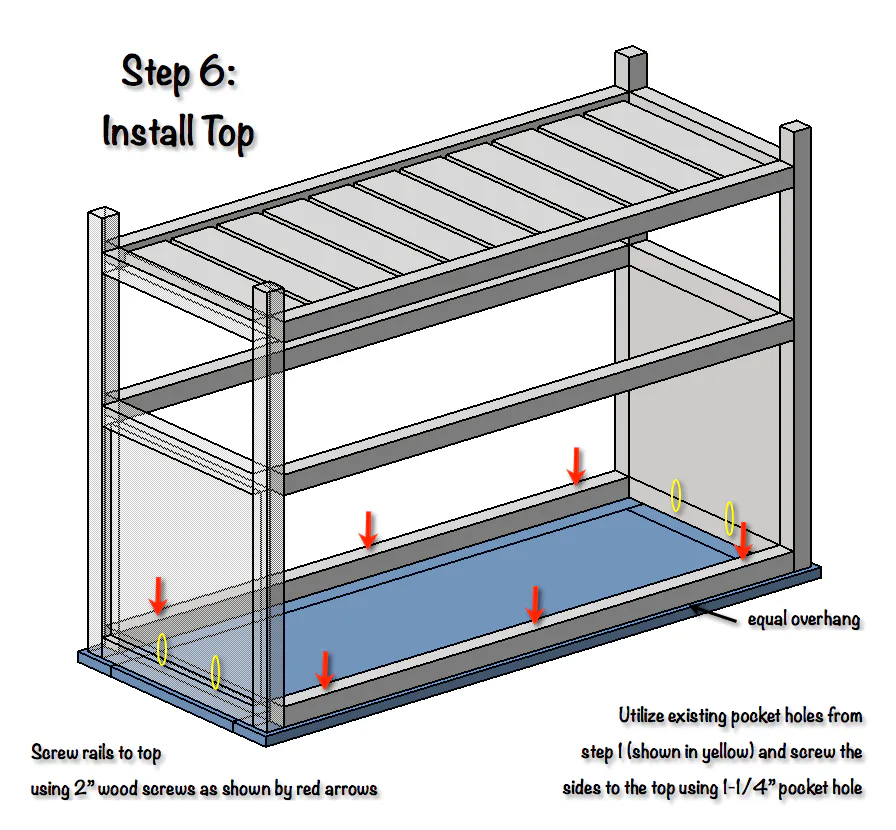
Step 6
After this step is the best time to paint your table.
Video for installing drawer slides

Step 8
Arrows shown are only for finishing nails to locate drawer front. Drawer fronts are actually secured with two or three 1-1/4" wood screws from with the drawer. Note: Before installing the drawer fronts it is best to stain them.

Step 9
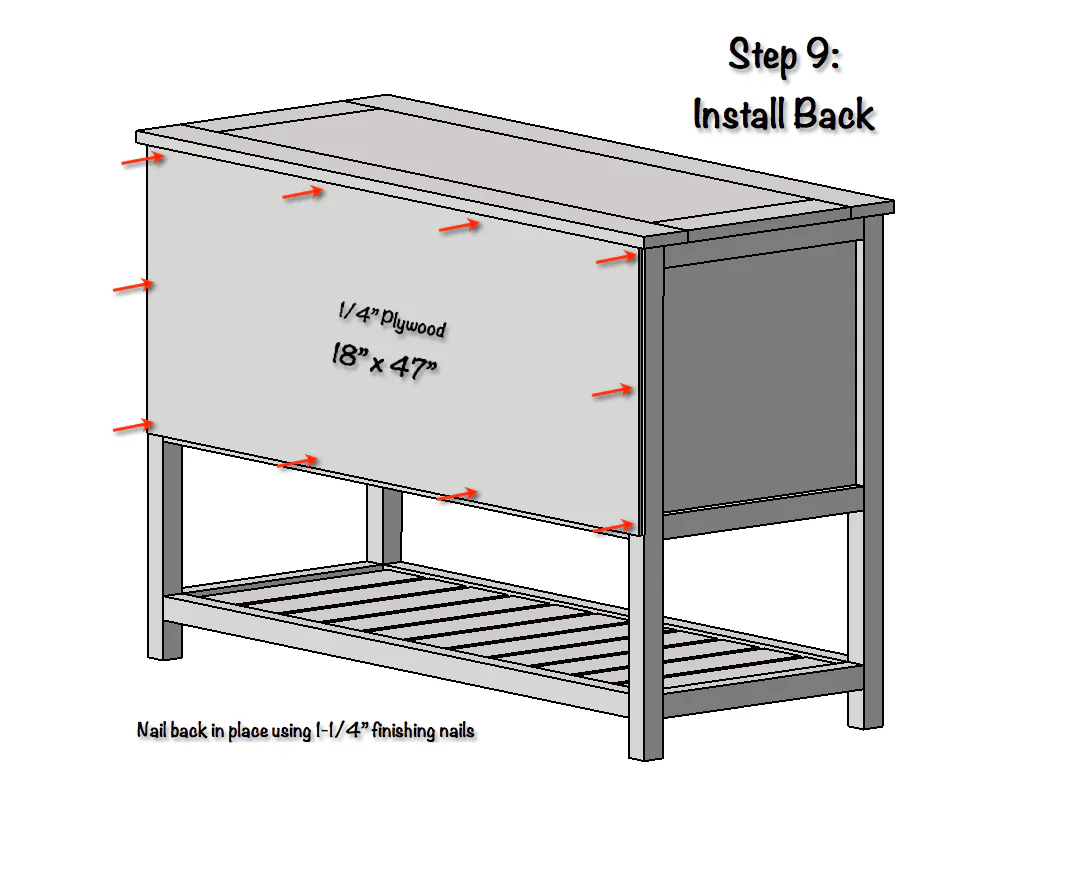
Finishing
Sand all surfaces, starting with a medium grit and finishing with fine. Wipe off the dust, fill any holes or gaps with wood filler, and sand smooth once dry. Apply primer if you're painting, then finish with your choice of paint or stain and seal with a durable clear topcoat. For outdoor projects, use exterior-rated primer, paint or stain, and sealer so the piece stands up to the weather.


