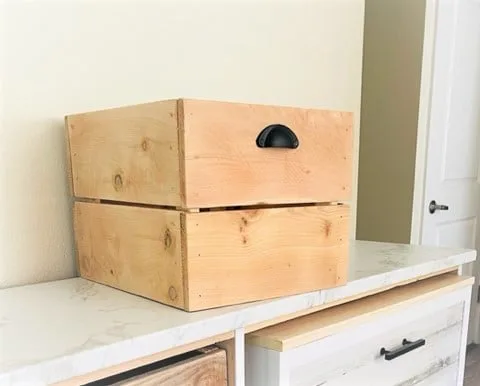
Plywood Gift Crate (man crate)
Build this crate and fill it with gifts, nail the top on, and present it along with a crowbar to open it! Who wouldn't have fun opening a gift with a crowbar?

What you need
- 1 pc ½” or ¾” plywood @ 2’ x 2’
- 4 pc ¼” x 1 ½” x 4’ poplar craft board
- 1 ¼” wire nails (for attaching the top -- you want these nails to be removable)
- 1 – 7” pry bar ( for opening up the sealed crate)
- Finishing materials for desired finish
- Miter saw
- Circular saw or table saw
- Nailgun and hammer
- Sander or sandpaper
- Measuring tape
- Wood Glue
- 1 ¼” finish nails
- 5/8” brad nails
- Finishing materials as desired
OR two 8’ sticks of ¼” x 1 ½” pine lattice
OR 1 pc ¼’ plywood @ 2’ x 2’, cut 8 strips, 1 ½” wide, (this will use half of the piece)
Supplies list:
- 2 pc @ 5 ½” x 10 ½” (sides)
- 2 pc @ 5 ½” x 11 ½” (front/back)
- 1 pc @ 11 ½” x 11 ½” (bottom)
- 1 pc @ 12” x 12” (top)
- 4 pc @ 12” (front/back upper & lower trims)
- 4 pc @ 11 ½” (side upper & lower trims)
- 8 pc @ 3” (side upright trims) (measure and cut to fit)
- 2 pc @ 12” (front/back trims)
- 2 pc @ 9” (side trims)
- 2 pc @ 5 ½” x 10 ” (sides)
- 2 pc @ 5 ½” x 11 ½” (front/back)
- 1 pc @ 11 ½” x 11 ½” (bottom)
- 1 pc @ 12” x 12” (top)
- 4 pc @ 12” (front/back upper & lower trims)
- 4 pc @ 11 ½” (side upper & lower trims)
- 8 pc @ 3 ¼” (side upright trims) (measure and cut to fit)
- 2 pc @ 12” (front/back trims)
- 2 pc @ 9” (side trims)
Crate dimensions: 12” L x 12” W x 6 ¾” H
½” plywood:
¼” x 1 ½” craft board/trim:
Crate:
Top:
Cut list for ¾” plywood:
Crate dimensions: 12” L x 12” W x 7 ¼” H
½” plywood:
¼” x 1 ½” craft board/trim:
Crate:
Top:
- measuring tape
- square
- pencil
- hammer
- safety glasses
- hearing protection
- circular saw
- compound miter saw
- table saw
- nailer
- sander
Step by step
Step 1
Attach sides between front and back as shown. Use glue and 1 ¼” finish nails.

Step 2
Attach bottom to box, keeping outside edges flush. Use glue and 1¼” finish nails.
Step 3
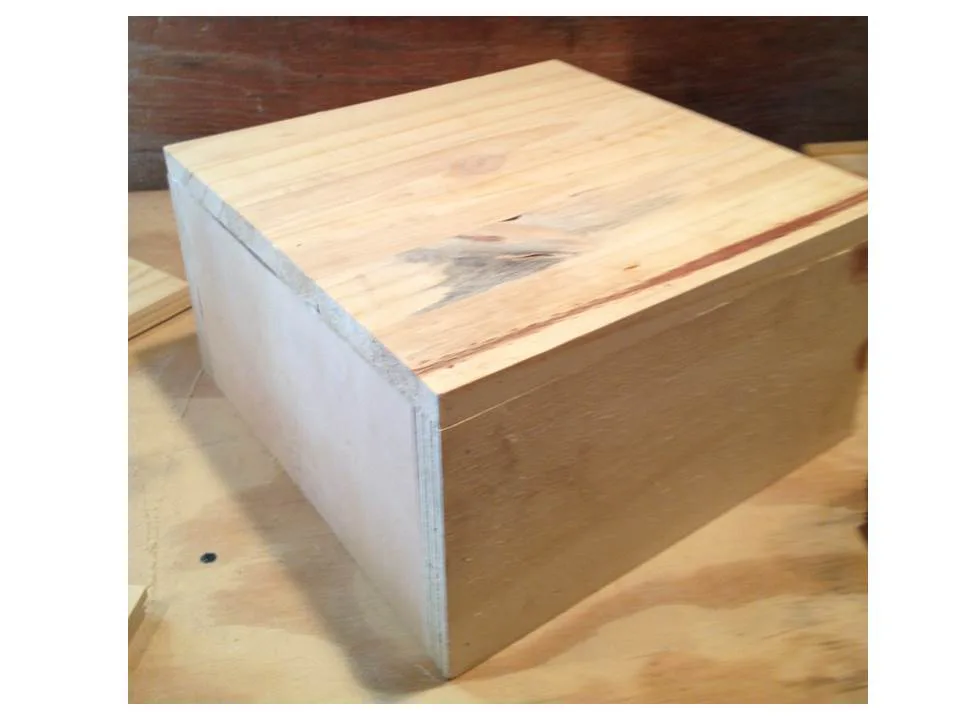
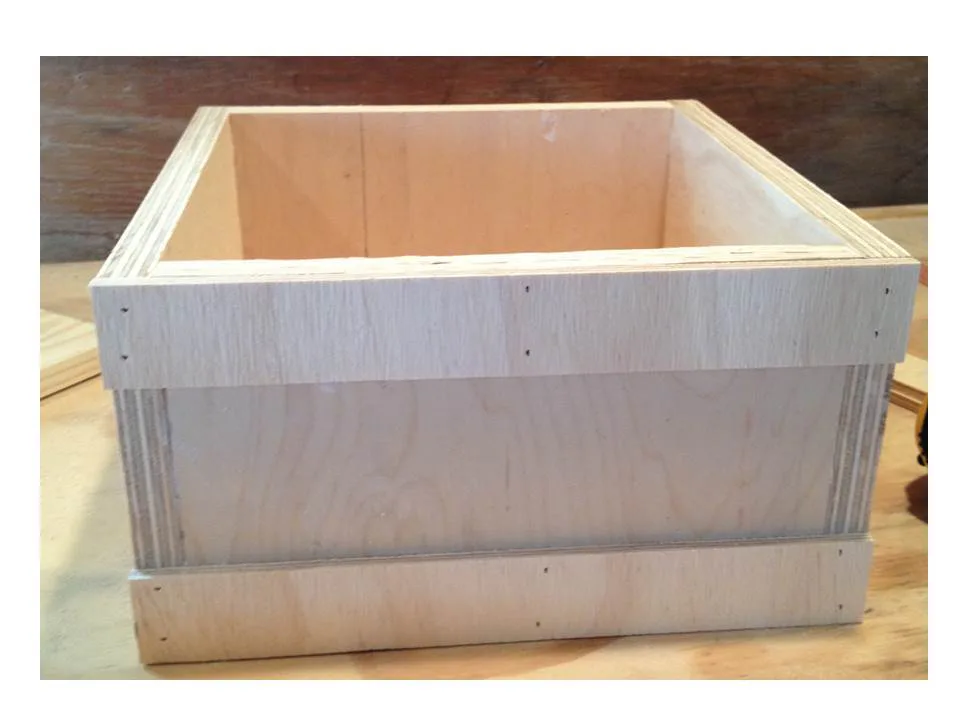
Attach upper and lower trim to sides of box, keeping top and outside edges flush. Use glue and 5/8” brad nails.
Step 4
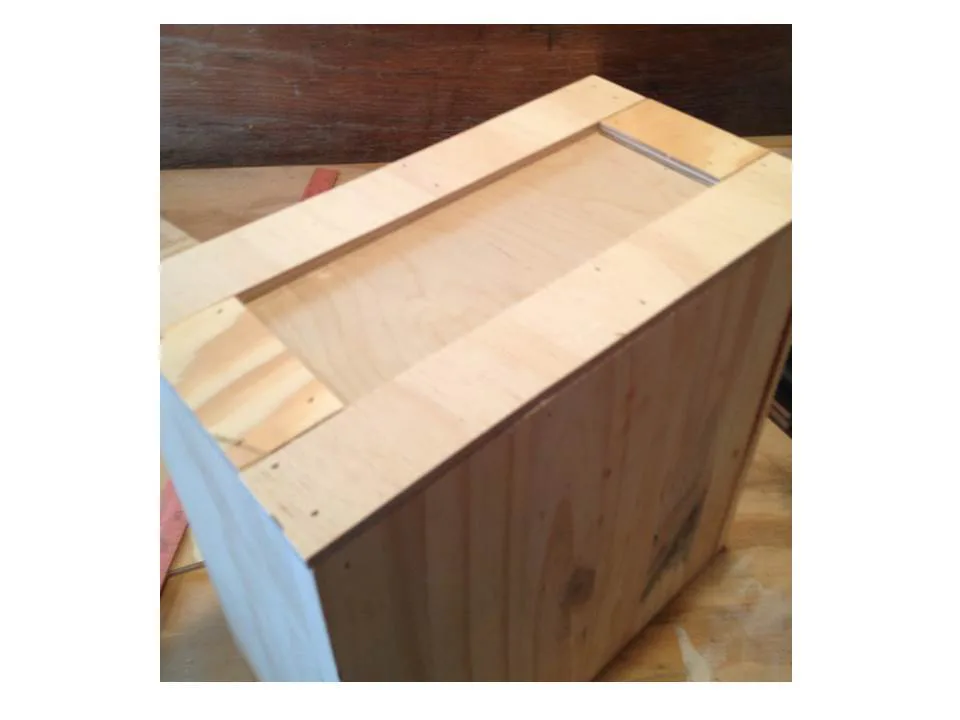
Attach upright trims to sides of box, keeping outside edges flush. You should measure and cut these to fit. Use glue and 5/8” brad nails.
Step 5

Step 6
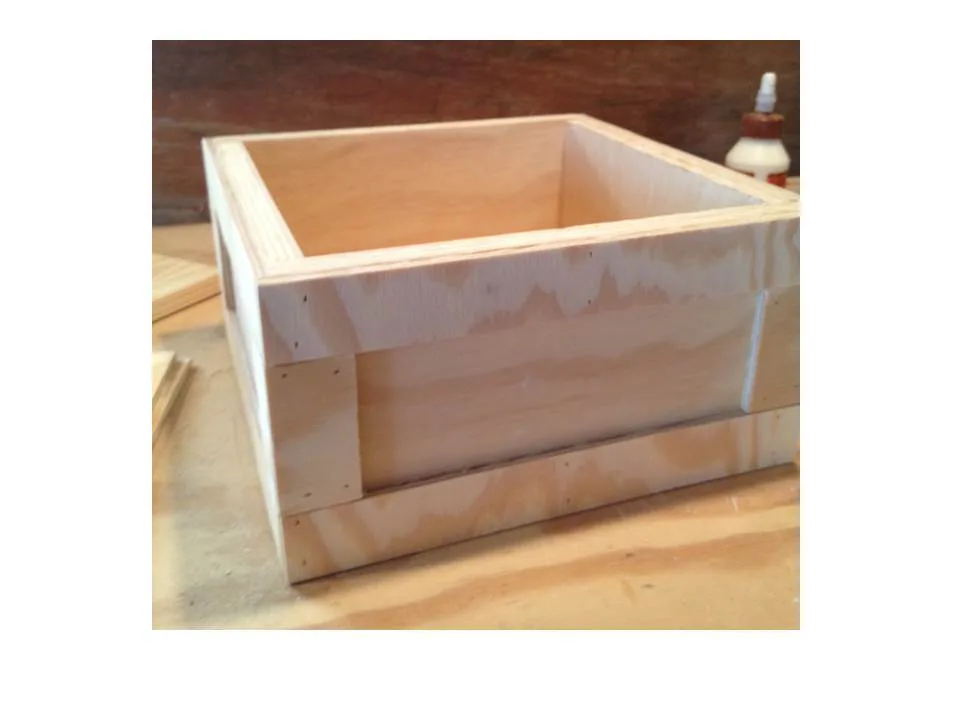
Attach upright trim to front and back of box, keeping outside edges flush. You should measure and cut these to fit. Use glue and 5/8” brad nails.
Step 7
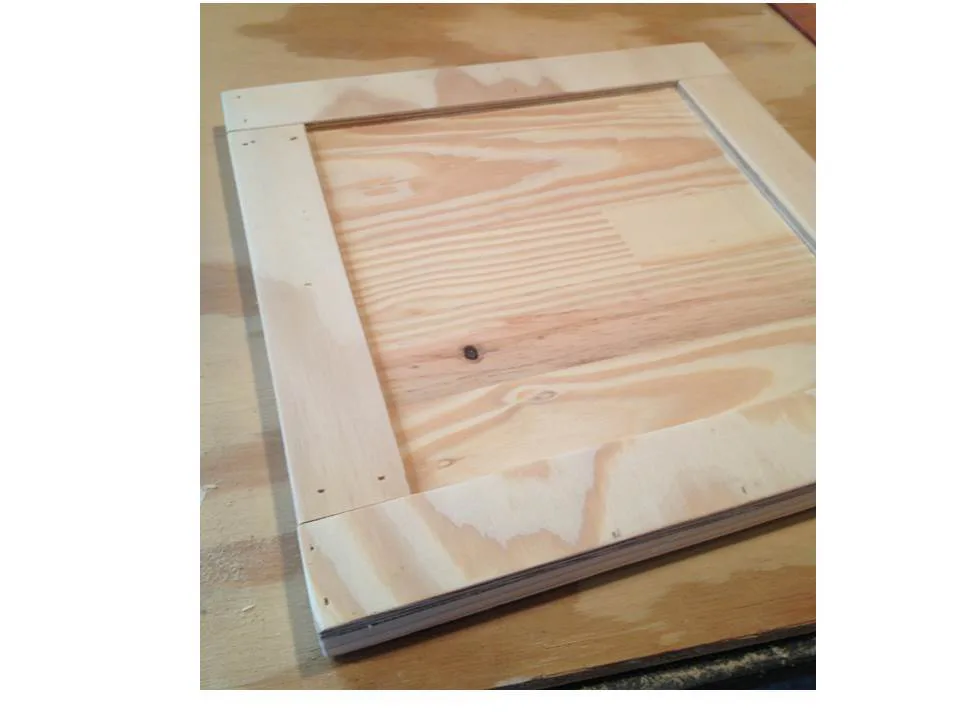
Attach front and back trim to box top, keeping outside edges flush. Use glue and 5/8” brad nails.

Step 8
Attach side trim to box top, keeping outside edges flush. Use glue and 5/8” brad nails.
Step 9
Sand piece to smooth cut edges and any rough spots. Finish as desired. You could leave unfinished if using as a “man crate”. If desired, you could stencil “Man Crate” or a fun caption on the side after sanding.

Step 10
To use this as a “Man crate”, after filling the box, attach the top using wire nails and a hammer. No glue is required here. These would work:

Step 11
Use a crowbar to open the top of the box. You can also use it to remove the nails. This would work:

Finishing
Sand all surfaces, starting with a medium grit and finishing with fine. Wipe off the dust, fill any holes or gaps with wood filler, and sand smooth once dry. Apply primer if you're painting, then finish with your choice of paint or stain and seal with a durable clear topcoat. For outdoor projects, use exterior-rated primer, paint or stain, and sealer so the piece stands up to the weather.