Over the Toilet Storage
Easy to make over the toilet storage leaning shelf - add storage for towels and tolietries without drilling holes in the wall! You'll love our step by step plans with diagrams.

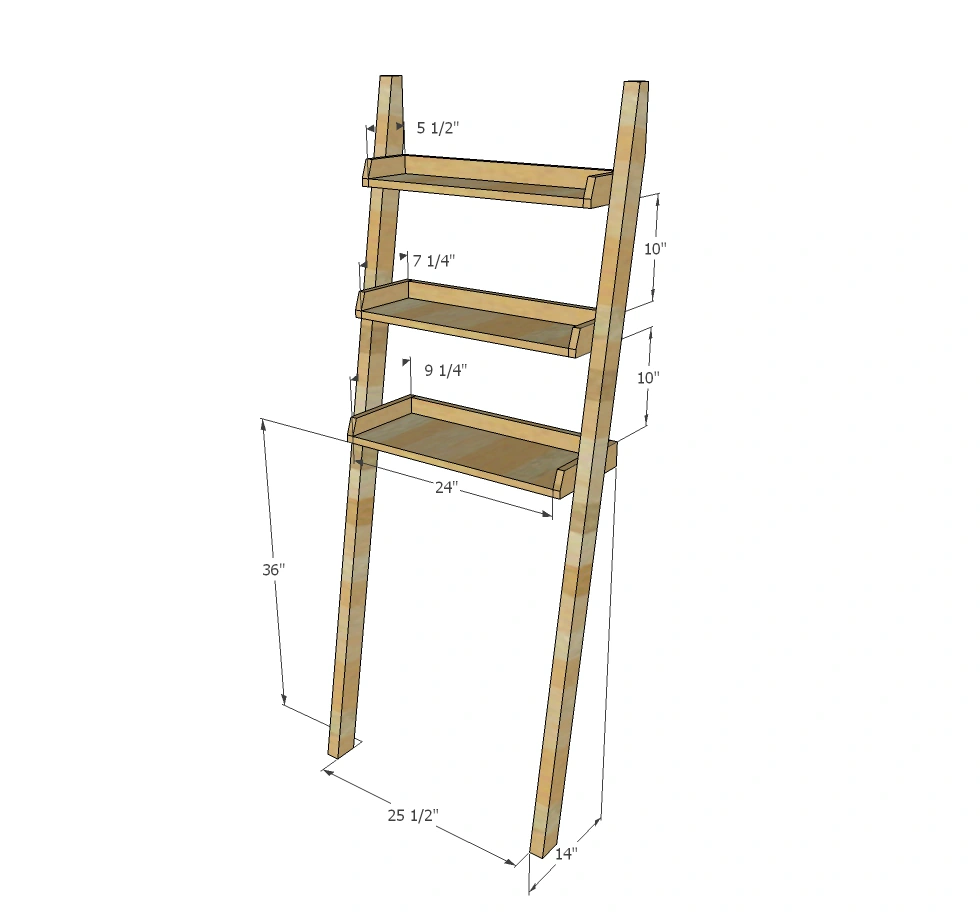
Dimensions
Use the size-specific shopping and cut lists below.
What you need
- 2 – 2x3 @ 8 feet or stud length (can also use 1x3 or 2x4 if 2x3s cannot be sourced)
- 1 – 1x10 @ 24”
- 1 – 1x8 @ 24”
- 1 – 1x6 @ 24”
- 2 – 1x3 @ 6 feet
- 1-1/4” brad nails
- 1-1/4” wood screws
- 2 – 2x3 @ 72” (can also use 1x3 or 2x4 if 2x3s cannot be sourced) – both ends cut at 10 degrees off square, long point to short point, ends are parallel
- 1 – 1x10 @ 24”
- 1 – 1x8 @ 24”
- 1 – 1x6 @ 24”
- 3 – 1x3 @ 24”
- 2 – 1x3 @ 10”
- 2 – 1x3 @ 8”
- 2 – 1x3 @ 6-1/4”
- measuring tape
- square
- pencil
- safety glasses
- hearing protection
- drill
- jigsaw
- compound miter saw
- nailer
- sander
Step by step
01
Step 1
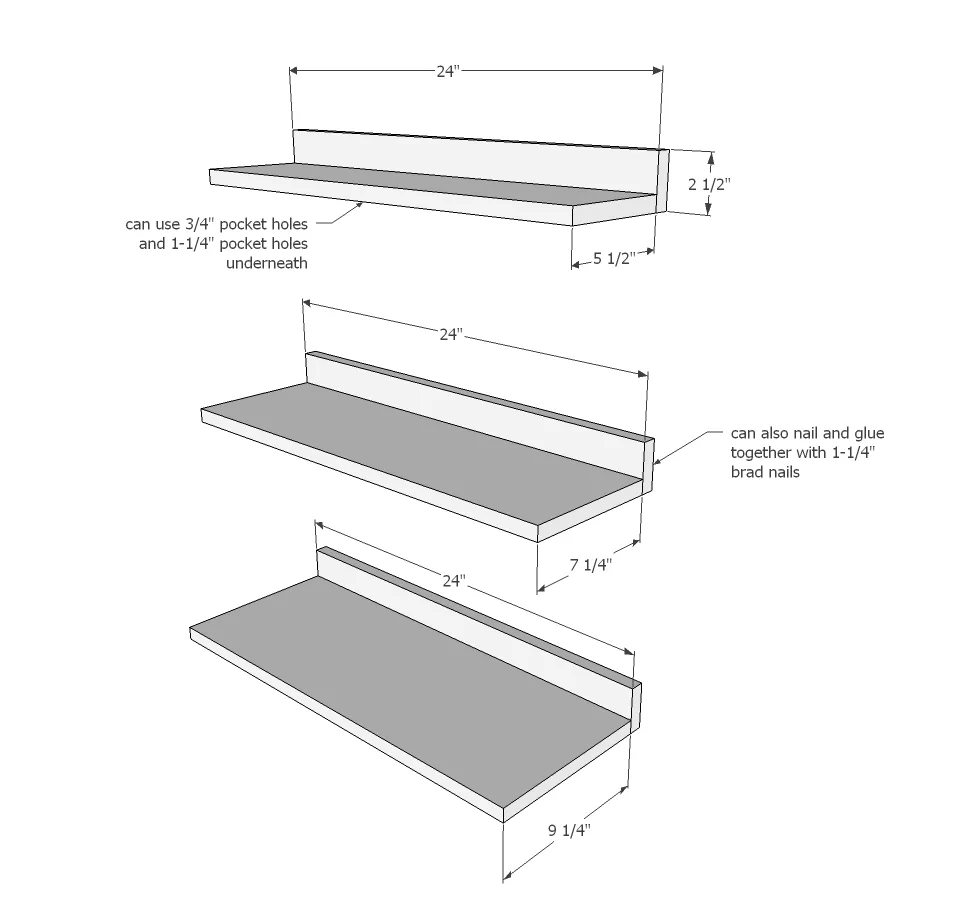
Attach backs to shelves
02
Step 2
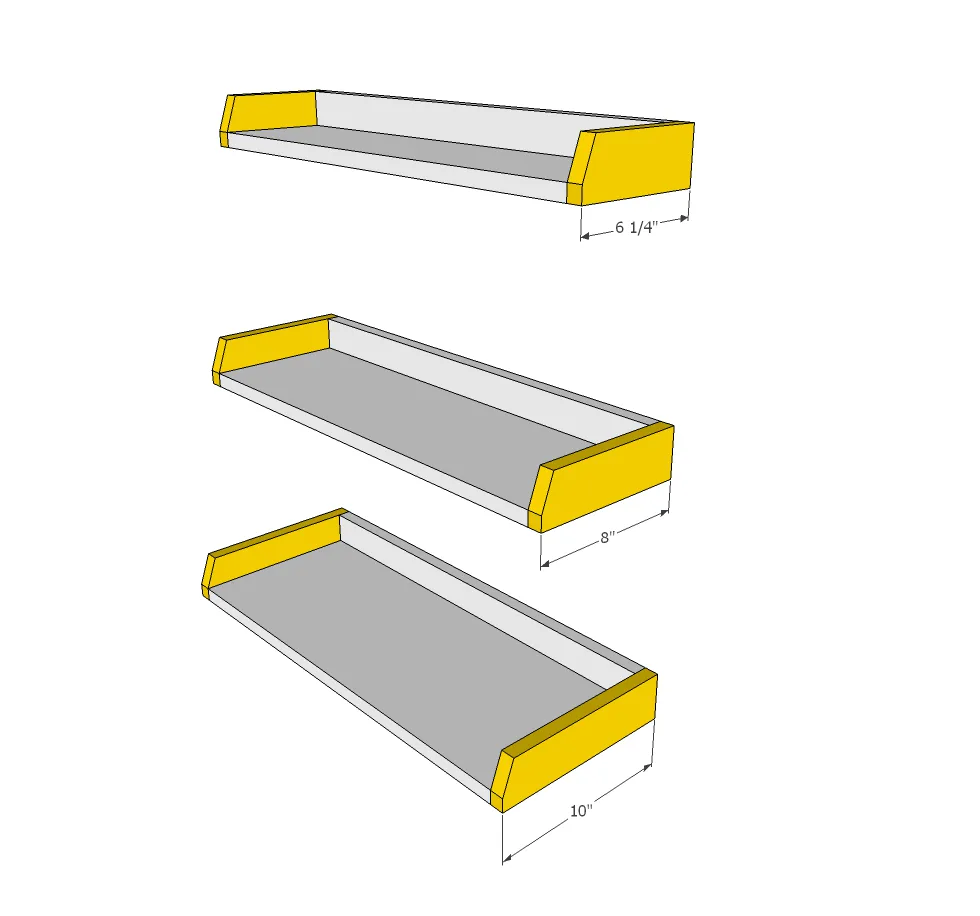
Measure and cut sides. Attach to shelf and back.
03
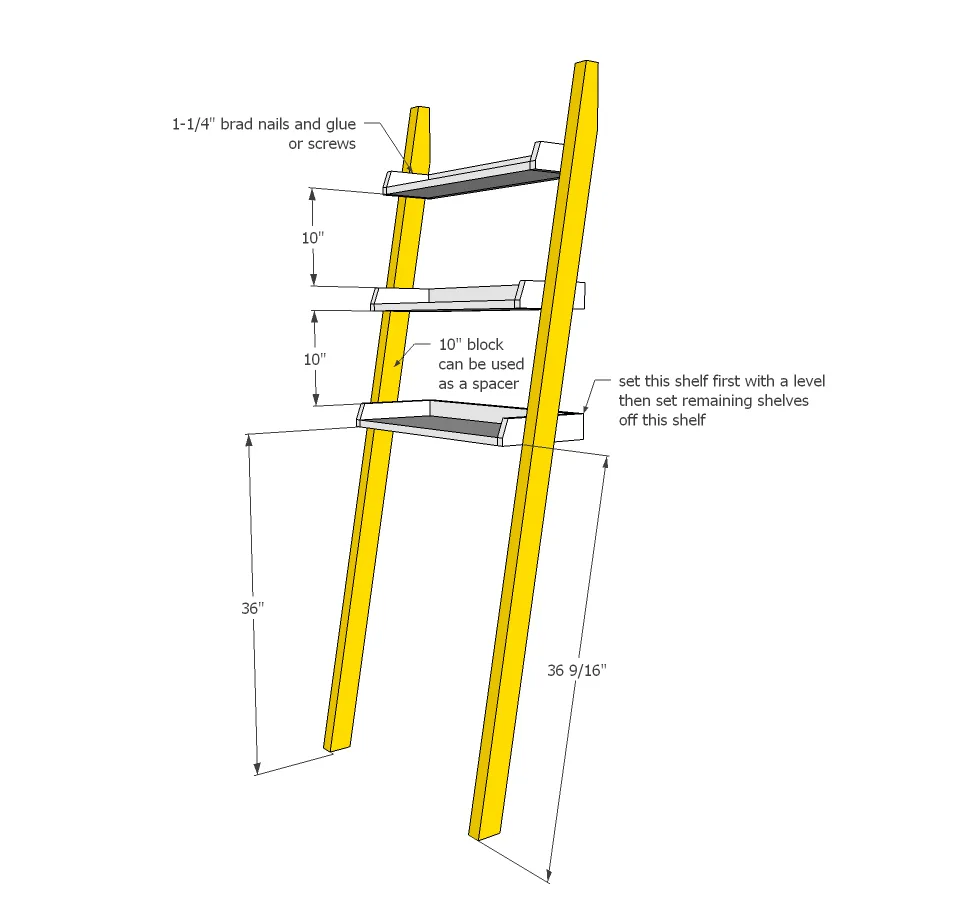
Place bottom shelf with a level and attach.
Add upper shelves.
04
Finishing
Sand all surfaces, starting with a medium grit and finishing with fine. Wipe off the dust, fill any holes or gaps with wood filler, and sand smooth once dry. Apply primer if you're painting, then finish with your choice of paint or stain and seal with a durable clear topcoat. For outdoor projects, use exterior-rated primer, paint or stain, and sealer so the piece stands up to the weather.