Mitered Corner 1x2 Frames
Build a frame for photos, posters, art and more with this easy DIY project! The mitered corners make this one look professional and beautiful. with lots of reader submitted photos. See Also: Build Simple Gallery Frames (No Miters).

What you need
- 1x2 boards, length is twice the permitter of the desired frame size
- 1-1/4" brad nails
- wood paint or stain as desired
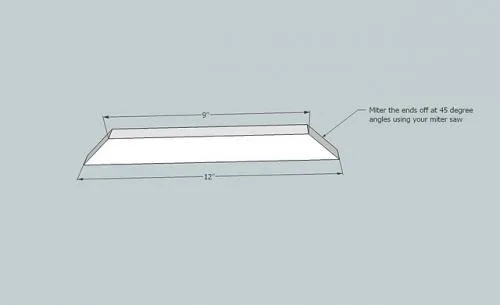
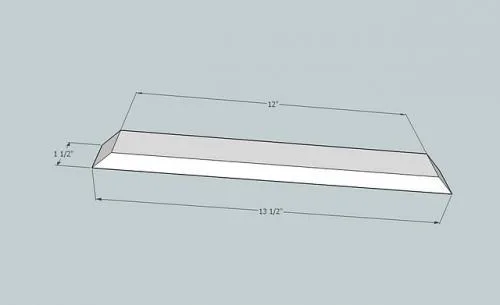
- 4 – 1x2s @ 12" - long point measurement, both ends cut at a 45 degree miter, ends not parallel
- 4 – 1x2s @ 13 1/2″, long point measurement, both ends cut at a 45 degree bevel, ends not parallel
Example cut list for a frame made as shown, outside measurement of frame is 13-1/2" x 13-1/2"
- measuring tape
- square
- safety glasses
- hearing protection
- circular saw
- compound miter saw
- nailer
- sander
Step by step
Step 1
Start by cutting the inner pieces at 12″ with ends mitered, as shown above, at a 45 degree angle.
Step 2
Then do your 13 1/2″ pieces, that will be on the outside of the frame, with a 45 degree bevel cut.
Step 3
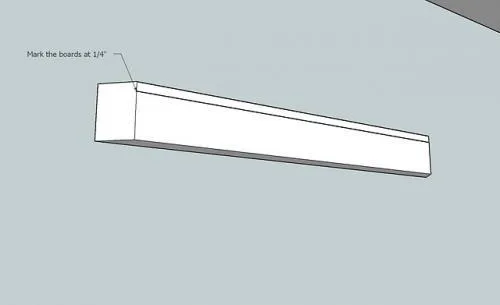
Mark your 13 1/2″ pieces as shown above.
Step 4
Back to the 12″ pieces. Nail through the corners into the perpendicular board, as shown above. Do this on all corners to make the inside frame.

Step 5
Step 6
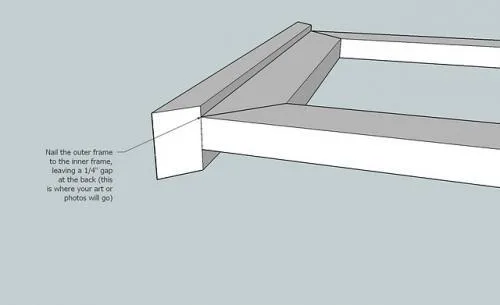
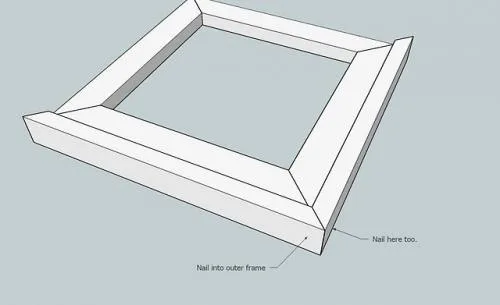
Nail the corners like we did in step 4. Also, make sure you nail the outer frame to the inner frame.
Step 7
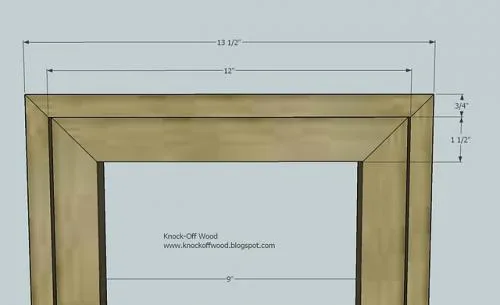
Here are some measurements to guide you.
Finishing
Sand all surfaces, starting with a medium grit and finishing with fine. Wipe off the dust, fill any holes or gaps with wood filler, and sand smooth once dry. Apply primer if you're painting, then finish with your choice of paint or stain and seal with a durable clear topcoat. For outdoor projects, use exterior-rated primer, paint or stain, and sealer so the piece stands up to the weather.