Kids Wood Play Toy Grill
Build this cute kids play toy wood grill! Free.

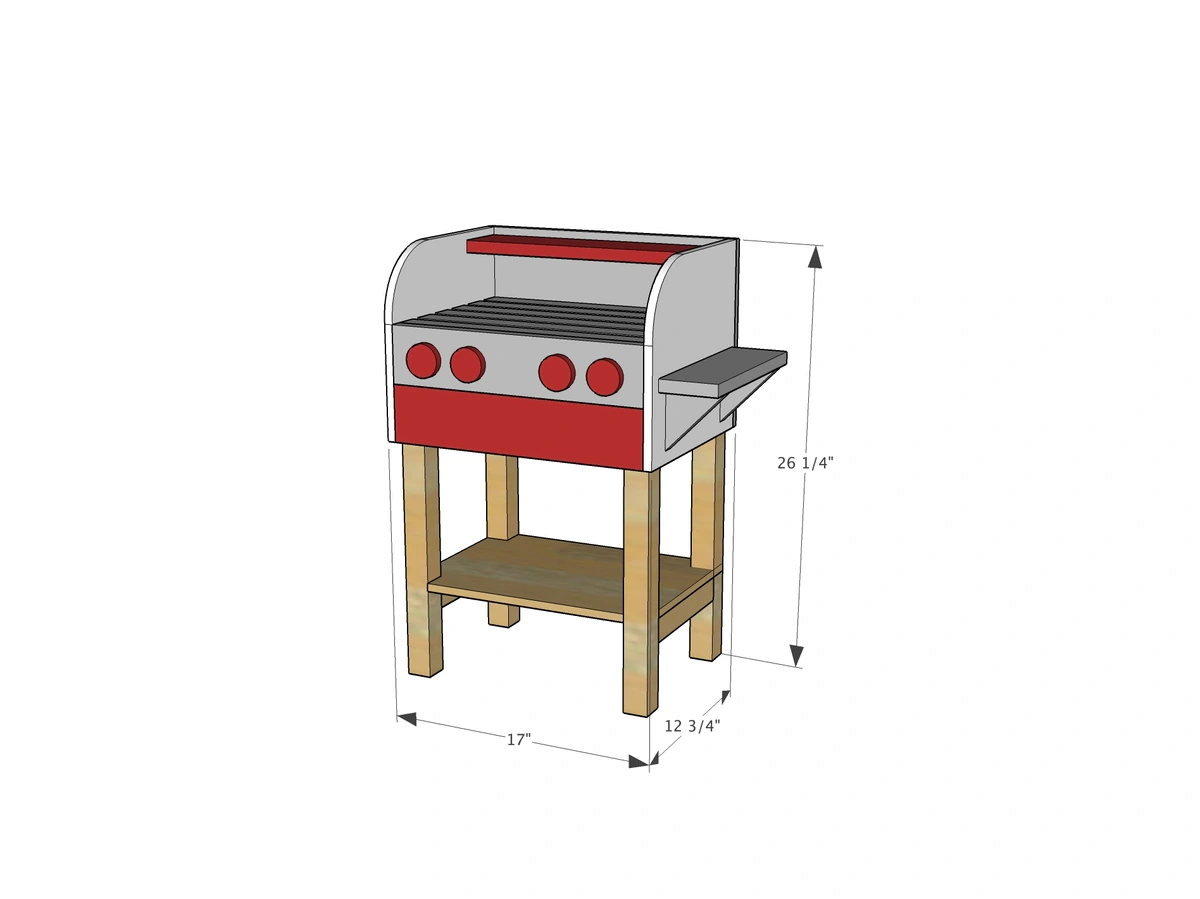
Dimensions
Use the size-specific shopping and cut lists below.
What you need
- 2 - 2x2 @ 8 feet long
- 1 - 1/2" plywood 24" x 48"
- 1 - 1x2 @ 8 feet long (may need a little more or can cut grill slats to 15-7/8")
- 1 - 1x4 @ 8 feet long
- Wood glue
Screws for attaching 2x2s, either 2-1/2" pocket hole screws or 2-3/4" self tapping wood screws (like SPAX)
Screws or brad nails (depending on type of attachment and tool set) 1-1/4" in length for all other attachment
- 4 - 2x2 @ 21" - legs
- 4 - 2x2 @ 8-1/2" - leg supports
- 1 - 1/2" plywood @ 16" x 11-1/2" - bottom shelf
- 6 - 1x2 @ 16" - grill slats
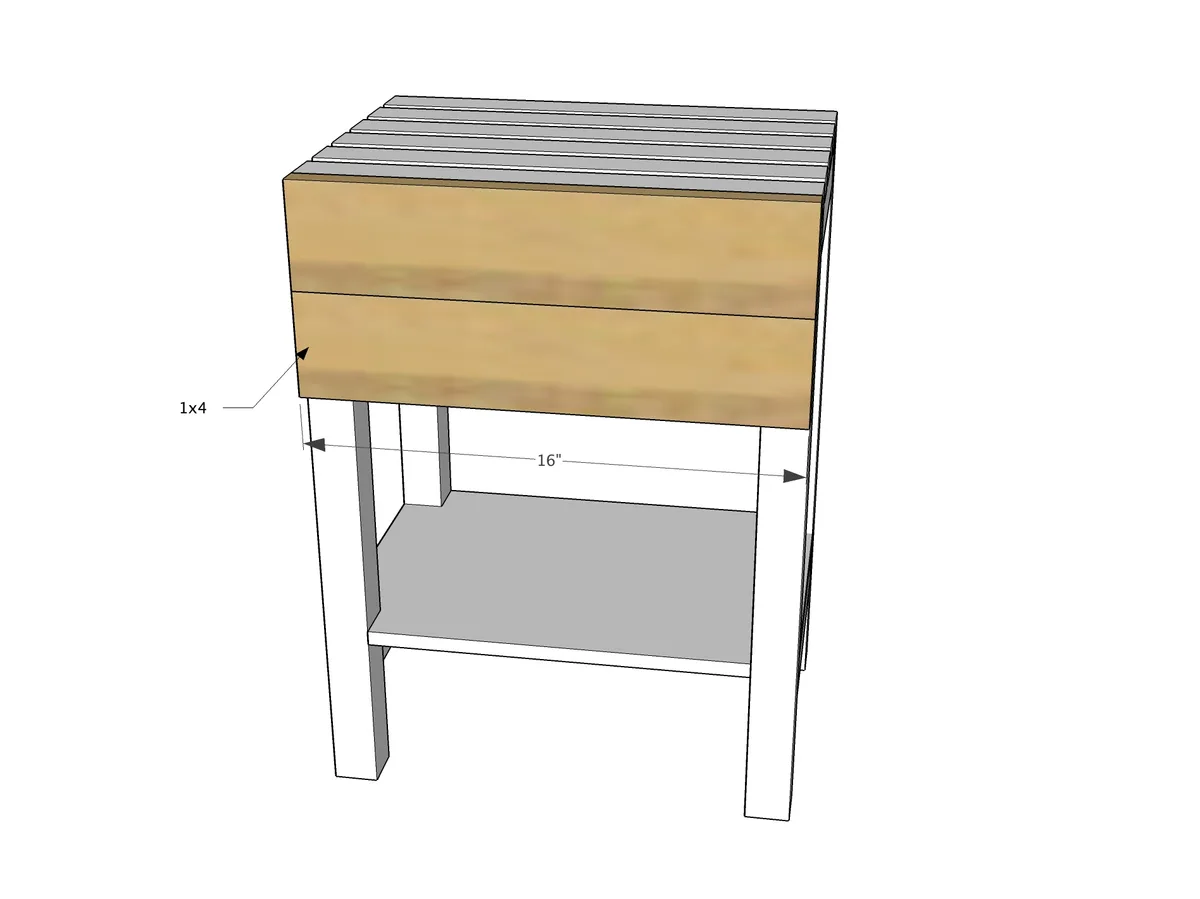
- 2 - 1x4 @ 16" - front of grill
- 2 - 1/2" plywood @ 12-1/4" x 11-1/2" - grill sides
- 1 - 1/2" plywood @ 17" x 11-1/2" - grill back
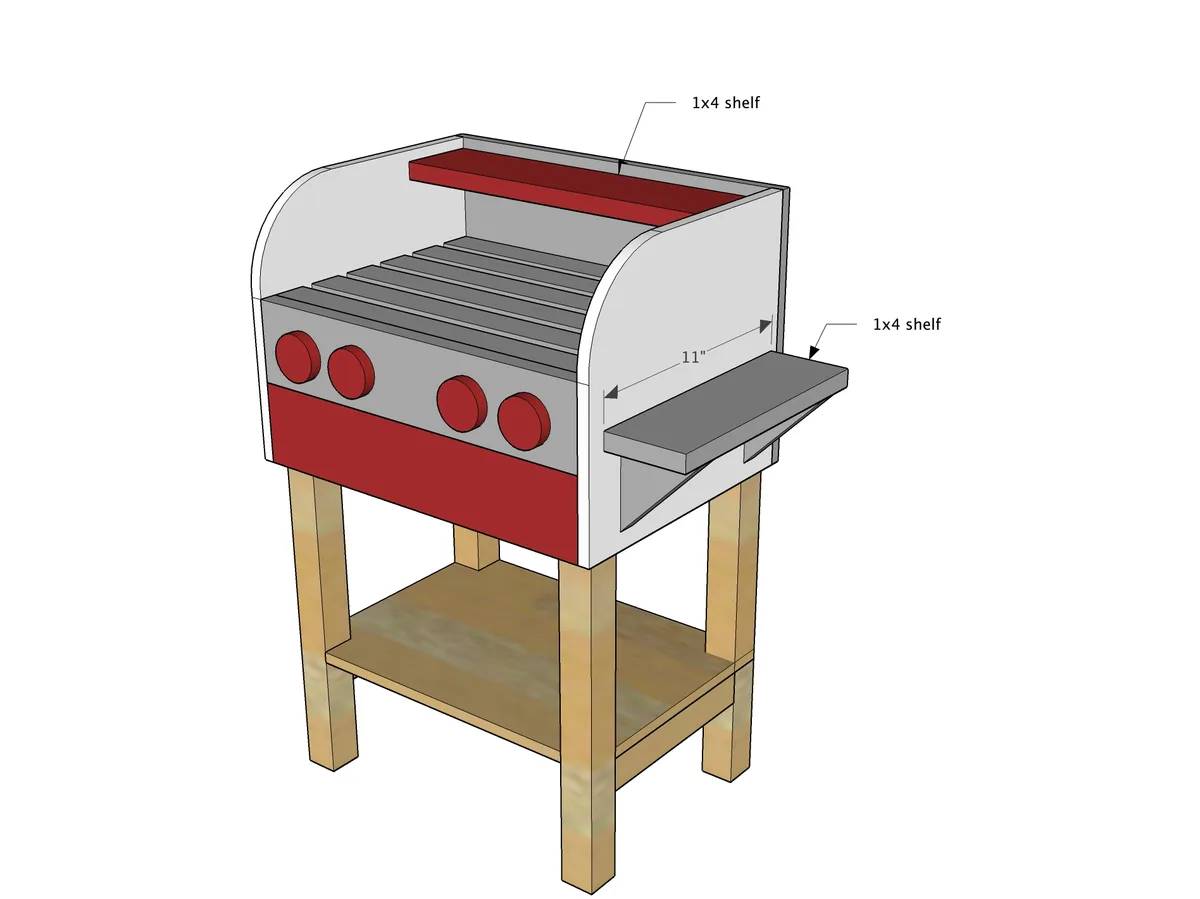
- 1 - 1x4 @ 16" - grill shelf
- 1 - 1x4 @ 11" - side shelf
- 2 - 1x4 @ 3-1/2" cut at 45 degrees - side shelf supports
- measuring tape
- square
- pencil
- safety glasses
- hearing protection
- drill
- jigsaw
- nailer
- sander
- countersink drill bit
Step by step
Step 1
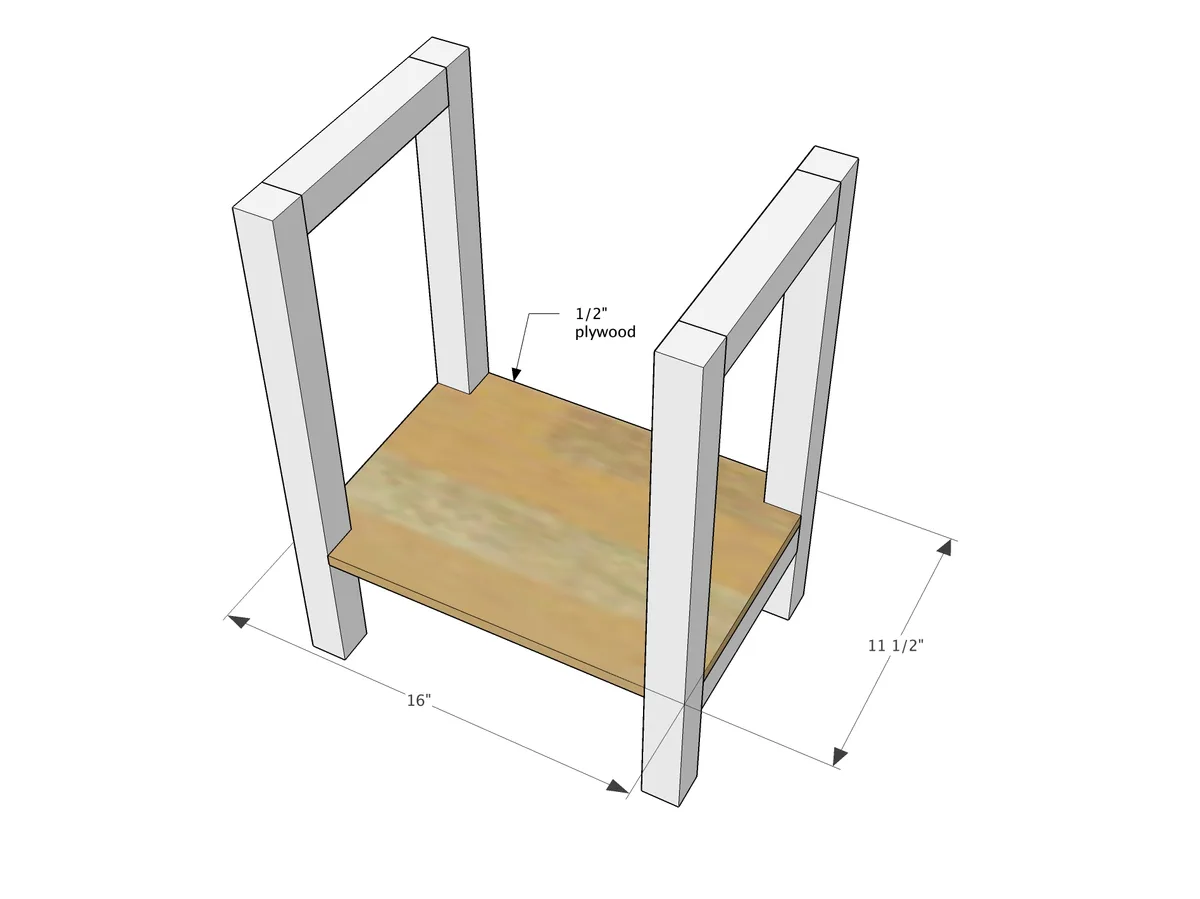
Build the 2x2 sides, use either pocket hole screws set for 1-1/2" stock and 2-1/2" pocket hole screws, or attach with 2-3/4" self tapping wood screws and glue.

Step 2
Cut bottom shelf and notch out for legs with jigsaw. Attach to 2x2 bottom pieces with either nails or self tapping wood screws (like SPAX), screws or nails should be at least 1" long.
Step 3
Attach top grill slats to the top with screws or nails at least 1-1/4" long and glue.

Step 4
Attach front grill aprons with screws or nails at least 1-1/4" long.
Step 5
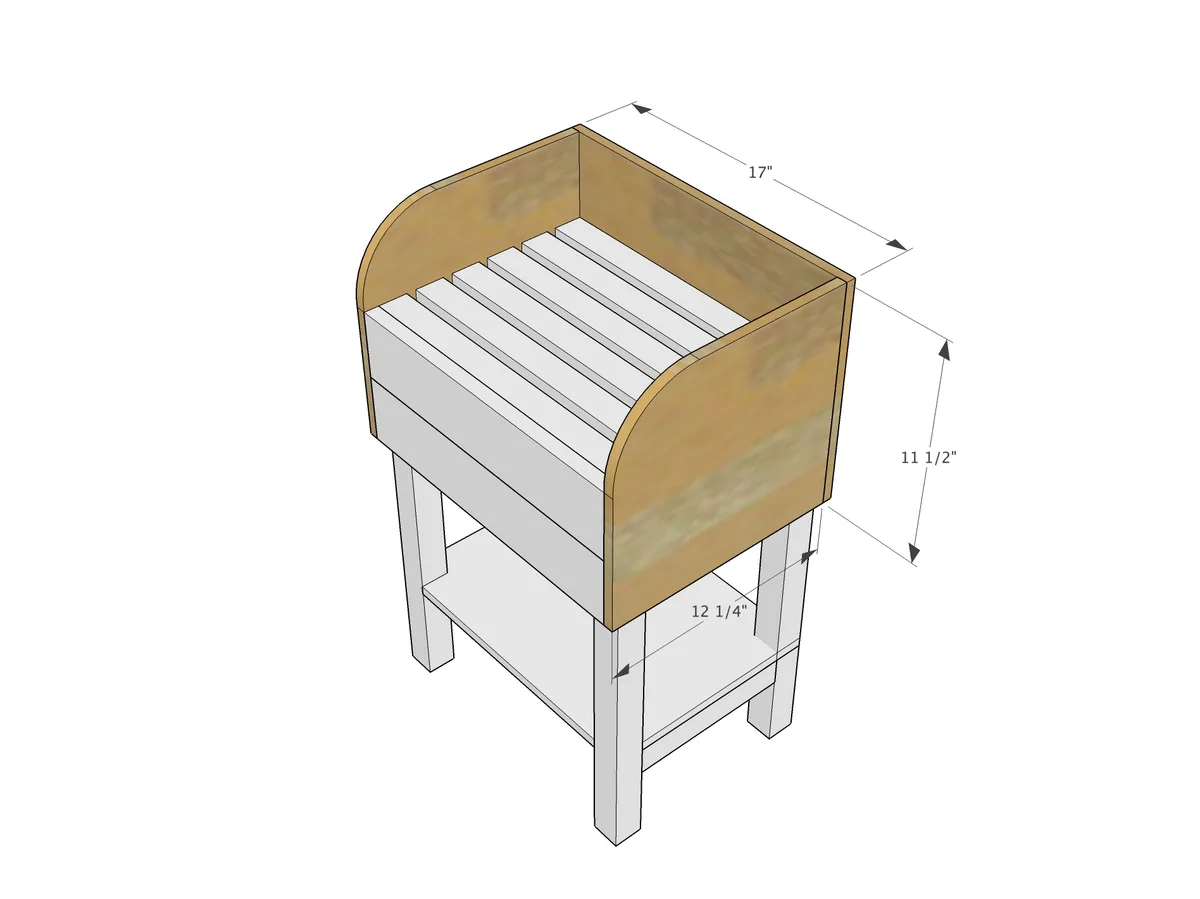
Step 6
Nail or screw accessories on and paint and finish.
Finishing
Sand all surfaces, starting with a medium grit and finishing with fine. Wipe off the dust, fill any holes or gaps with wood filler, and sand smooth once dry. Apply primer if you're painting, then finish with your choice of paint or stain and seal with a durable clear topcoat. For outdoor projects, use exterior-rated primer, paint or stain, and sealer so the piece stands up to the weather.