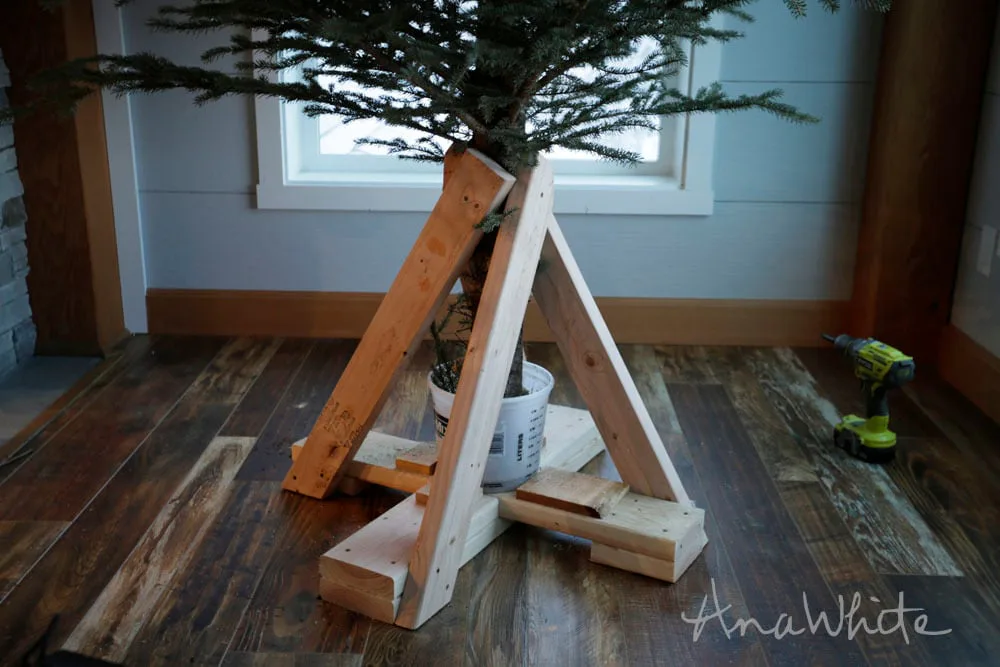
Heavy Duty Christmas Tree Stand
How to build a heavy duty christmas tree stand - diy tutorial.
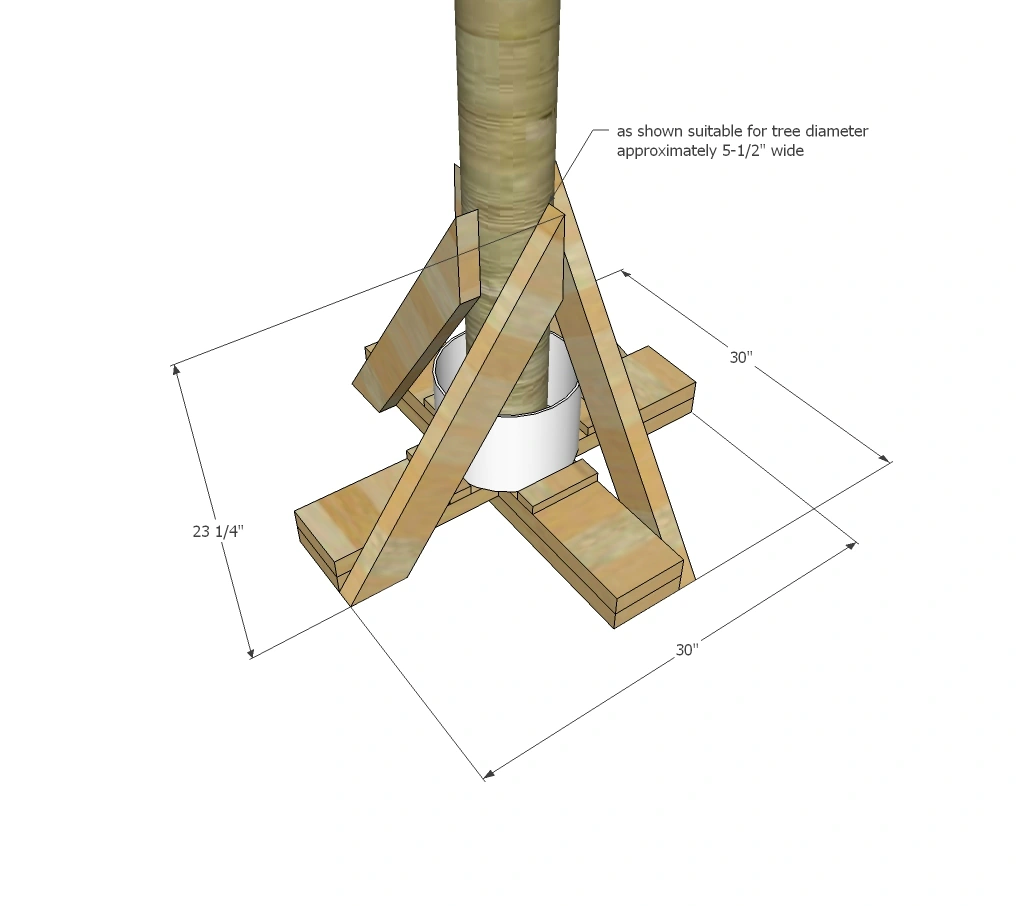
Dimensions
Use the size-specific shopping and cut lists below.
What you need
- 1 - 2x6 @ 8 feet long
- 1 - 2x4 @ 12 feet long (can cut in half for transport)
- 2-3/4" self tapping wood screws
- 1 - 1/4" brad nails
- bucket
- Saws-All or Jigsaw
- 2 - 2x6 @ 30"
- 2 - 2x6 @ 12"
- 2 - 2x6 @ 6"
- 4 - scrap wood pieces @ 5-1/2" long (1x2 or 1x3 work great)
- 4 - 2x4 @ 30" - approximate length - with one end cut at angle on bottom
- measuring tape
- square
- hammer
- safety glasses
- hearing protection
- drill
- compound miter saw
- nailer
Step by step
Step 1
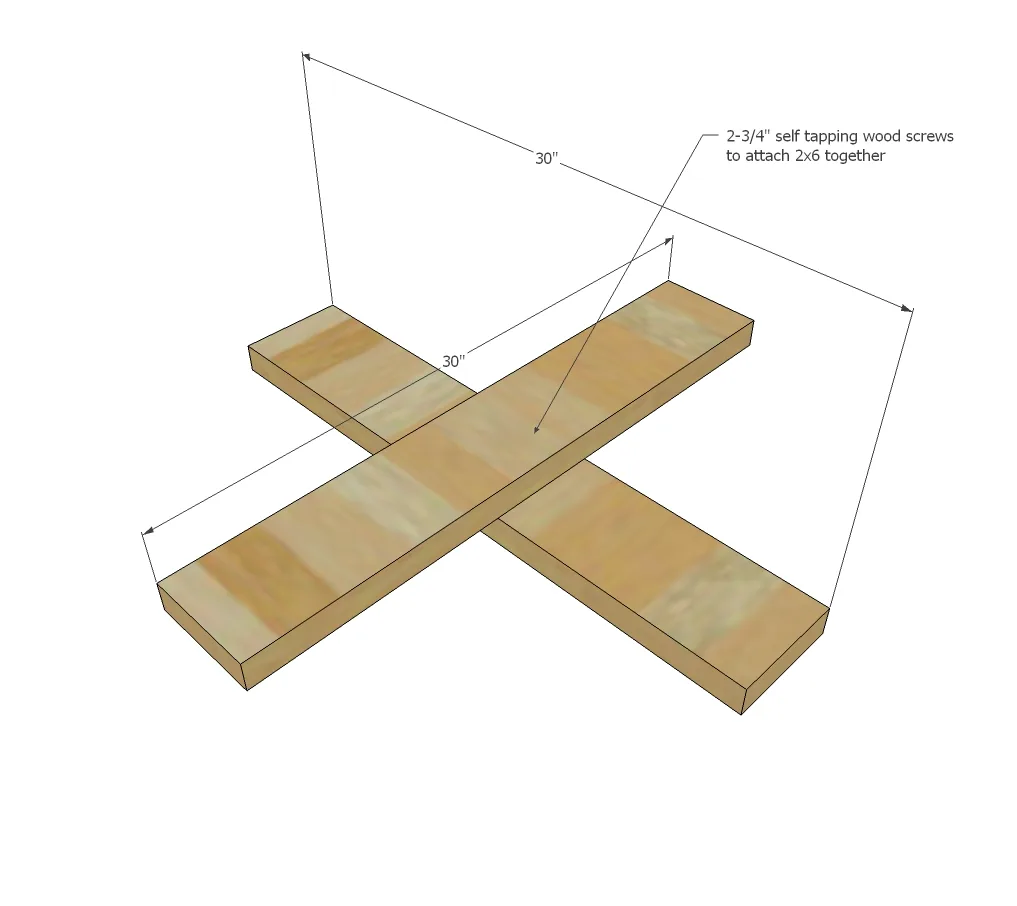
Attach 2- 2x6 boards together at center in large X. Make sure each 2x6 overhangs the same amount from the center. Use a speed square to make sure boards cross at a 90 degree angle.
Step 2
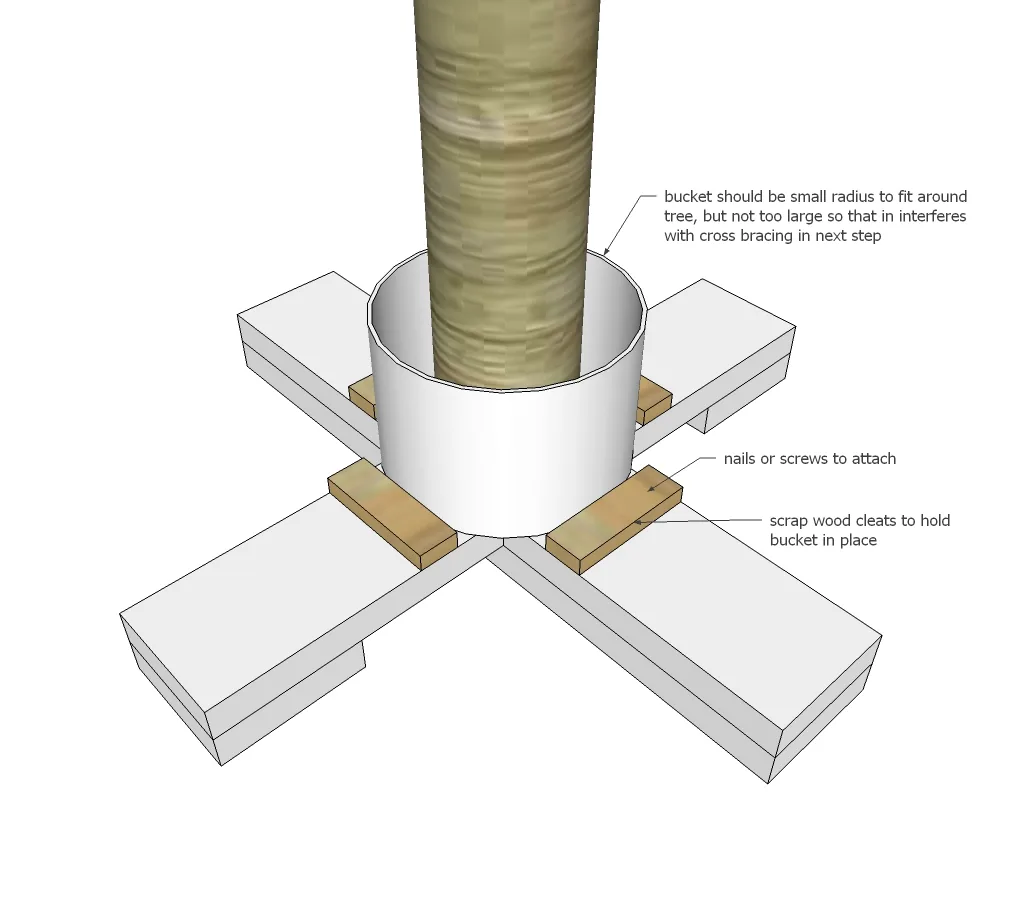
Fill in under the upper 2x6 on ends. Fill in the lower 2x6 on top - this helps support the bucket and gives you more to attach cross bracing to.

Step 3
Set bucket in center and attach scrap wood pieces around to secure bucket in center. Place tree in bucket.
Step 4
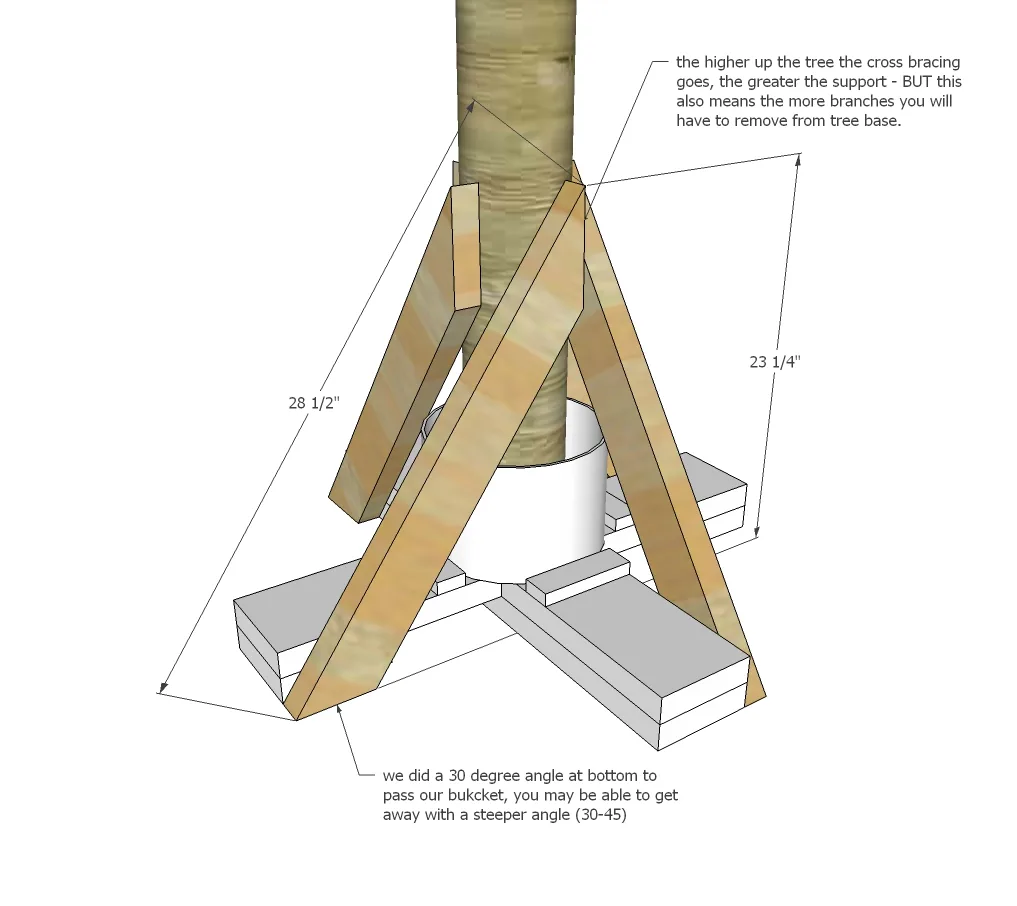
Cut cross bracing to fit tree from 2x4s and screw to base and tree trunk. We ended up using a saws-all to trim the tops of the 2x4s ends to fit around the tree.
Finishing
Sand all surfaces, starting with a medium grit and finishing with fine. Wipe off the dust, fill any holes or gaps with wood filler, and sand smooth once dry. Apply primer if you're painting, then finish with your choice of paint or stain and seal with a durable clear topcoat. For outdoor projects, use exterior-rated primer, paint or stain, and sealer so the piece stands up to the weather.