8-Foot Garage Shelving
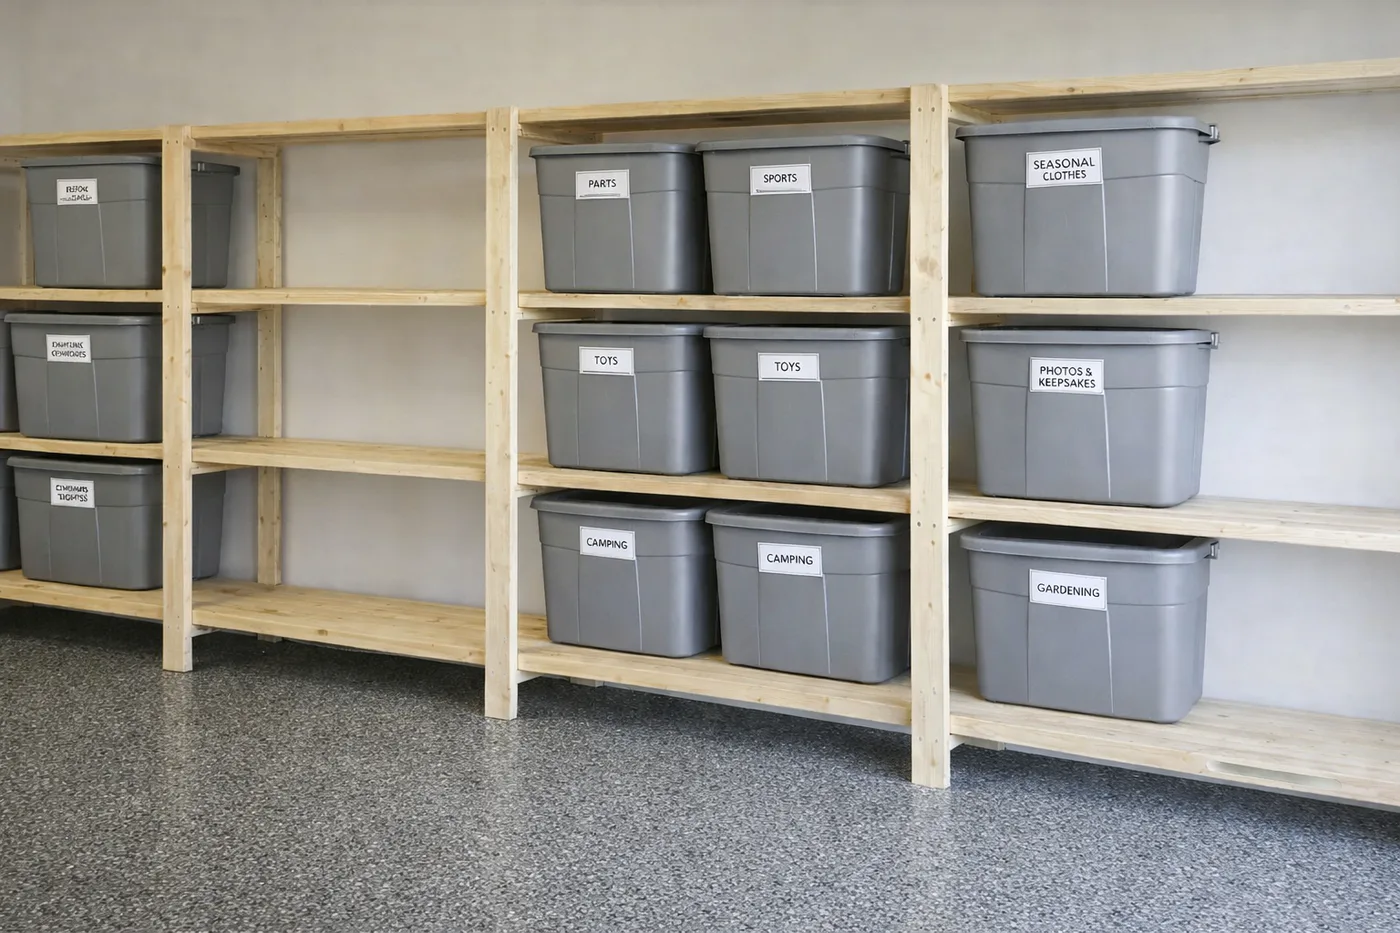
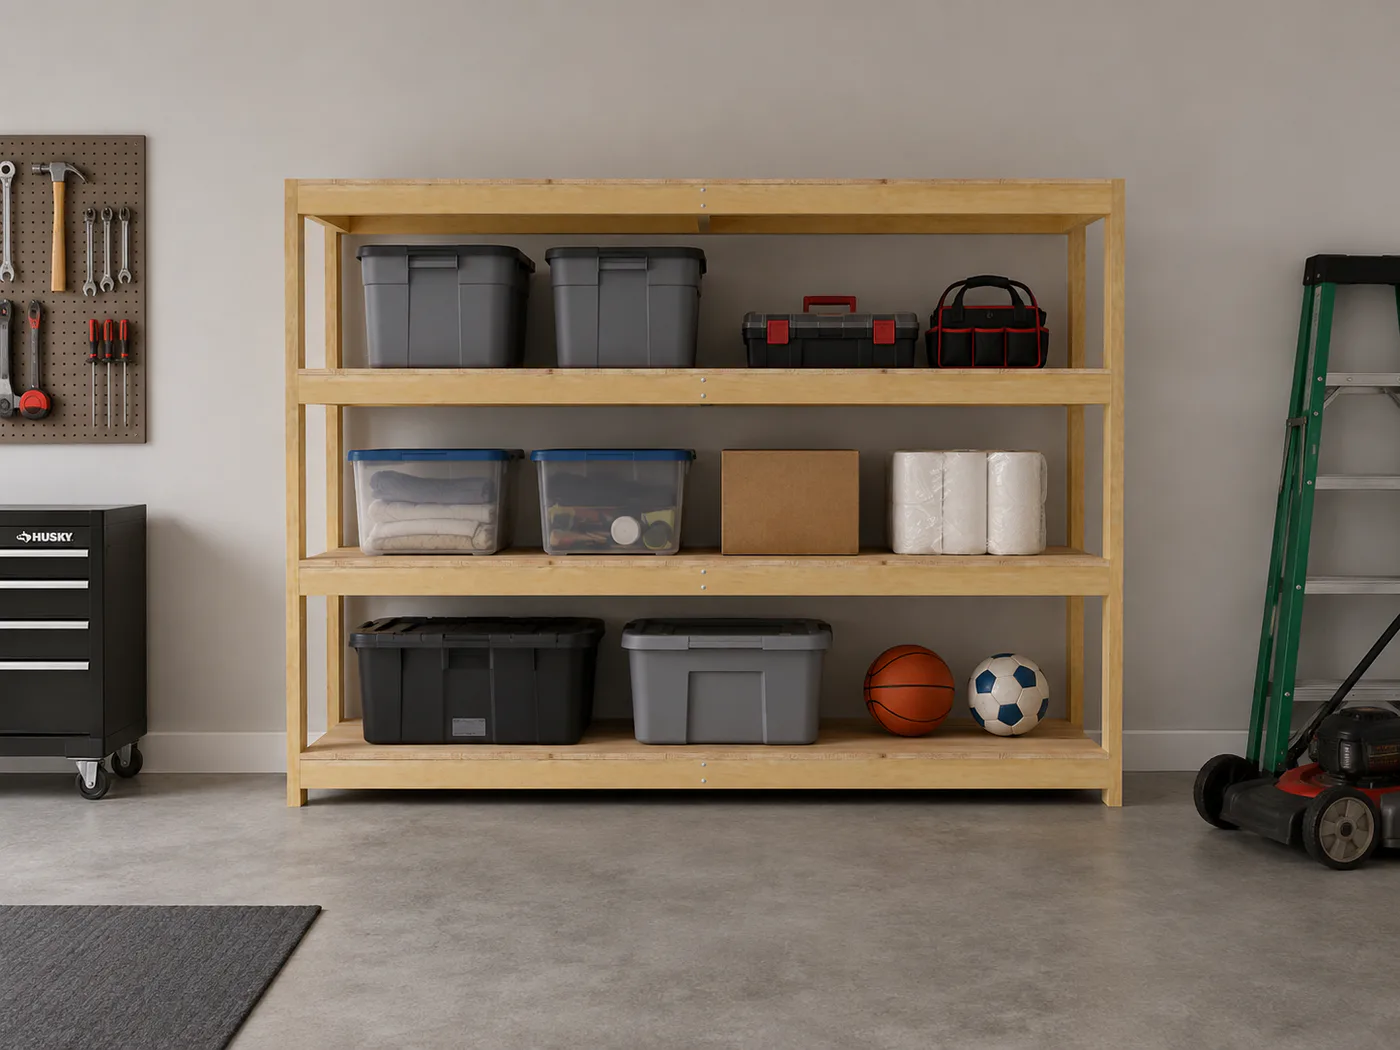
A free, print and go, complete solution to building a standard sized wood shelving unit. Looking to maximize storage in your garage, basement, or workshop? This free 8-foot garage shelving plan is the perfect solution! Designed for easy construction with minimal waste, this shelving unit is strong, spacious, and budget-friendly. Whether you're organizing tools, bins, or bulky items, this shelving system provides heavy-duty support without the need for custom designs.
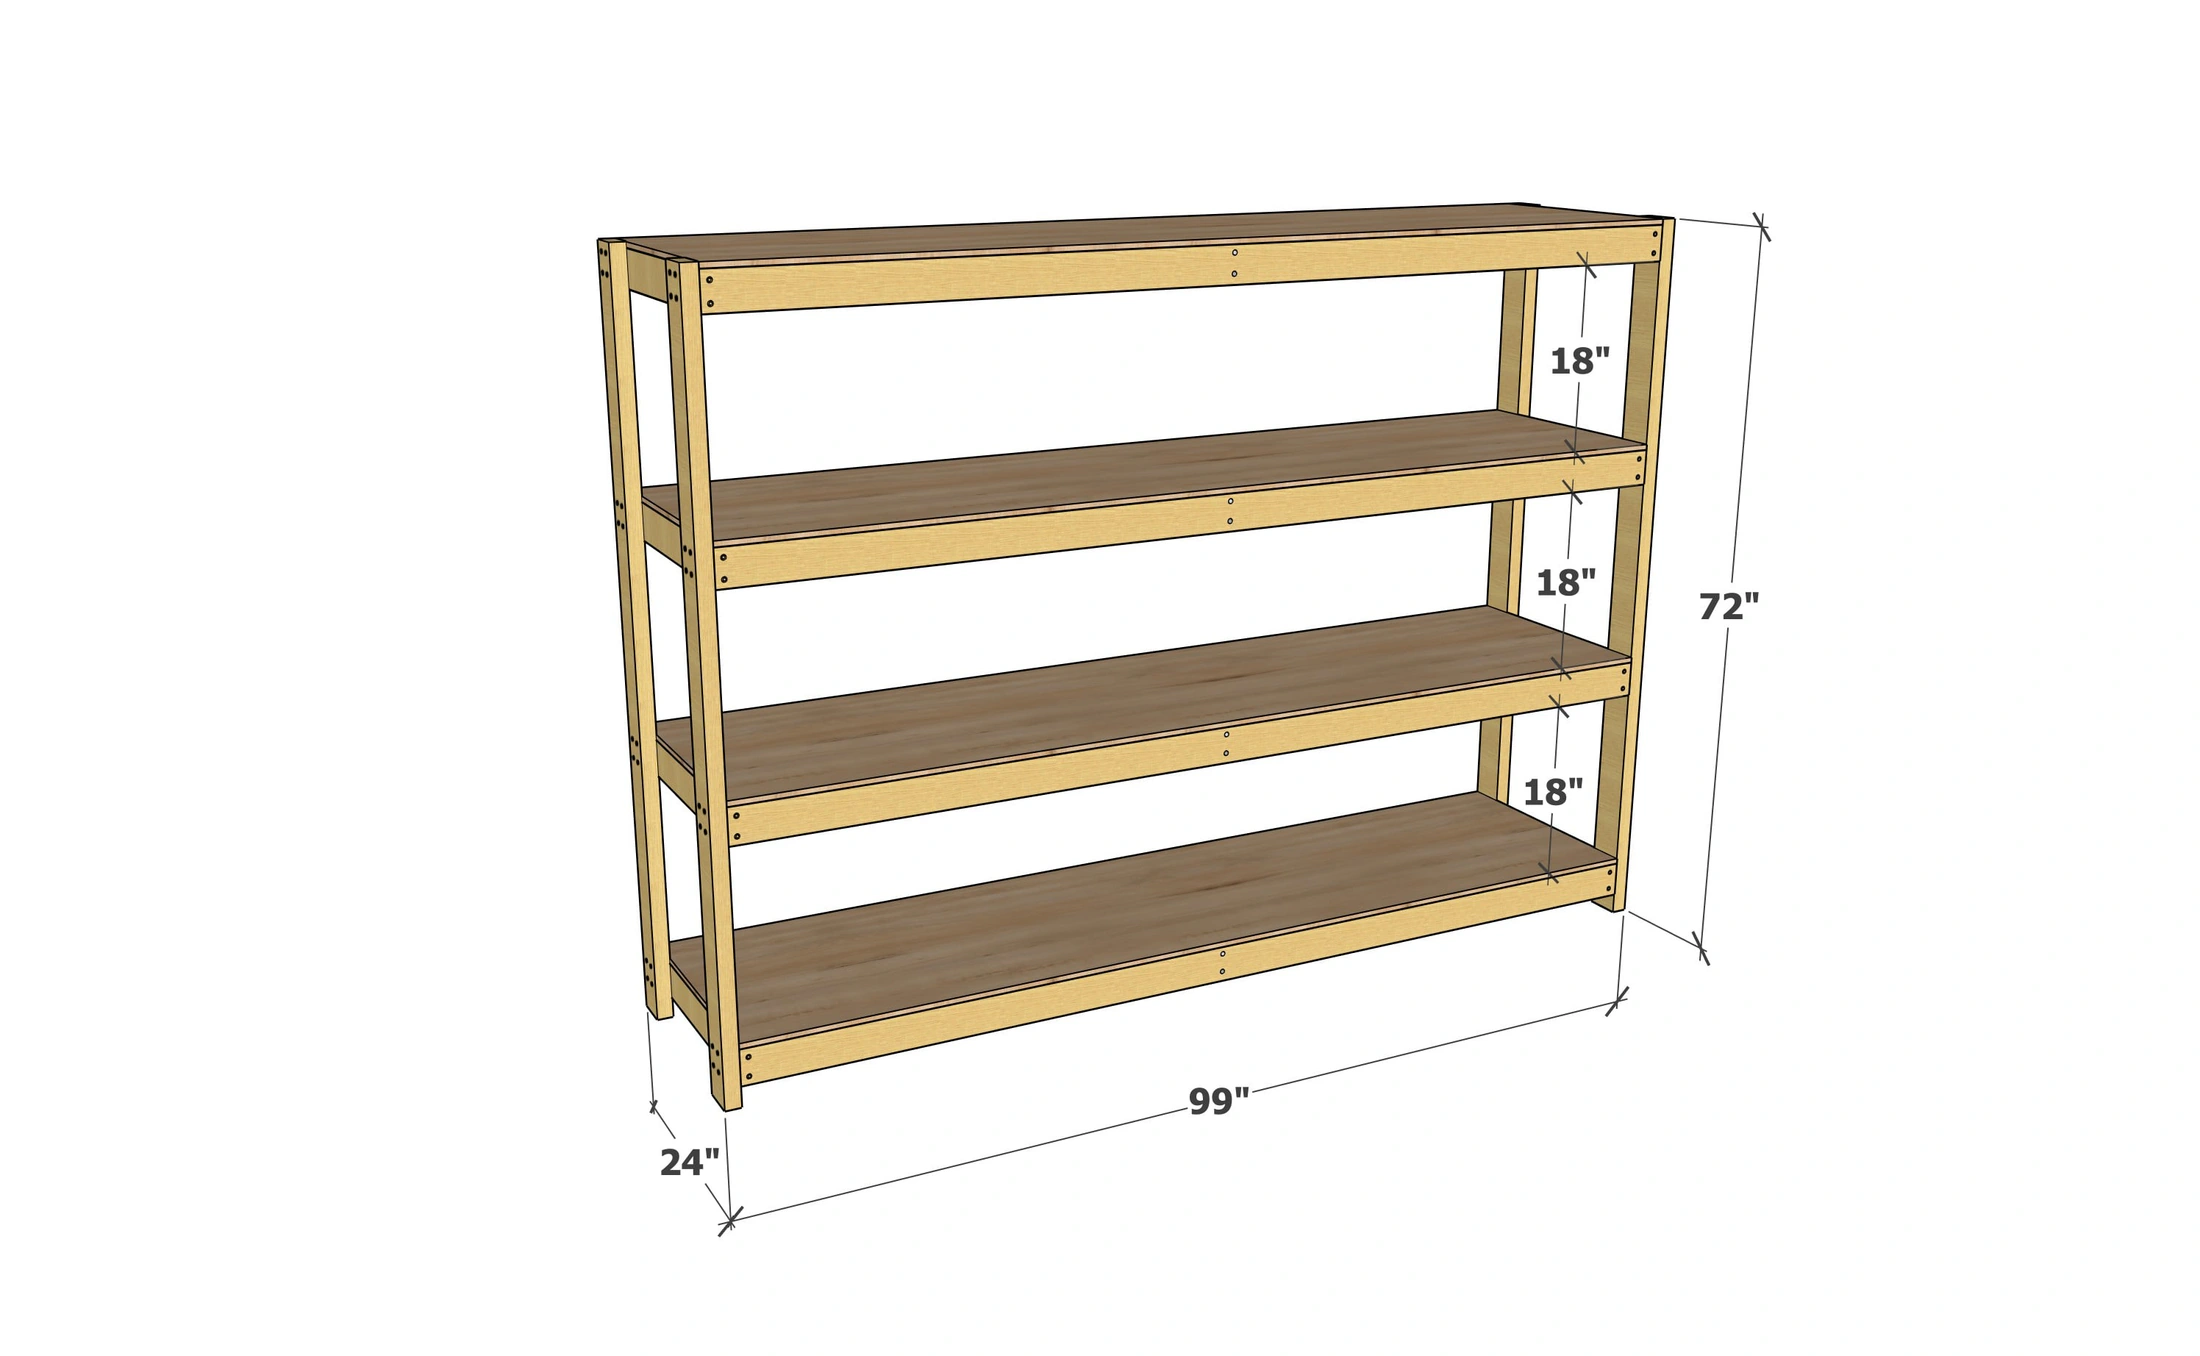
Dimensions
Use the size-specific shopping and cut lists below.
What you need
- 8 - 8 foot long 2x4s, do not cut
- 2 - 12 foot long 2x4s, cut in half exactly
- 3 - 8 foot or stud length 2x4s, use these boards to cut the 21" long pieces
- 2 - 1/2" sheets of plywood, cut in half lengthwise
- 100 - 3" self tapping star bit screws
- 40 - 1-3/4" self tapping star bit screws
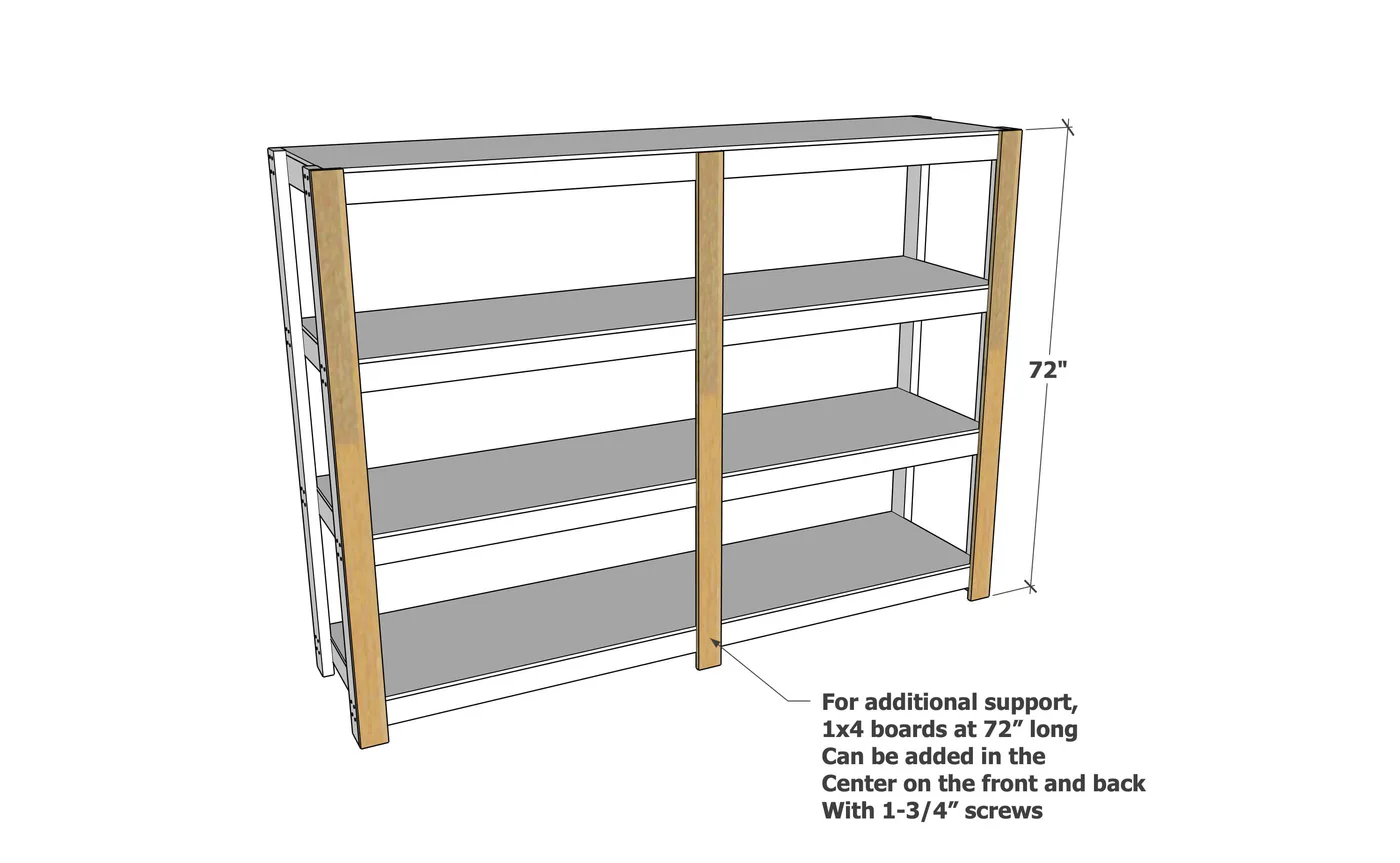
Extra support - 2-6 1x4 boards, 72" long and additional 1-3/4" screws
TIP: For lighter weight, easier to build shelving, use the light toned pine or spruce 2x4s. For heavier duty shelving with better moisture control, look for red toned 2x4 boards
- 4 - 2x4 @ 72" - legs (cut the 12' 2x4 boards in half to make these)
- 8 - 2x4 @ 96" - long supports (use the 8' 2x4 boards for these, check the ends for square and cut to length)
- 12 - 2x4 @ 21" - supports (cut from the three remaining 2x4s)
- 4 - 1/2" plywood @ 24" wide x 96" long (rip the plywood sheets in half with a circular saw)
- measuring tape
- square
- pencil
- safety glasses
- drill
- circular saw
Step by step
Step 1
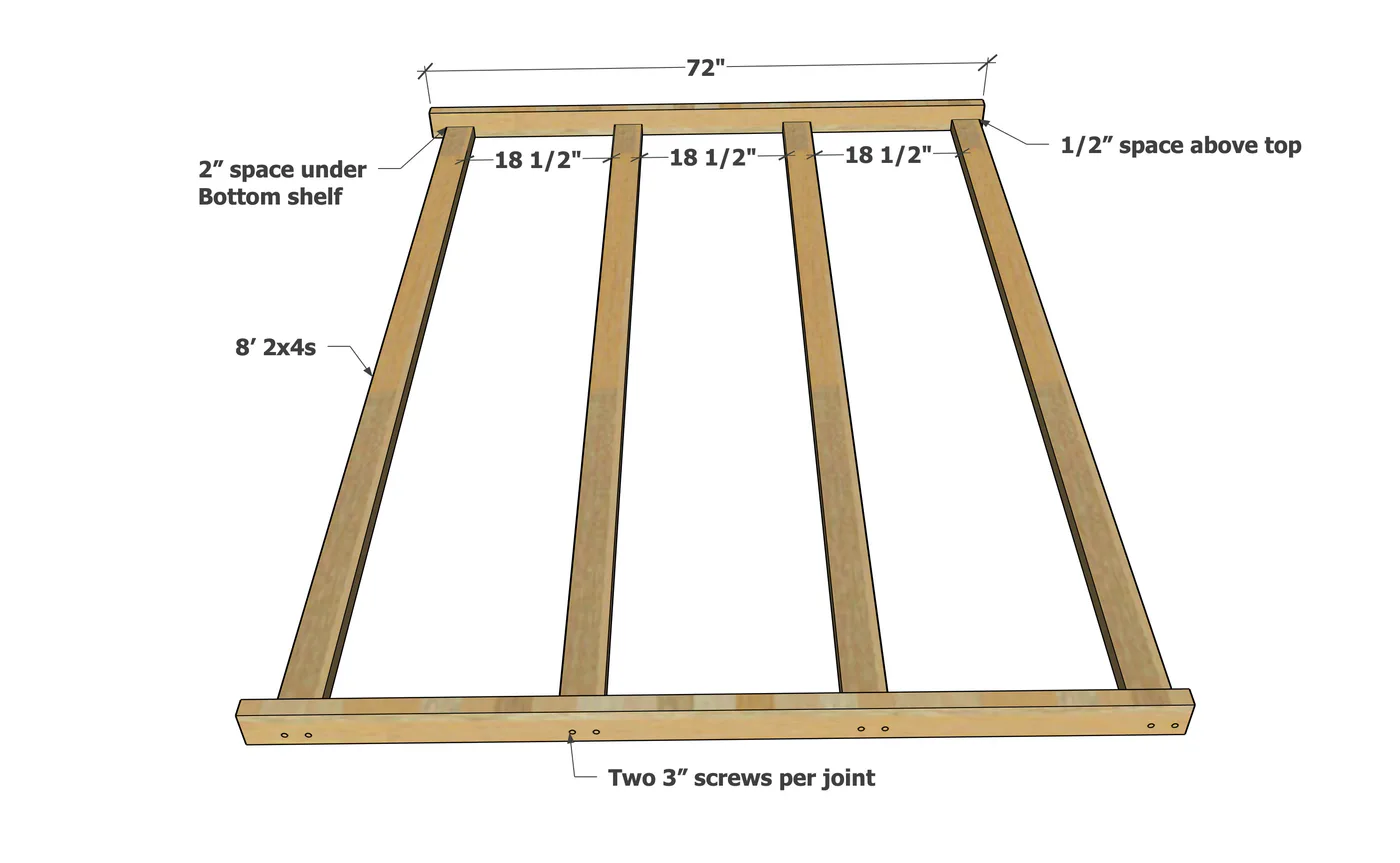
Find a flat, level surface to build the shelving. Mark the location of the joints, remembering the 2x4s are 3-1/2" wide. Lay out the legs and the long supports. Attach with 3" screws, so the frame pieces are all flush on the bottom. Repeat to build two identical.
Step 2
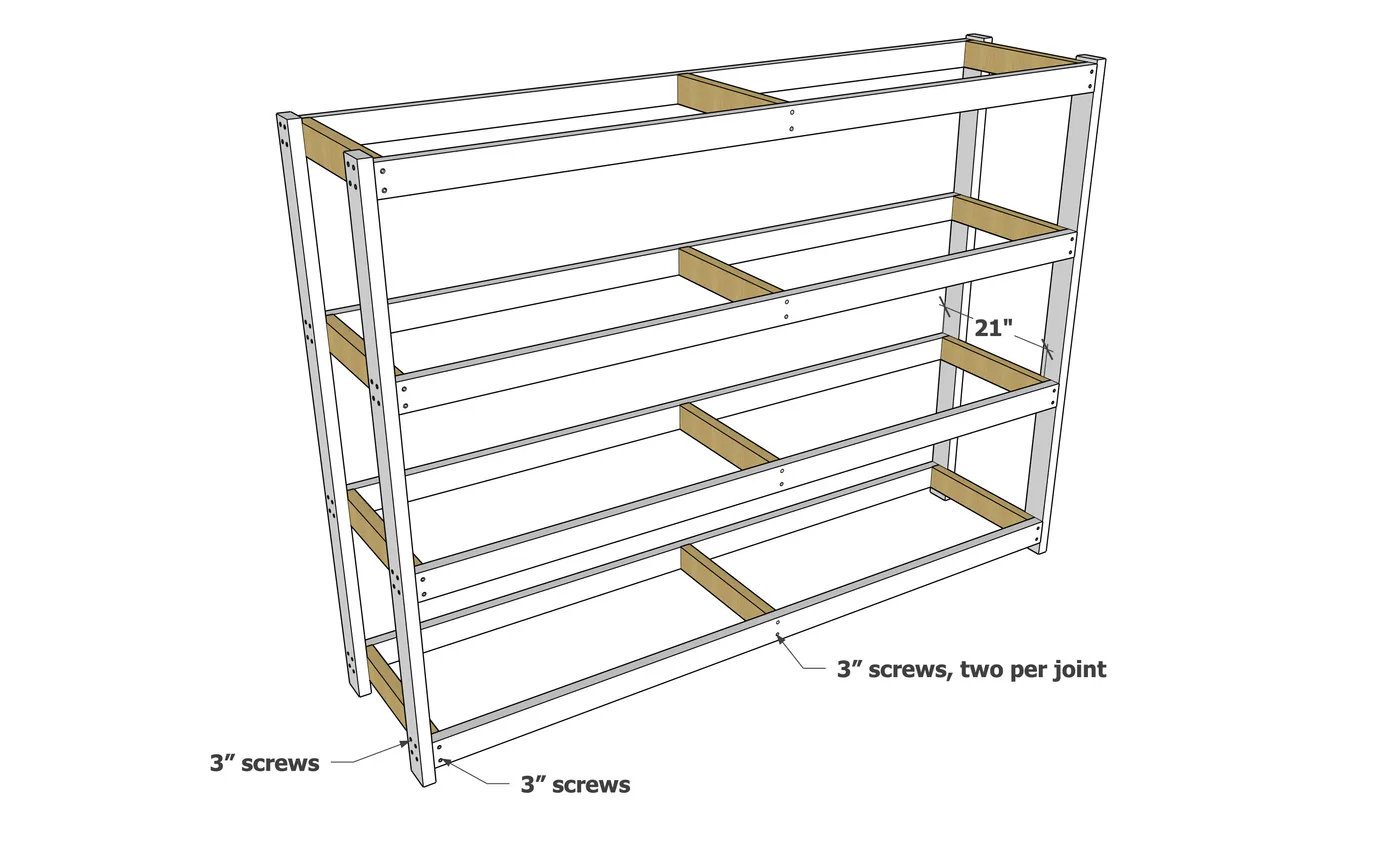
Join the two frames together with the 21" pieces, using two screws per joint. Reinforce the corner joints with additional screws into the long supports.
Step 3
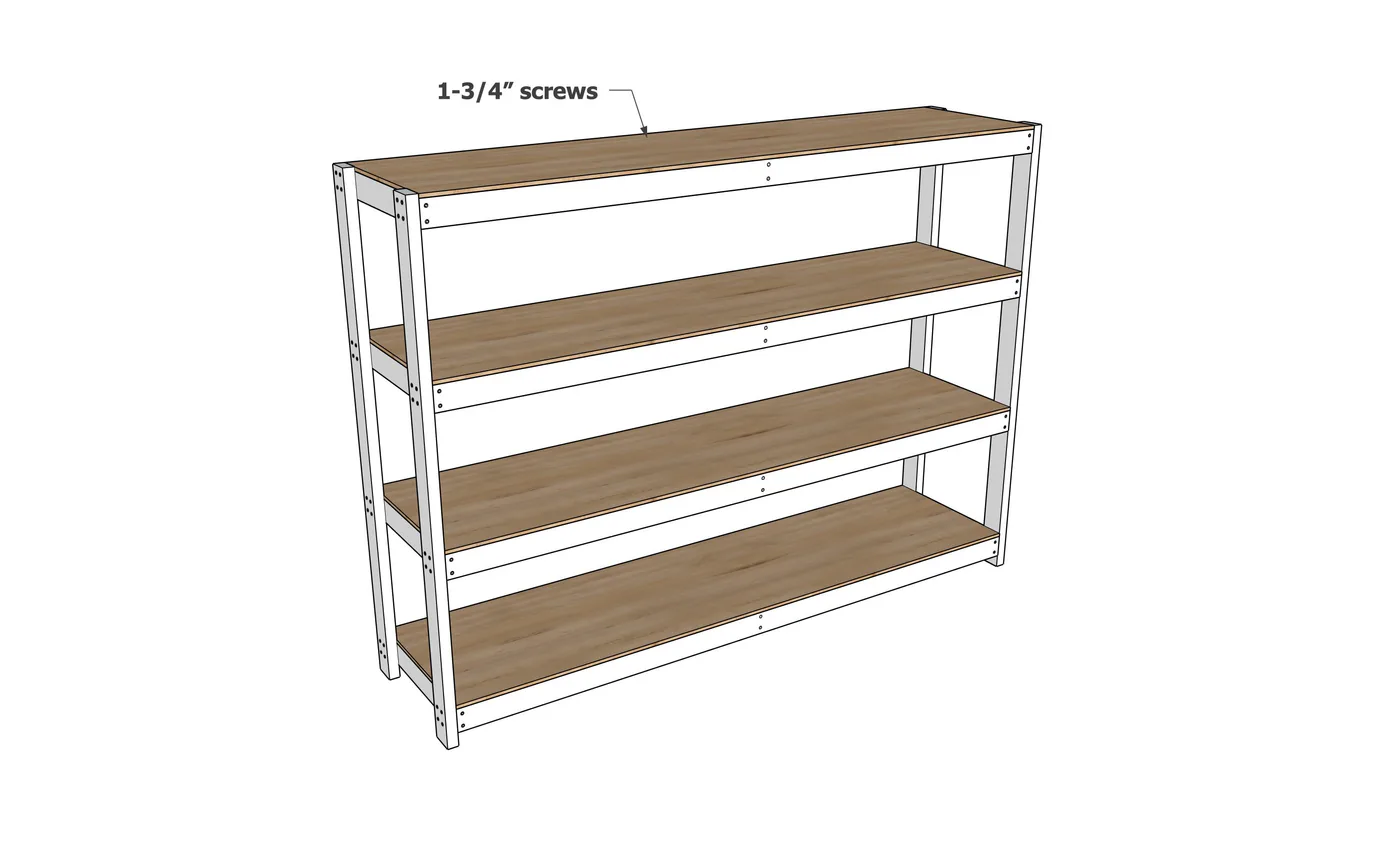
Place the 1/2" plywood on top of the shelving. Screw down, using the plywood to square up the shelving, with 1-3/4" screws.
Step 4
For heavier loads, add 1x4s as shown to support the center of the shelving.
Finishing
Sand all surfaces, starting with a medium grit and finishing with fine. Wipe off the dust, fill any holes or gaps with wood filler, and sand smooth once dry. Apply primer if you're painting, then finish with your choice of paint or stain and seal with a durable clear topcoat. For outdoor projects, use exterior-rated primer, paint or stain, and sealer so the piece stands up to the weather.