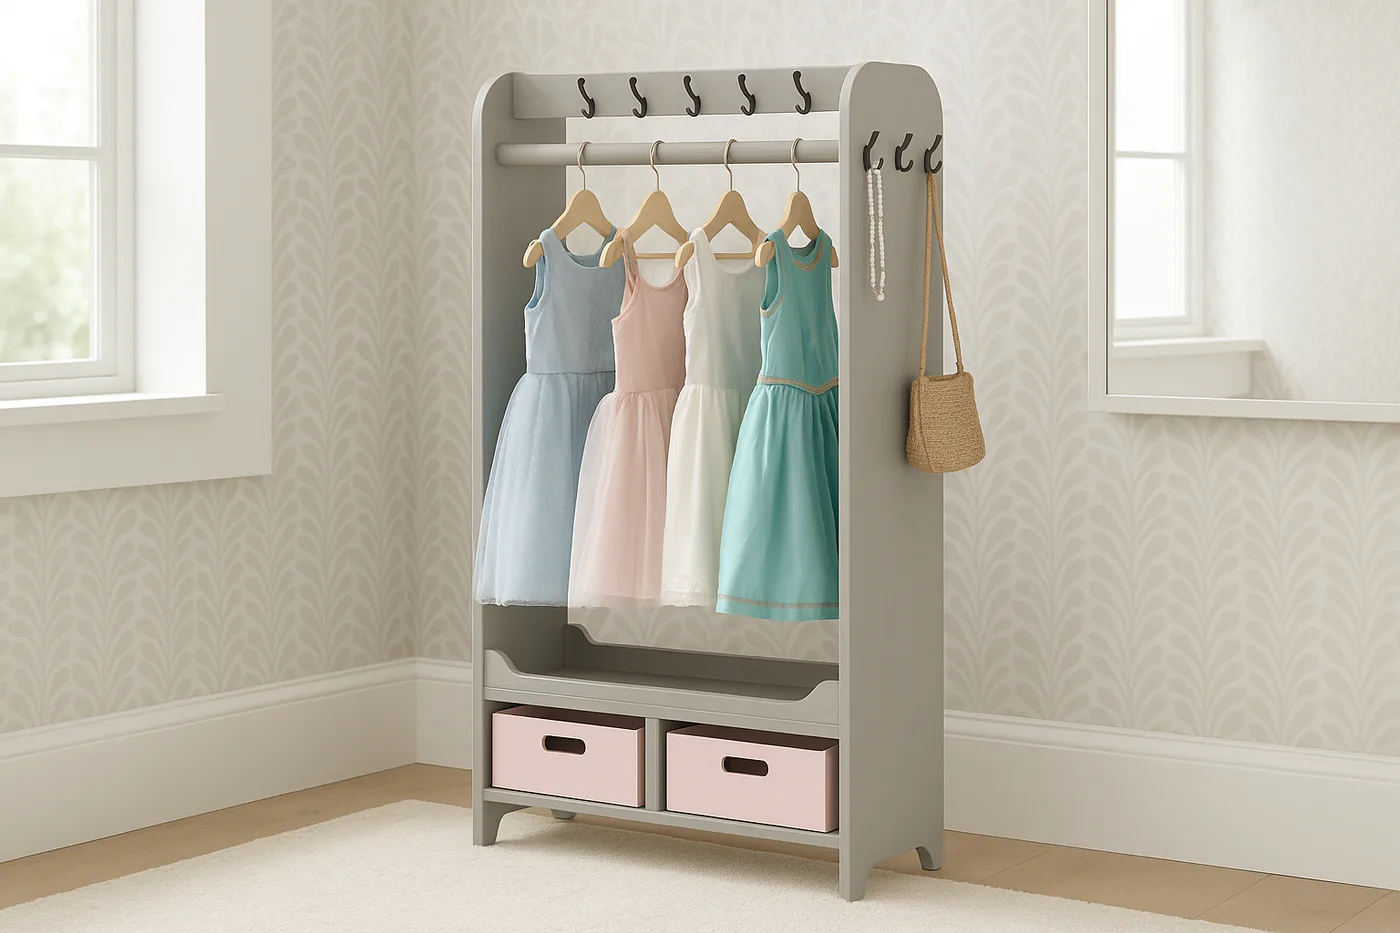
Fancy Dress Up Tower
Build your own dress up storage tower for you little ones! This step by step plan includes everything you need to DIY a dress up storage center.

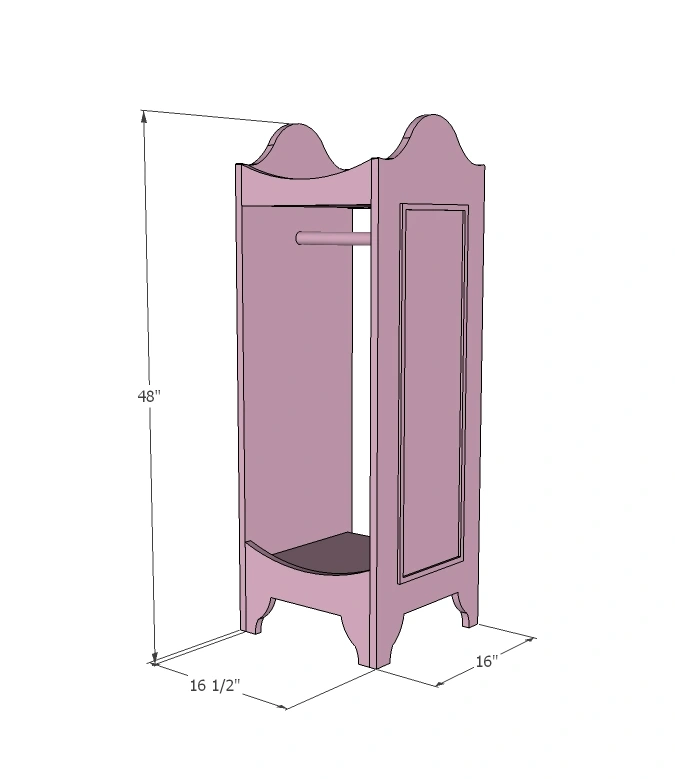
Dimensions
Use the size-specific shopping and cut lists below.
What you need
- 1 - 1/2 sheet 3/4" plywood, MDF or other sheet goods
- 1 - 1x4 @ 3 feet long
- 1 - package of rod pocket holders (check the closet aisle)
- 1 - 1 1/4" wood dowel, 16" long (diameter needs to work with the rod pocket holders you choose, so adjust if necessary)
Use either 1-1/4" pocket holes or 1-1/4" brad nails or 2" self tapping screws
- 2 - 1x4 @ 15"
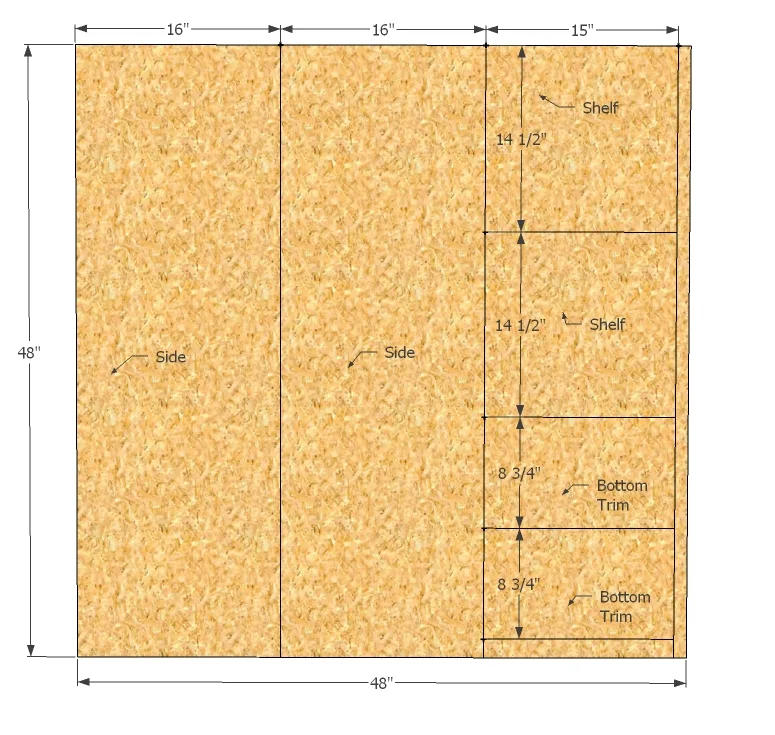
- 2 - 3/4" plywood @ 48" x 16"
- 2 - 3/4" plywood @ 14 1/2" x 15"
- 2 - 3/4" plywood @ 8 3/4" x 15"
- measuring tape
- square
- pencil
- safety glasses
- circular saw
- jigsaw
- nailer
- sander
- countersink drill bit
Step by step
Step 1
If you can get your hardware store to cut your plywood into two 16" wide strips and one 15" wide strips, this will save you much time and make transporting the boards much easier. Otherwise, rip the plywood with the grain into strips as shown in diagram. Then make cross cuts for the shelves and trim boards as shown in diagram.
Step 2
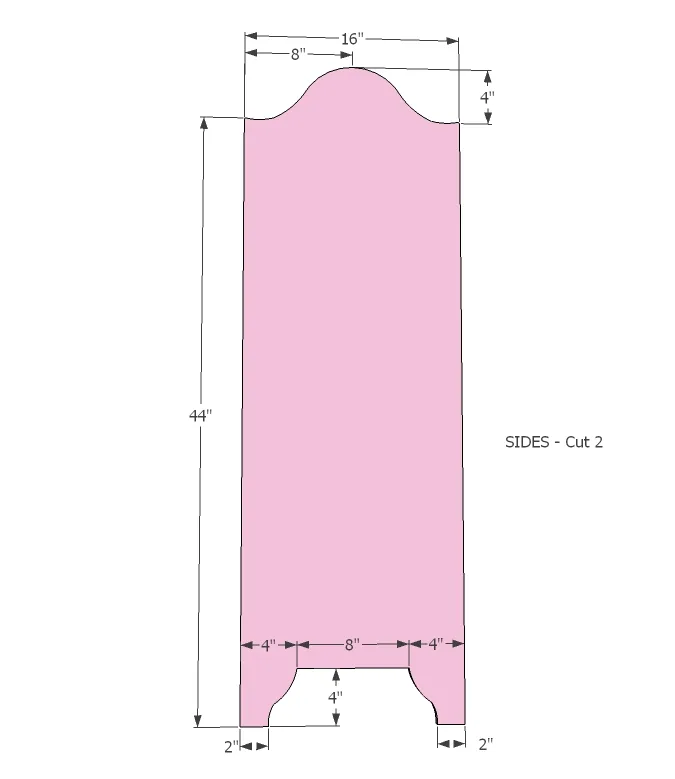
From large side pieces, carefully mark out a pattern as shown in diagram. You will need to cut two identical sides, so practice on scraps with your jigsaw until you are confident. Once you are happy with one side, use it as a pattern to cut the other side. Remember that the saw blade takes up space, so be very aware of what side of the traced line you cut on. Sand and sand some more when you are finished. This project will work best with a painted finish, but you could iron on edge banding if desired.
Step 3
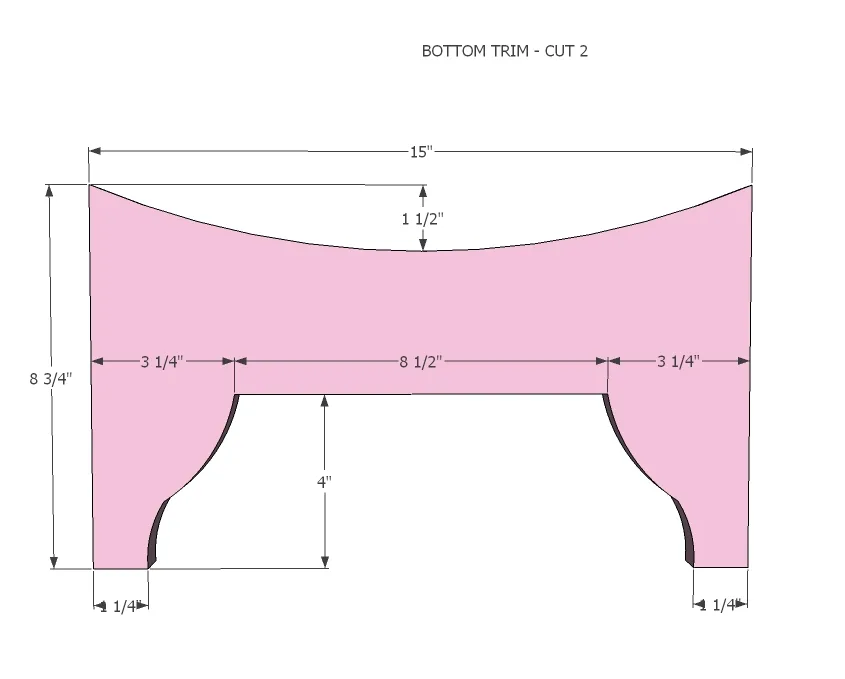
Cut the two bottom trim pieces as shown here, with the same care as you did the sides.
Step 4
From the 1x4 pieces, cut the top trim.

Step 5
Step 6
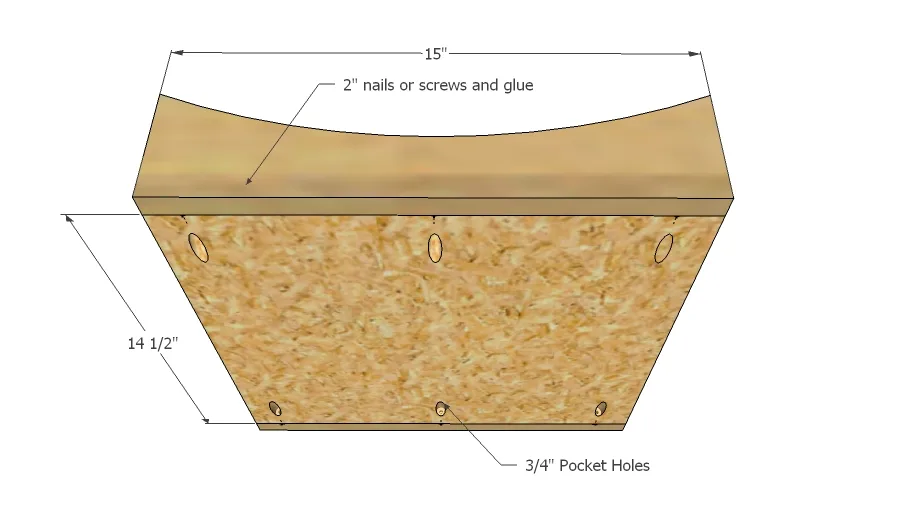
Mark the insides of the bottom trim 2" from the top. Attach sides to shelves, hiding pocket holes (if used) to the undersides of the shelves (this is shown opposite in diagram, my apologies).

Step 7
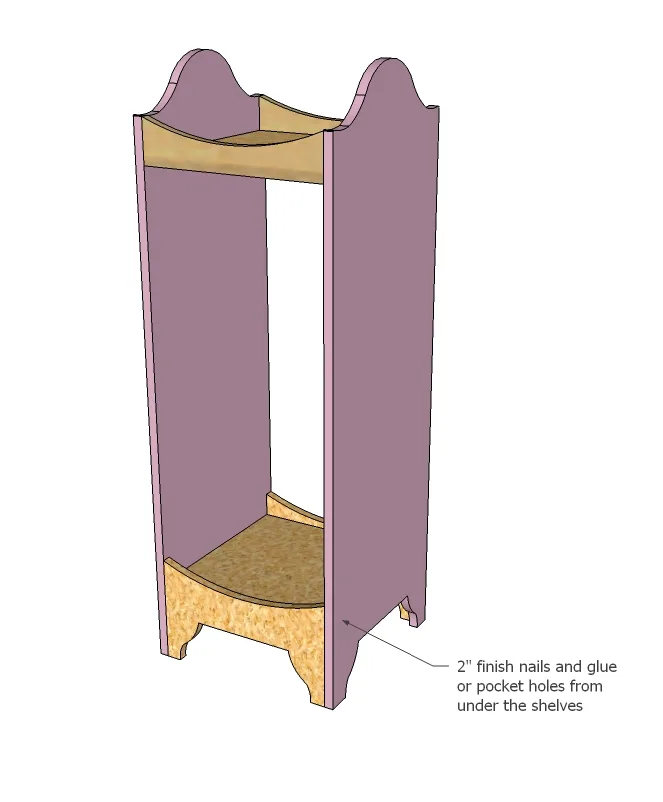
Start by attaching the sides to the base. Then attach top shelf to sides.
Step 8
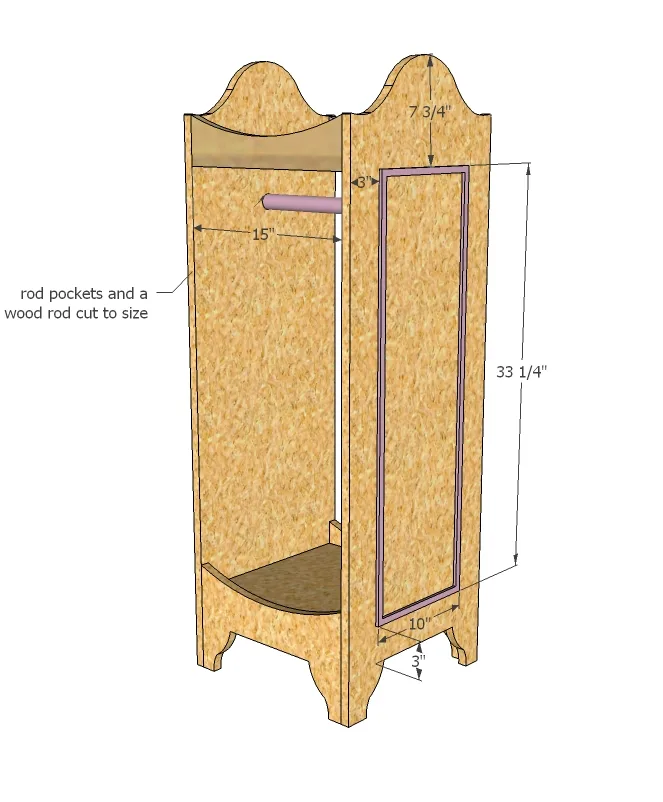
Add the rod pocket holders with included screws and cut and place wood dowel in rod pockets. For a little extra fancy, glue wood moulding to the sides.
Step 9
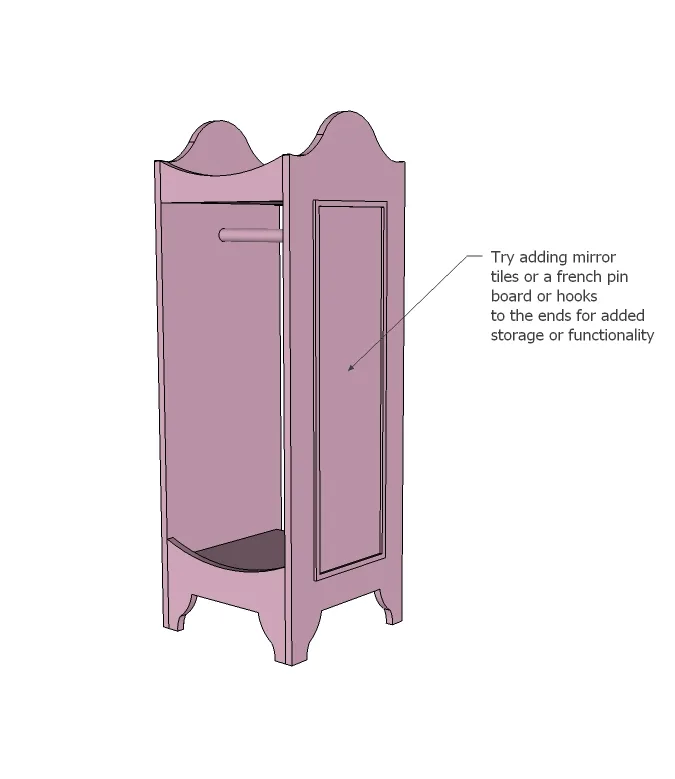
You can get really creative here - adding hooks for necklaces and hats and capes, or a mirror (love the stick on mirror tiles!) or even a french pin board. It's the details that will transform this 1/2 sheet of plywood into a beautiful gift!
Finishing
Sand all surfaces, starting with a medium grit and finishing with fine. Wipe off the dust, fill any holes or gaps with wood filler, and sand smooth once dry. Apply primer if you're painting, then finish with your choice of paint or stain and seal with a durable clear topcoat. For outdoor projects, use exterior-rated primer, paint or stain, and sealer so the piece stands up to the weather.