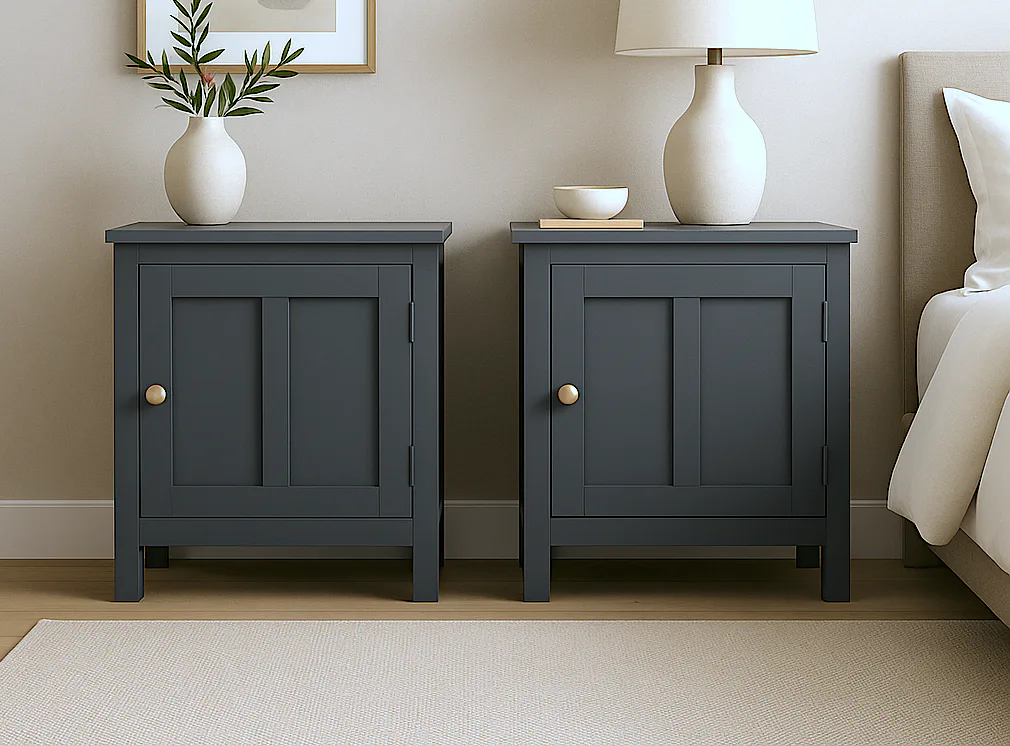
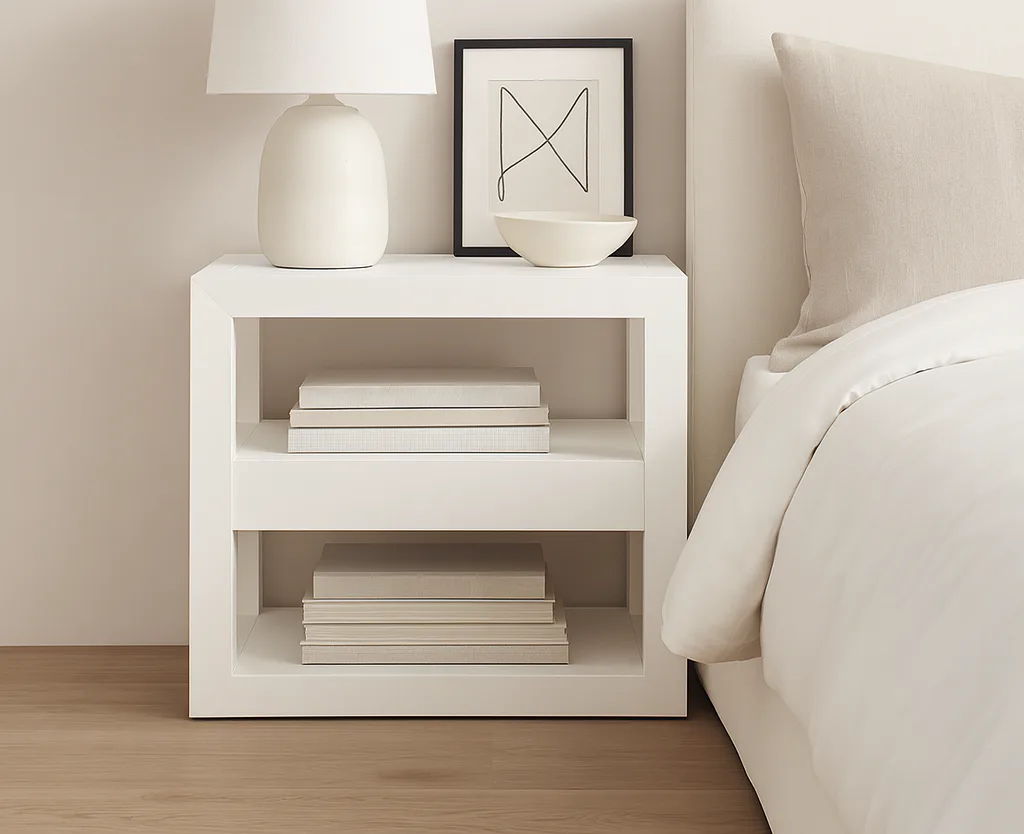
Emily Nightstand
for pretty nightstand inspired by Ballard Designs Isabella Nightstand.

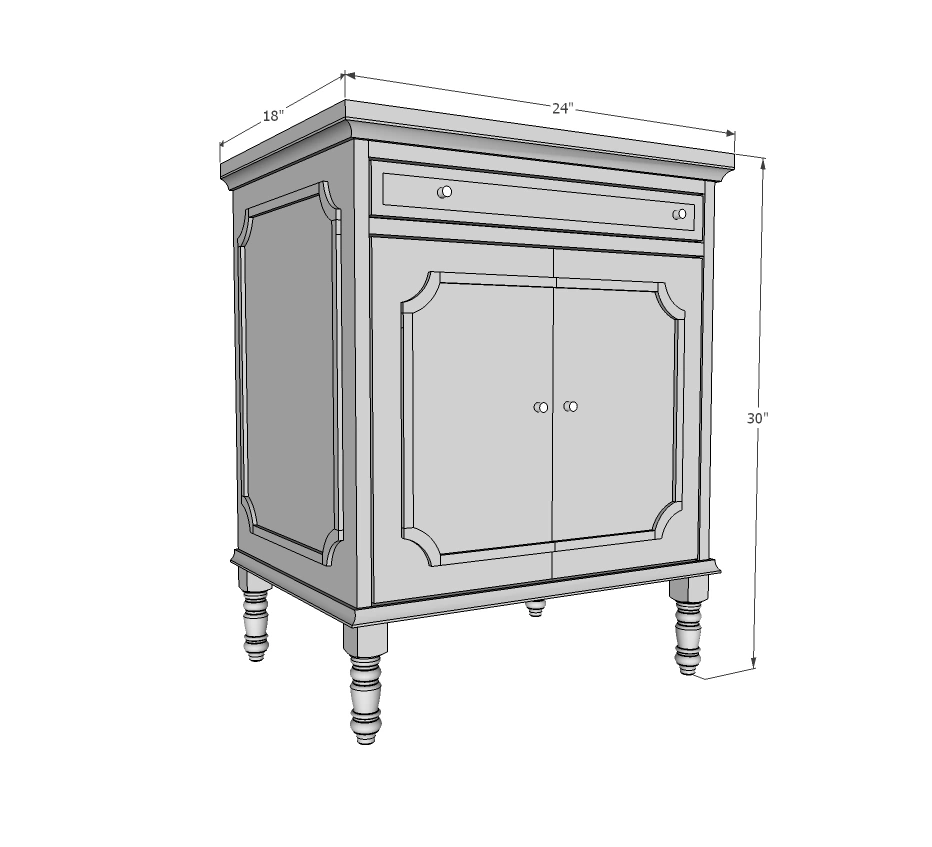
Dimensions
Use the size-specific shopping and cut lists below.
What you need
- 1/2 sheet of 3/4" plywood
- 1/4 sheet of 1/4" plywood
- 2 - 1x2x6'
- 1 - 20-3/4" of 1x3
- 4 Osborne Wood turned legs
- Iron-On Veneer edging
- 3/4" x 3/4" cove moulding
- moulding for the drawer face
- 3/4" brad nails
- 1 set of 14" drawer slides
- 4 knobs
- 4 hinges
- Hanger bolts/tee nuts or lag screws
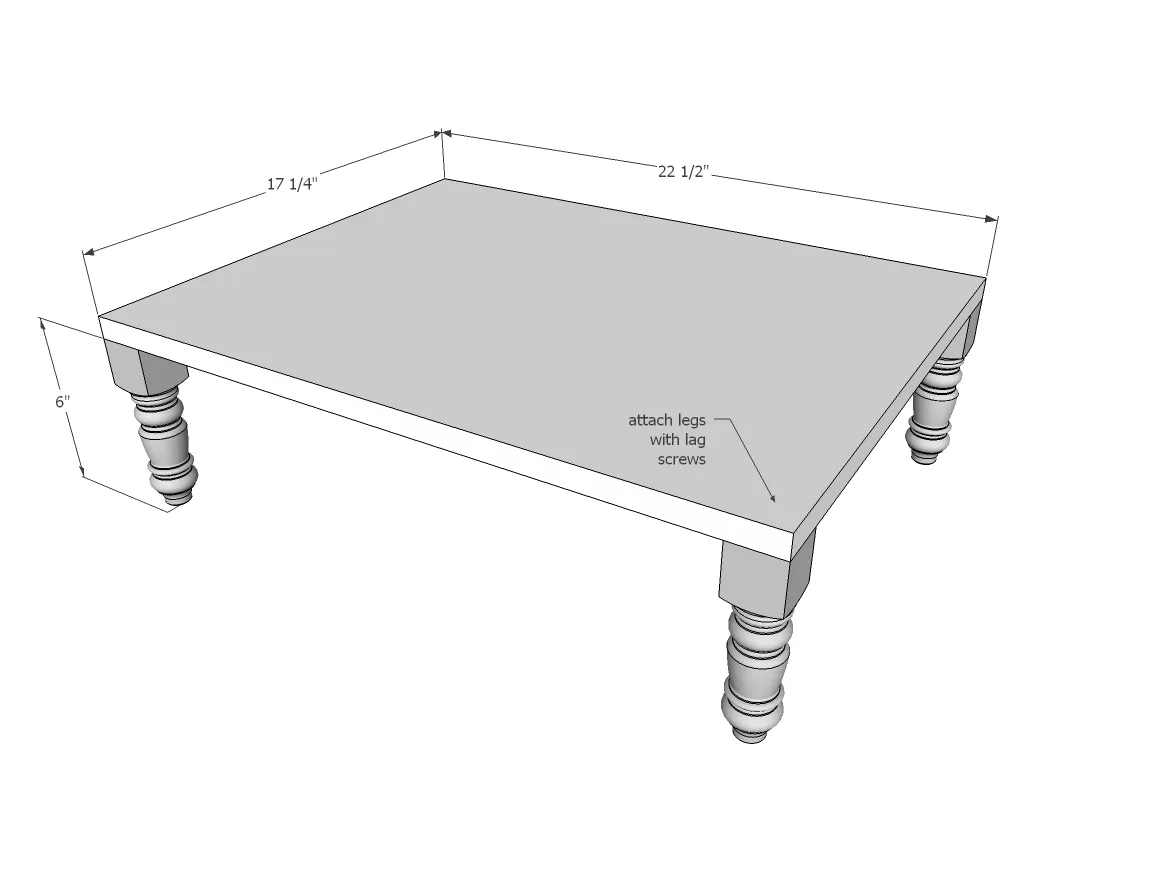
- 4 turned feet, 6" long (we got ours from Osborne Wood
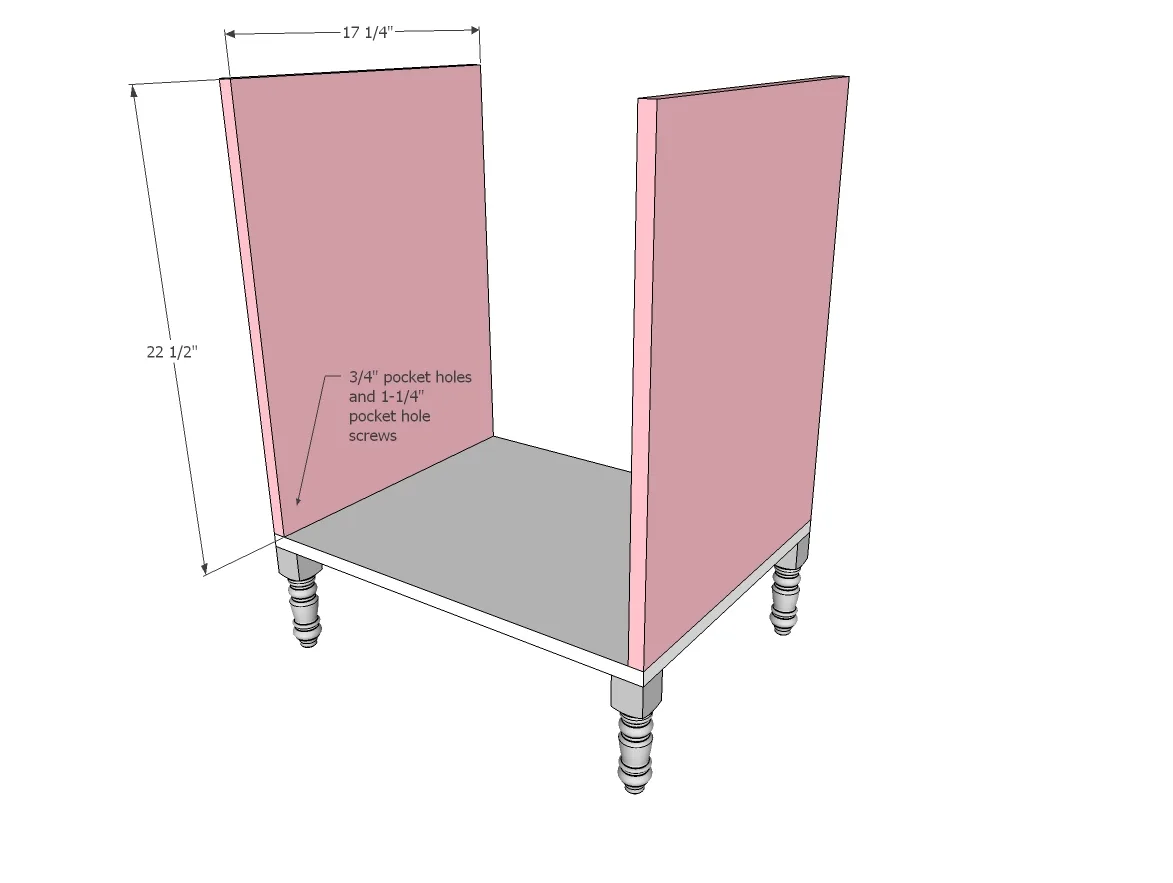
- 3 - 3/4" plywood @ 22-1/2" x 17-1/4" (bottom & sides)
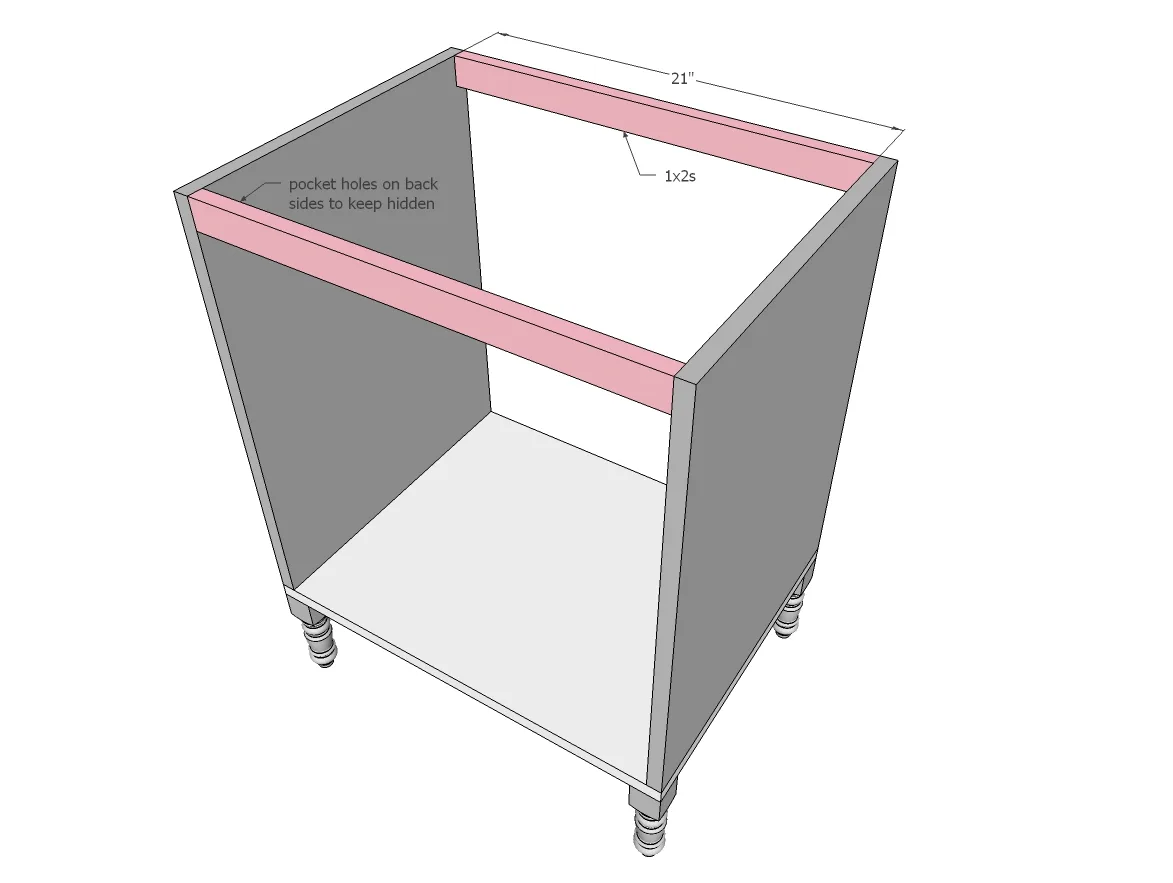
- 3 - 1x2 @ 21" (carcass supports)
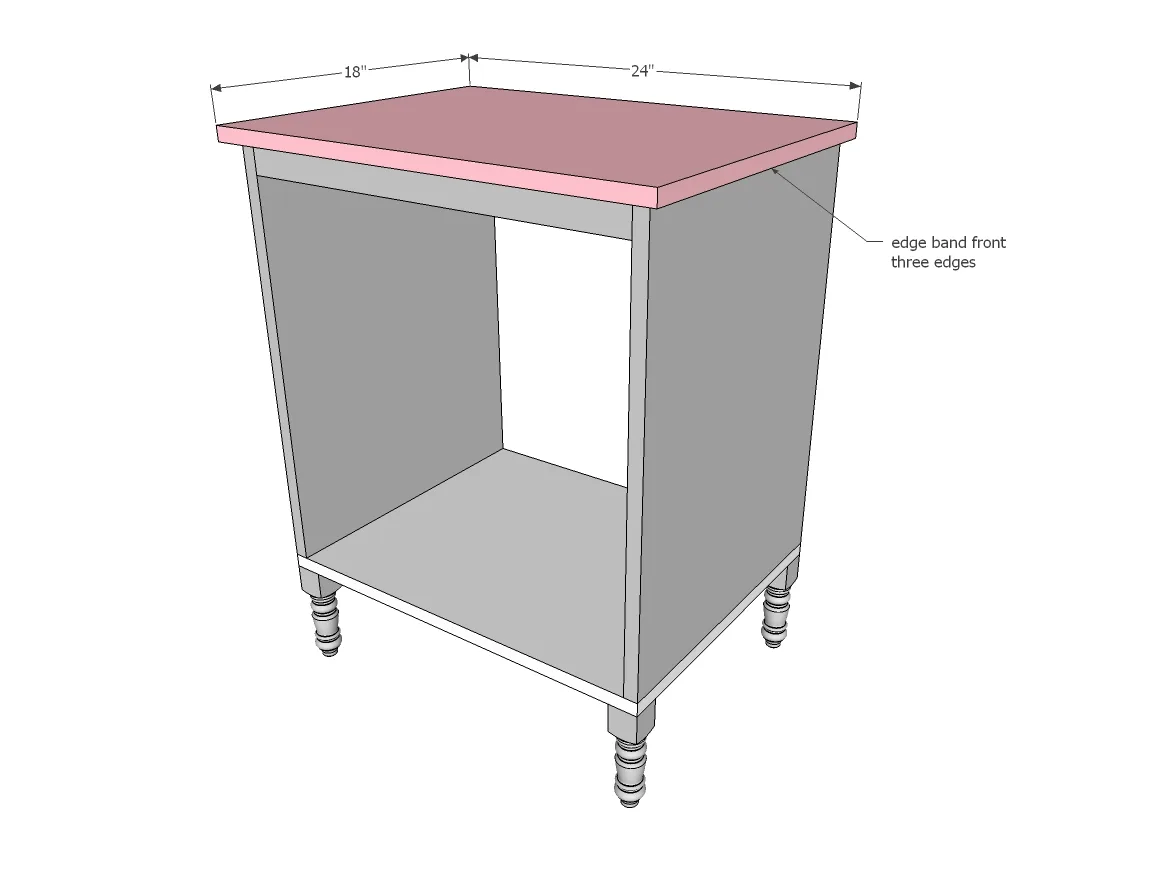
- 1 - 3/4" plywood @ 24" x 18" (top)
- 2 - 3/4" x 3/4" cove moulding @ 24" (top and bottom trim)
- 4 - 3/4" x 3/4" cove moulding @ 18" (top and bottom trim)
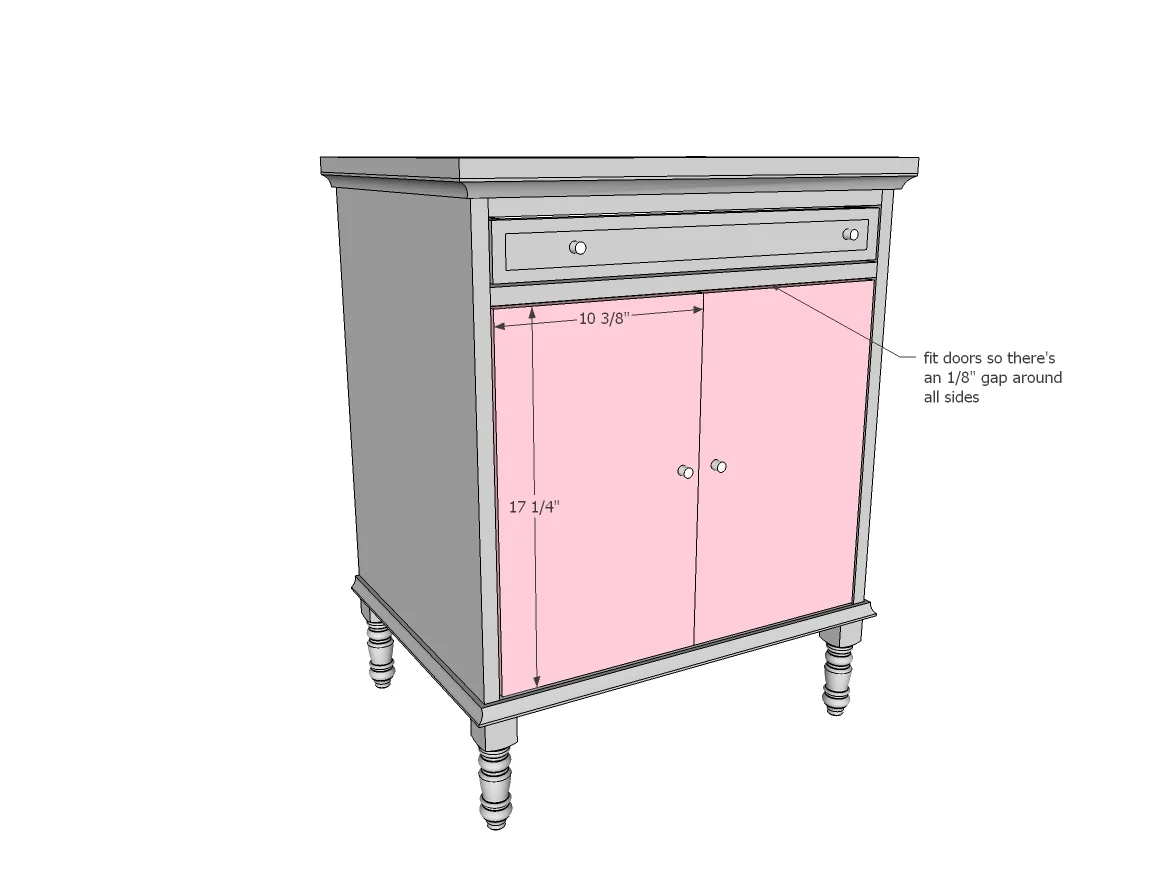
- 2 - 3/4" plywood @ 17-1/4" x 10-3/8" (doors)
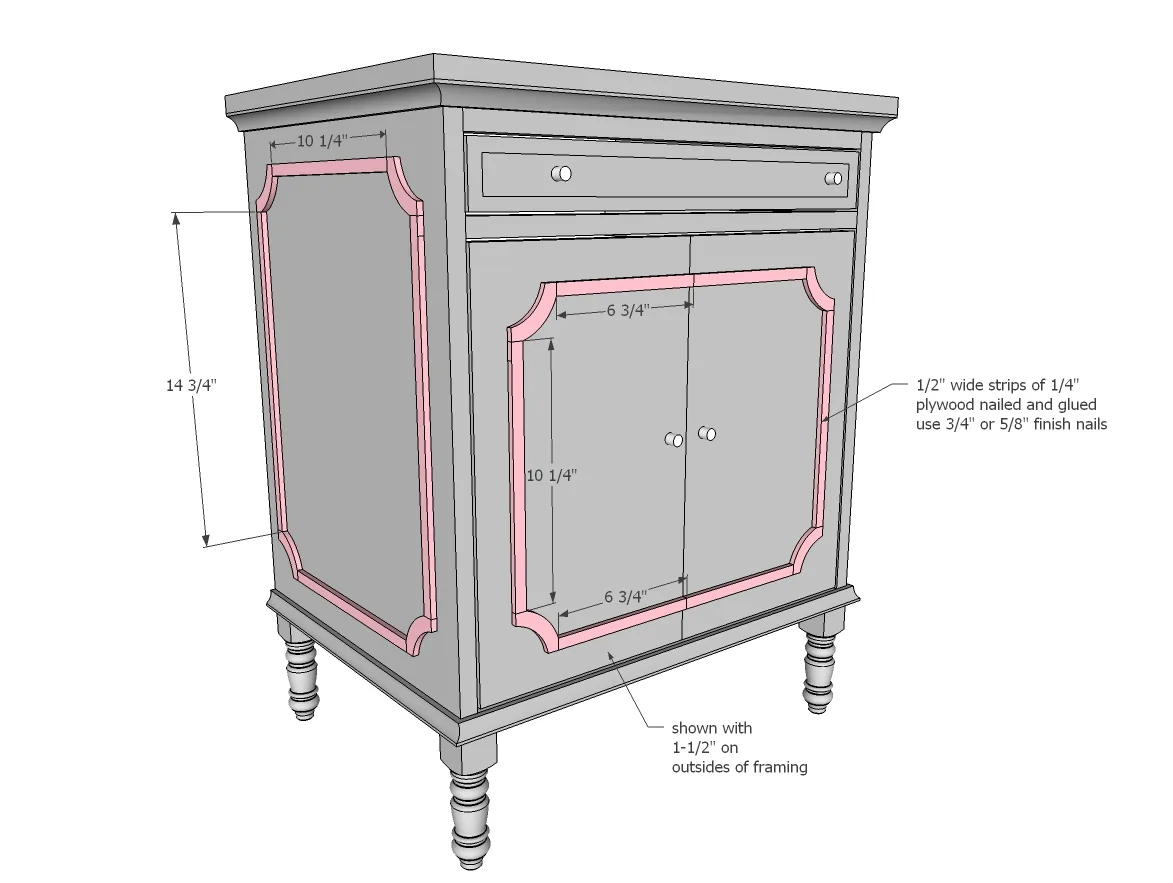
- 4 - 1/2" x 1/4" moulding @ 14-3/4" (trim)
- 6 - 1/2" x 1/4" moulding @ 10-1/4" (trim)
- 4 - 1/2" x 1/4" moulding @ 6-3/4" (trim)
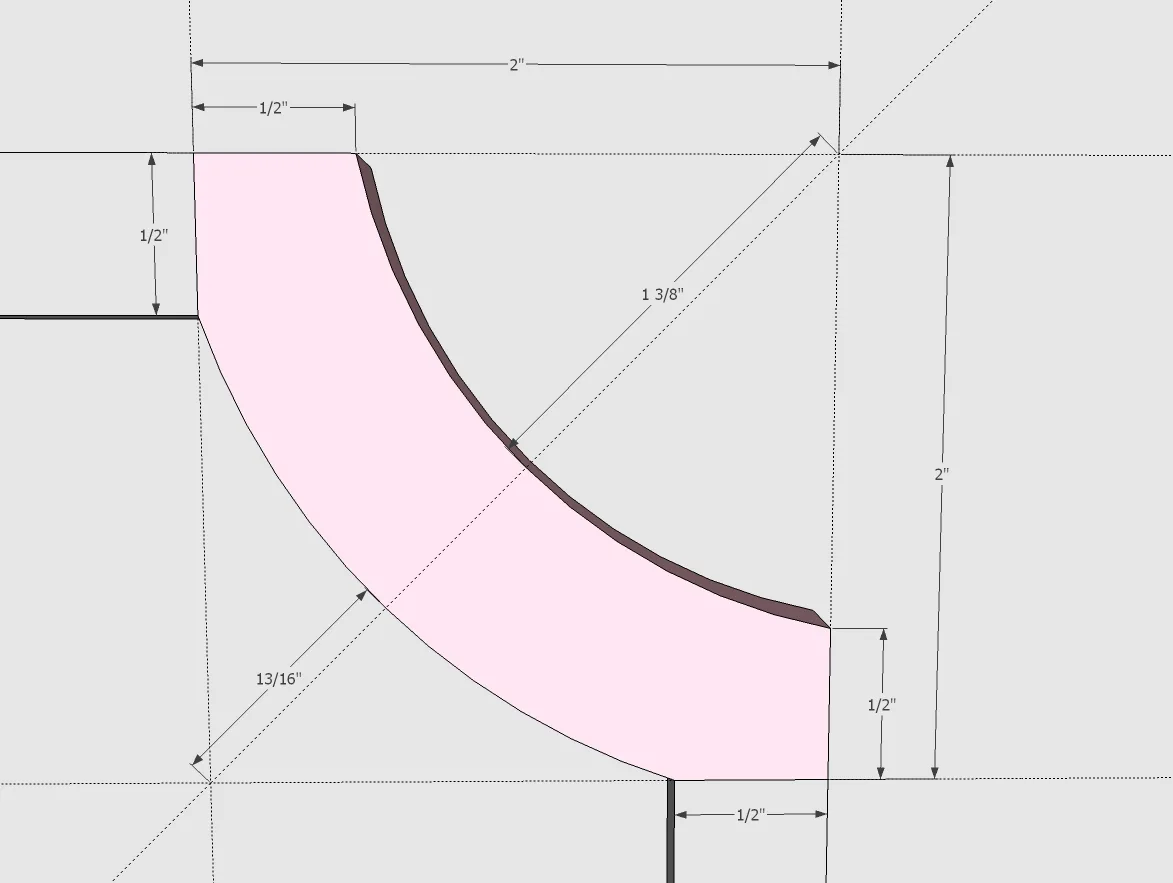
- 12 - curved moulding (cut out of 1/4" plywood - see diagram)
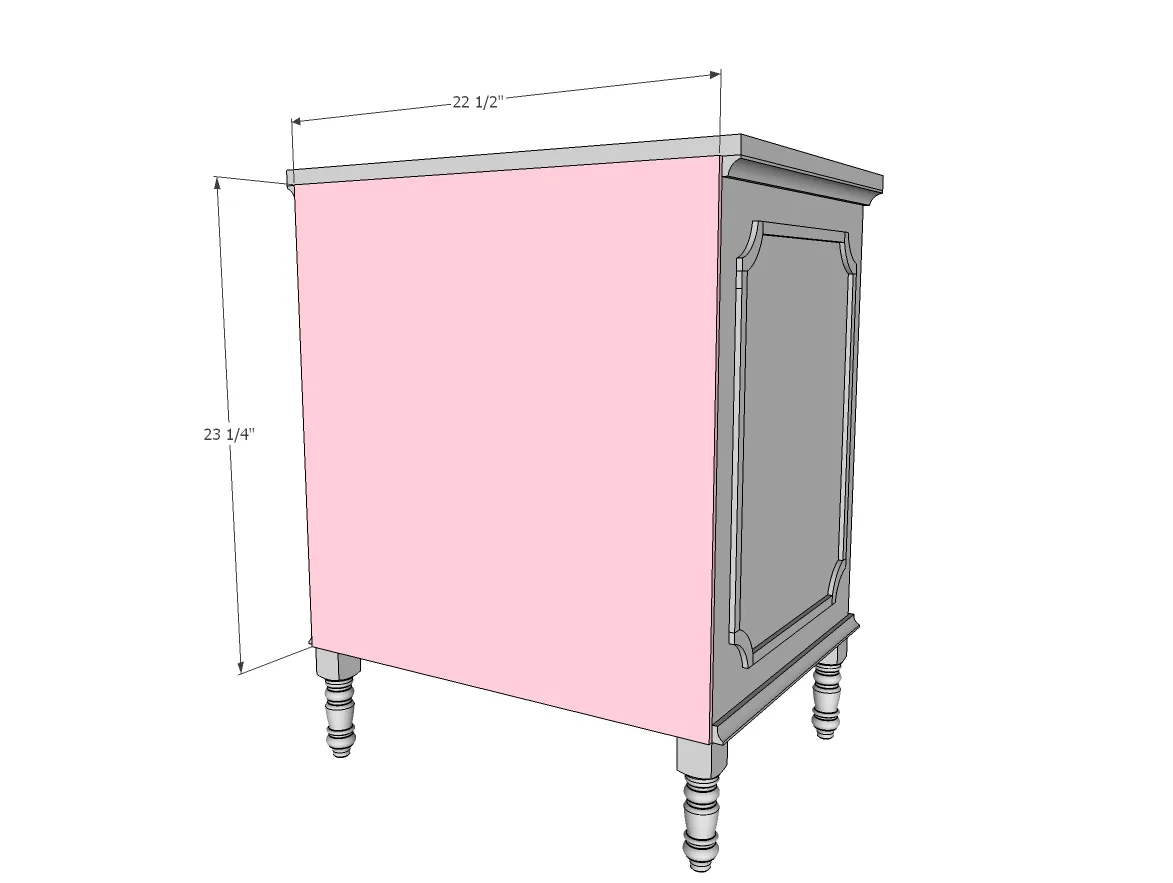
- 1 - 1/4" plywood @ 23-1/4" x 22-1/2" (back)
- 1 - 3/4" plywood @ 21" x 16-1/2" (optional shelf)
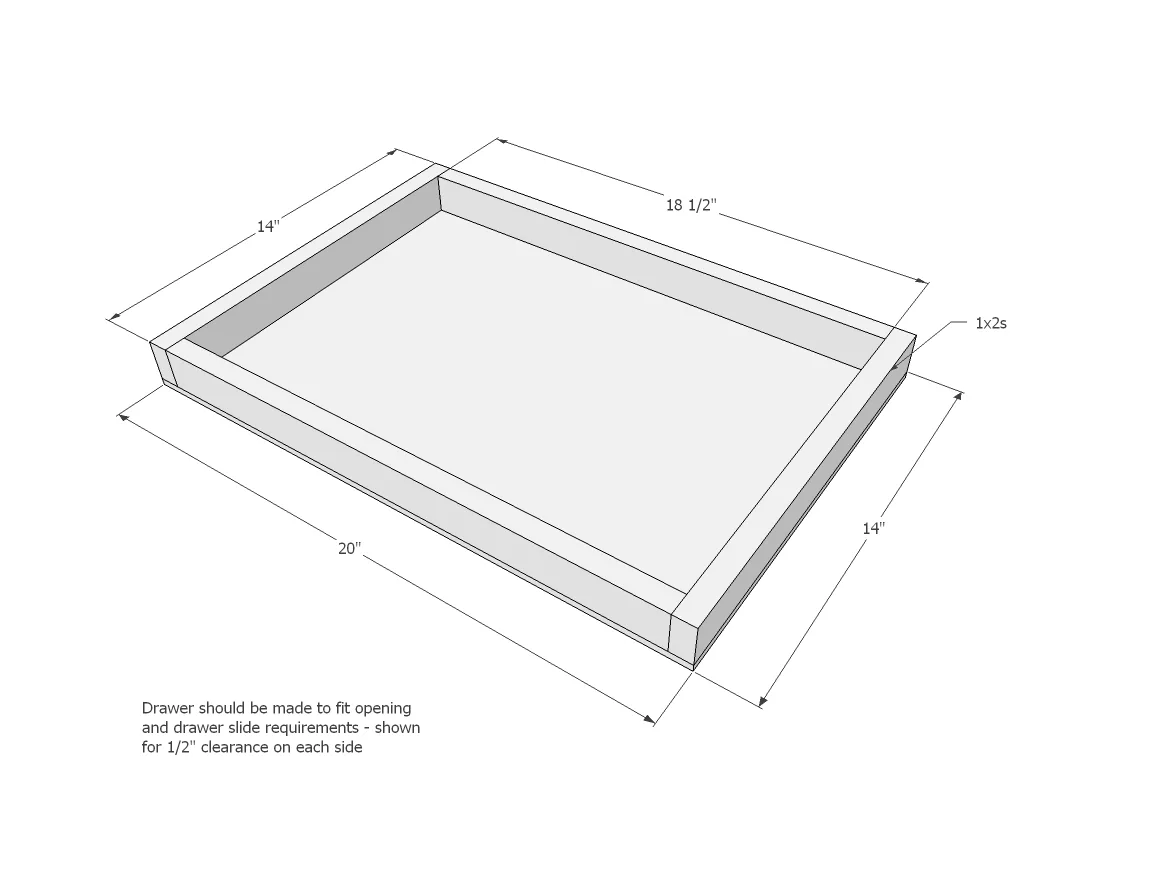
- 2 - 1x2 @ 18-1/2" (drawer front/back)
- 2 - 1x2 @ 14" (drawer sides)
- 1 - 1/4" plywood @ 20" x 14" (drawer bottom)
- 1 - 1x3 @ 20-3/4" (drawer face)
- 2 - moulding @ 20-3/4" (drawer face trim)
- 2 - moulding @ 2-1/2" (drawer face trim)
Cut List:
Drawer:
- measuring tape
- square
- pencil
- safety glasses
- hearing protection
- kreg-jig
- drill
- compound miter saw
- table saw
- nailer
- sander
- scroll saw
- shelf pin jig
- Iron
Step by step
Step 1
If it's easier (depending on your legs and how they attach) you may want to attach the legs now.
Step 2
You'll want to edge band the front edges of the side panels. If you are a perfectionist, you'll want to take about an 1/8" off the front edge (you'll need a tablesaw) to allow for edgebanding (depending on thickness of your edgebanding). If you are painting, you can also fill the front edges of the plywood with wood filler, sand and paint. Drill 3/4" pocket holes facing upward for attaching the top in later steps on the insides. Attach side panels to base with 3/4" pocket holes along bottom inside edge with 1-1/4" pocket hole screws.
Step 3
Attach top supports at front and back - also drill 3/4" pocket holes facing upward for attaching the top in next step.
Step 4
Attach top to sides and top trim with 1-1/4" pocket hole screws and glue.
Step 5
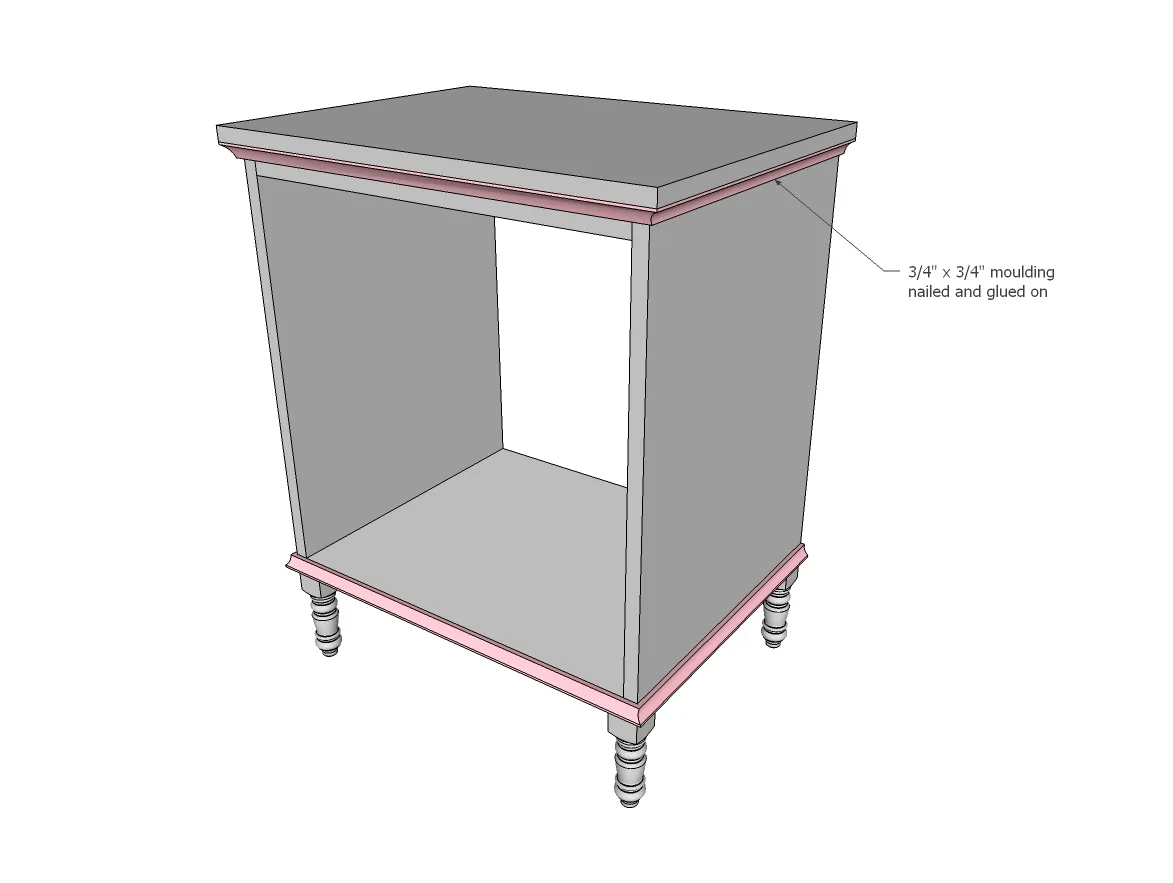
Step 6
Build the drawer to fit your drawer slides and openings - the drawer shown is for drawer slides that require 1/2" clearance on each side (total of 1" clearance) and if your opening is true to width. Place pocket holes on outsides - they will be hidden by drawer face. Attach 1/4" plywood to bottom with nails (3/4") and glue.
Step 7
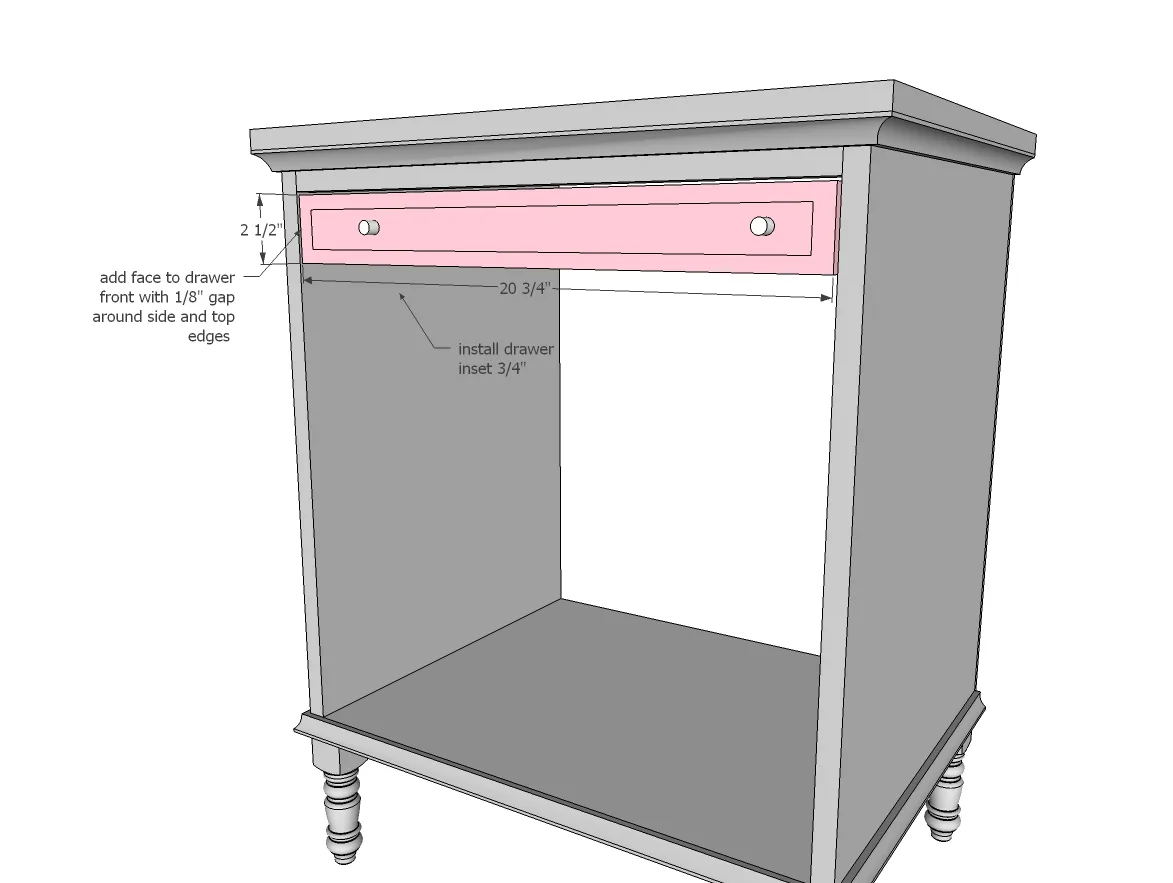
Install drawer 3/4" inset, and place drawer face on top and nail on in a few places (avoid areas where you will add hardware), leaving 1/8" gap to top and sides. Remove drawer and add a few 1-1/4" screws from back side.
Step 8
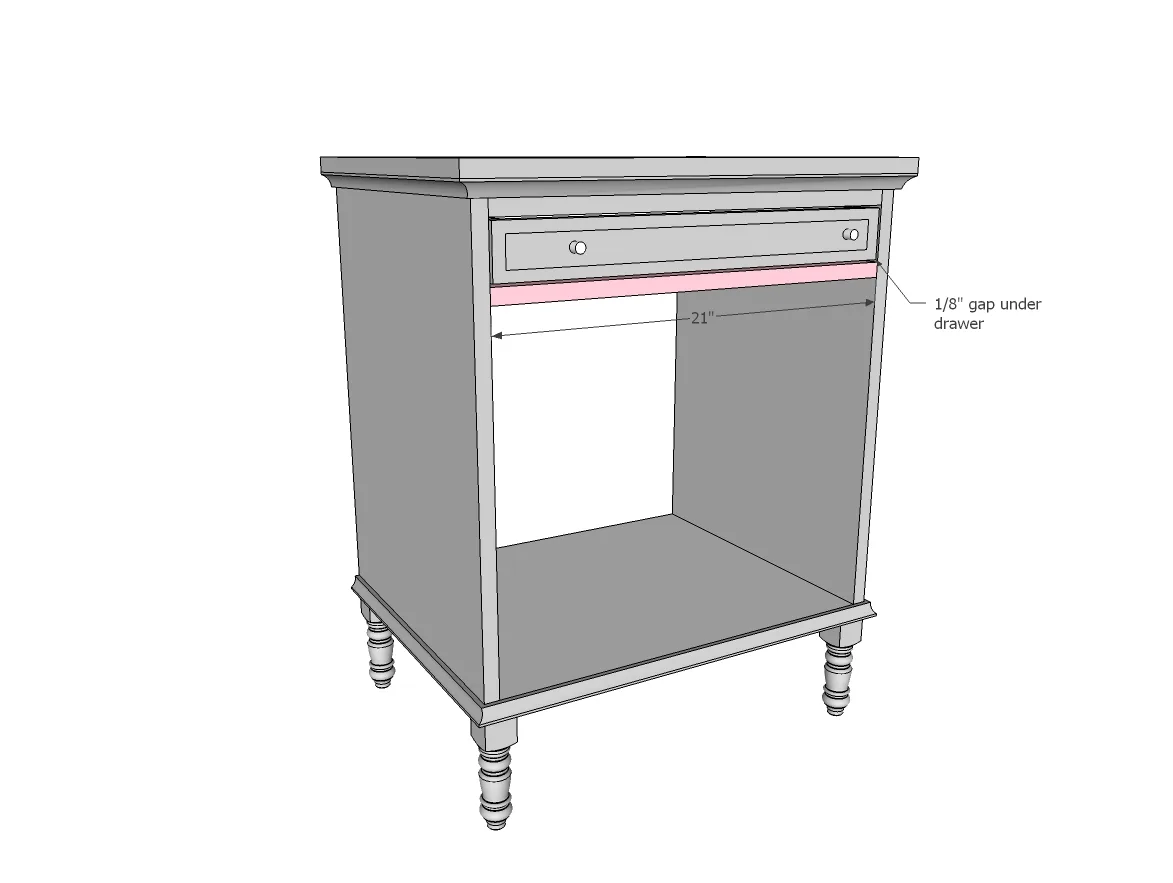
Attach drawer bottom trim with 1/8" gap above, so all around the drawer is 1/8" gaps. Use 3/4" pocket holes and 1-1/4" pocket hole screws to attach.
Step 9
Cut doors out of 3/4" plywood and attach with hinges.
Step 10
Create a pattern for the moulding and cut out with a scroll saw.
Step 11
Attach moulding to drawer faces with 3/4" brad nails and glue.
Step 12
Attach back plywood with 3/4" brad nails and glue.
Finishing
Sand all surfaces, starting with a medium grit and finishing with fine. Wipe off the dust, fill any holes or gaps with wood filler, and sand smooth once dry. Apply primer if you're painting, then finish with your choice of paint or stain and seal with a durable clear topcoat. For outdoor projects, use exterior-rated primer, paint or stain, and sealer so the piece stands up to the weather.