Doll High Chair
DIY Doll High Chair ( ) This easy-to-build DIY doll high chair is a fun weekend project using basic tools and materials. Made from 1x2 and 1x3 boards, it's perfectly sized for 18" dolls or smaller. The include step-by-step instructions, cut lists, and diagrams—great for beginners or as a gift project.

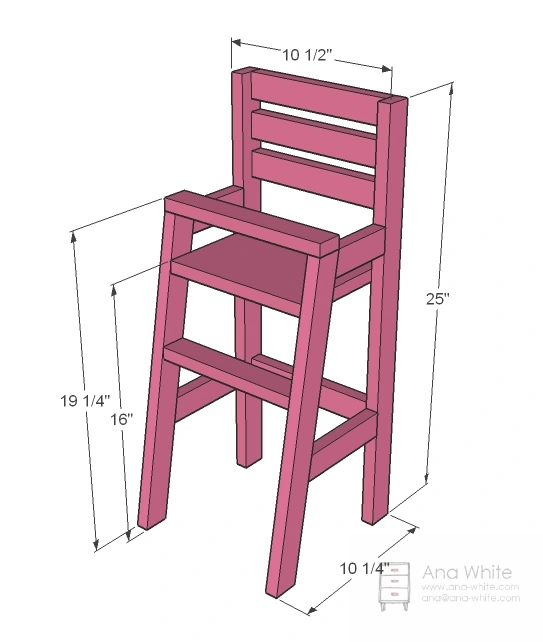
Dimensions
Use the size-specific shopping and cut lists below.
What you need
- 2 – 1×2 @ 8 feet long
- 1 – 1×4 @ 10 1/2″ long
- 1 – 1×8 @ 9″ long
- 2 – 1×2 @ 25″
- 2 – 1×2 @ 18 3/4″ long, both ends cut at 10 degrees off square, parallel to each other
- 2 – 1×2 @ 4″, one end cut at 10 degrees off square
- 2 – 1×2 @ 6″, one end cut at 10 degrees off square
- 6 – 1×2 @ 9″
- 1 – 1×4 @ 10 1/2″ long
- 1- 1x8 @ 9" long
- measuring tape
- square
- pencil
- safety glasses
- hearing protection
- kreg-jig
- drill
- compound miter saw
- sander
- level
- countersink drill bit
Step by step
Chair Sides
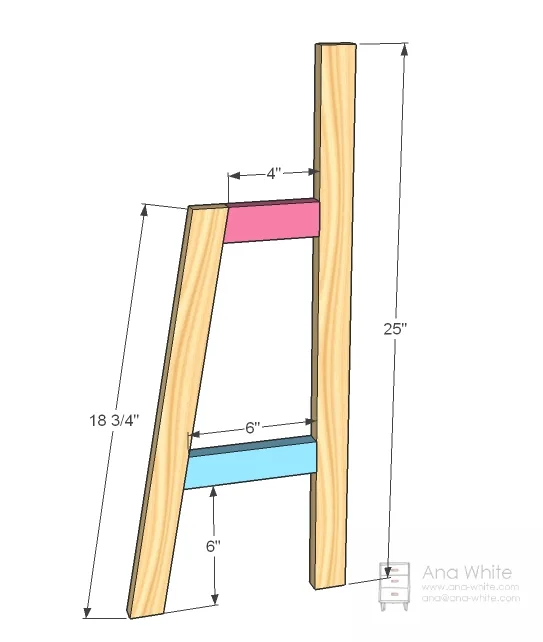
Build the chair sides as shown above. Use 2″ screws predrilled from the outsides of the chair back and fronts into the ends of the side rails, or pocket holes. Build two of these.
Back Slats
Now add the back slats, again, with 2″ screws and glue.
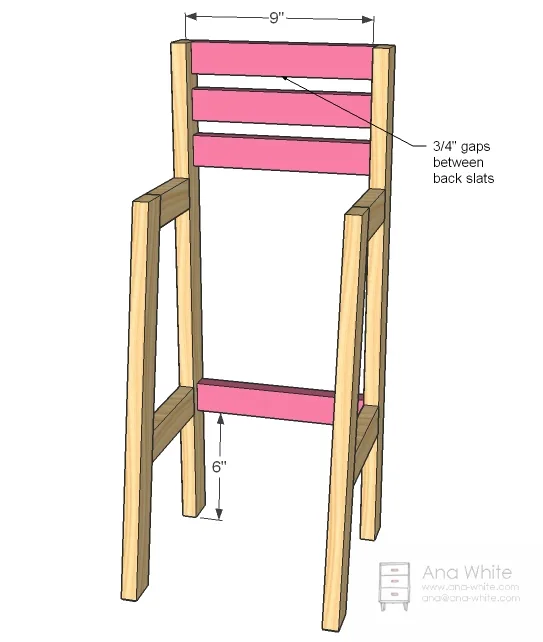
Foot Rest
And now the foot rest. Same thing, 2″ screws and glue.
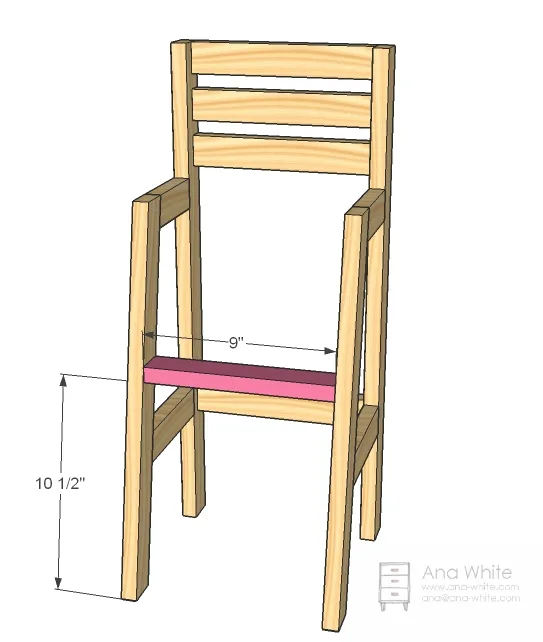
Seat
And finally the seat. I recommend positioning the seat according to the dimensions of the doll that will sit in the seat.
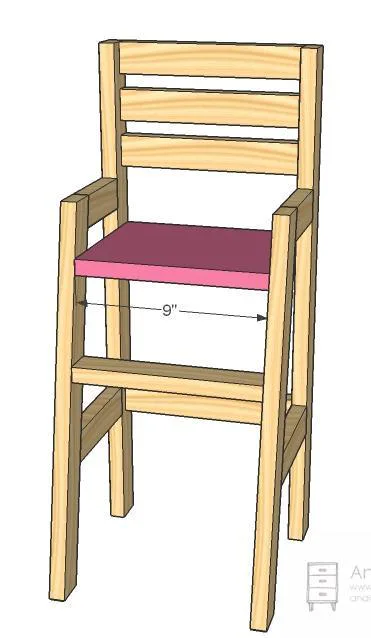
Step 5
Attach the tray piece to the top with 1-1/4" brad nails and glue.
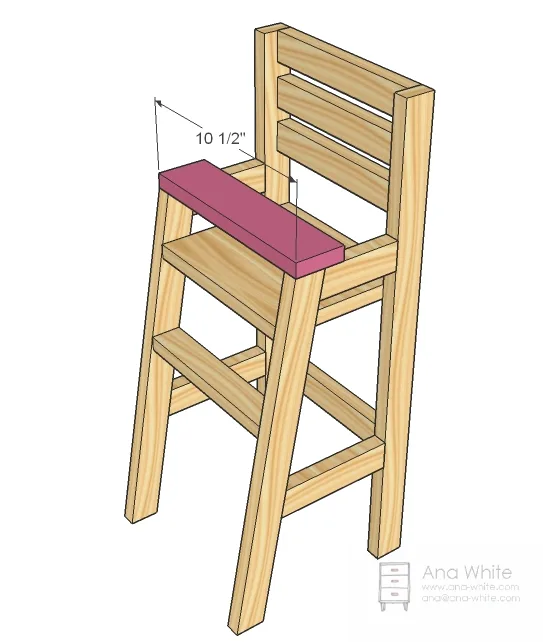
Finishing
Sand all surfaces, starting with a medium grit and finishing with fine. Wipe off the dust, fill any holes or gaps with wood filler, and sand smooth once dry. Apply primer if you're painting, then finish with your choice of paint or stain and seal with a durable clear topcoat. For outdoor projects, use exterior-rated primer, paint or stain, and sealer so the piece stands up to the weather.