Countertop Cooling Rack
Fresh bakes + proper airflow = better results every time This DIY cooling rack is a simple, space-saving build that lets you cool a lot at once without taking over the counter. The stacked design keeps air moving underneath, so everything sets the way it should. Not just for cookies — it’s great for: • Brownies & bar cookies • Muffins & cupcakes • Quick breads & loaf cakes • Scones & biscuits • Yeast breads & rolls • Pizza crusts & flatbreads • Glazed pastries • Fried foods like donuts or churros Perfect for home bakers, cottage bakers, or anyone who bakes in batches. Beginner friendly, budget conscious, and easy to customize. available Build it once, use it every bake day.

Dimensions
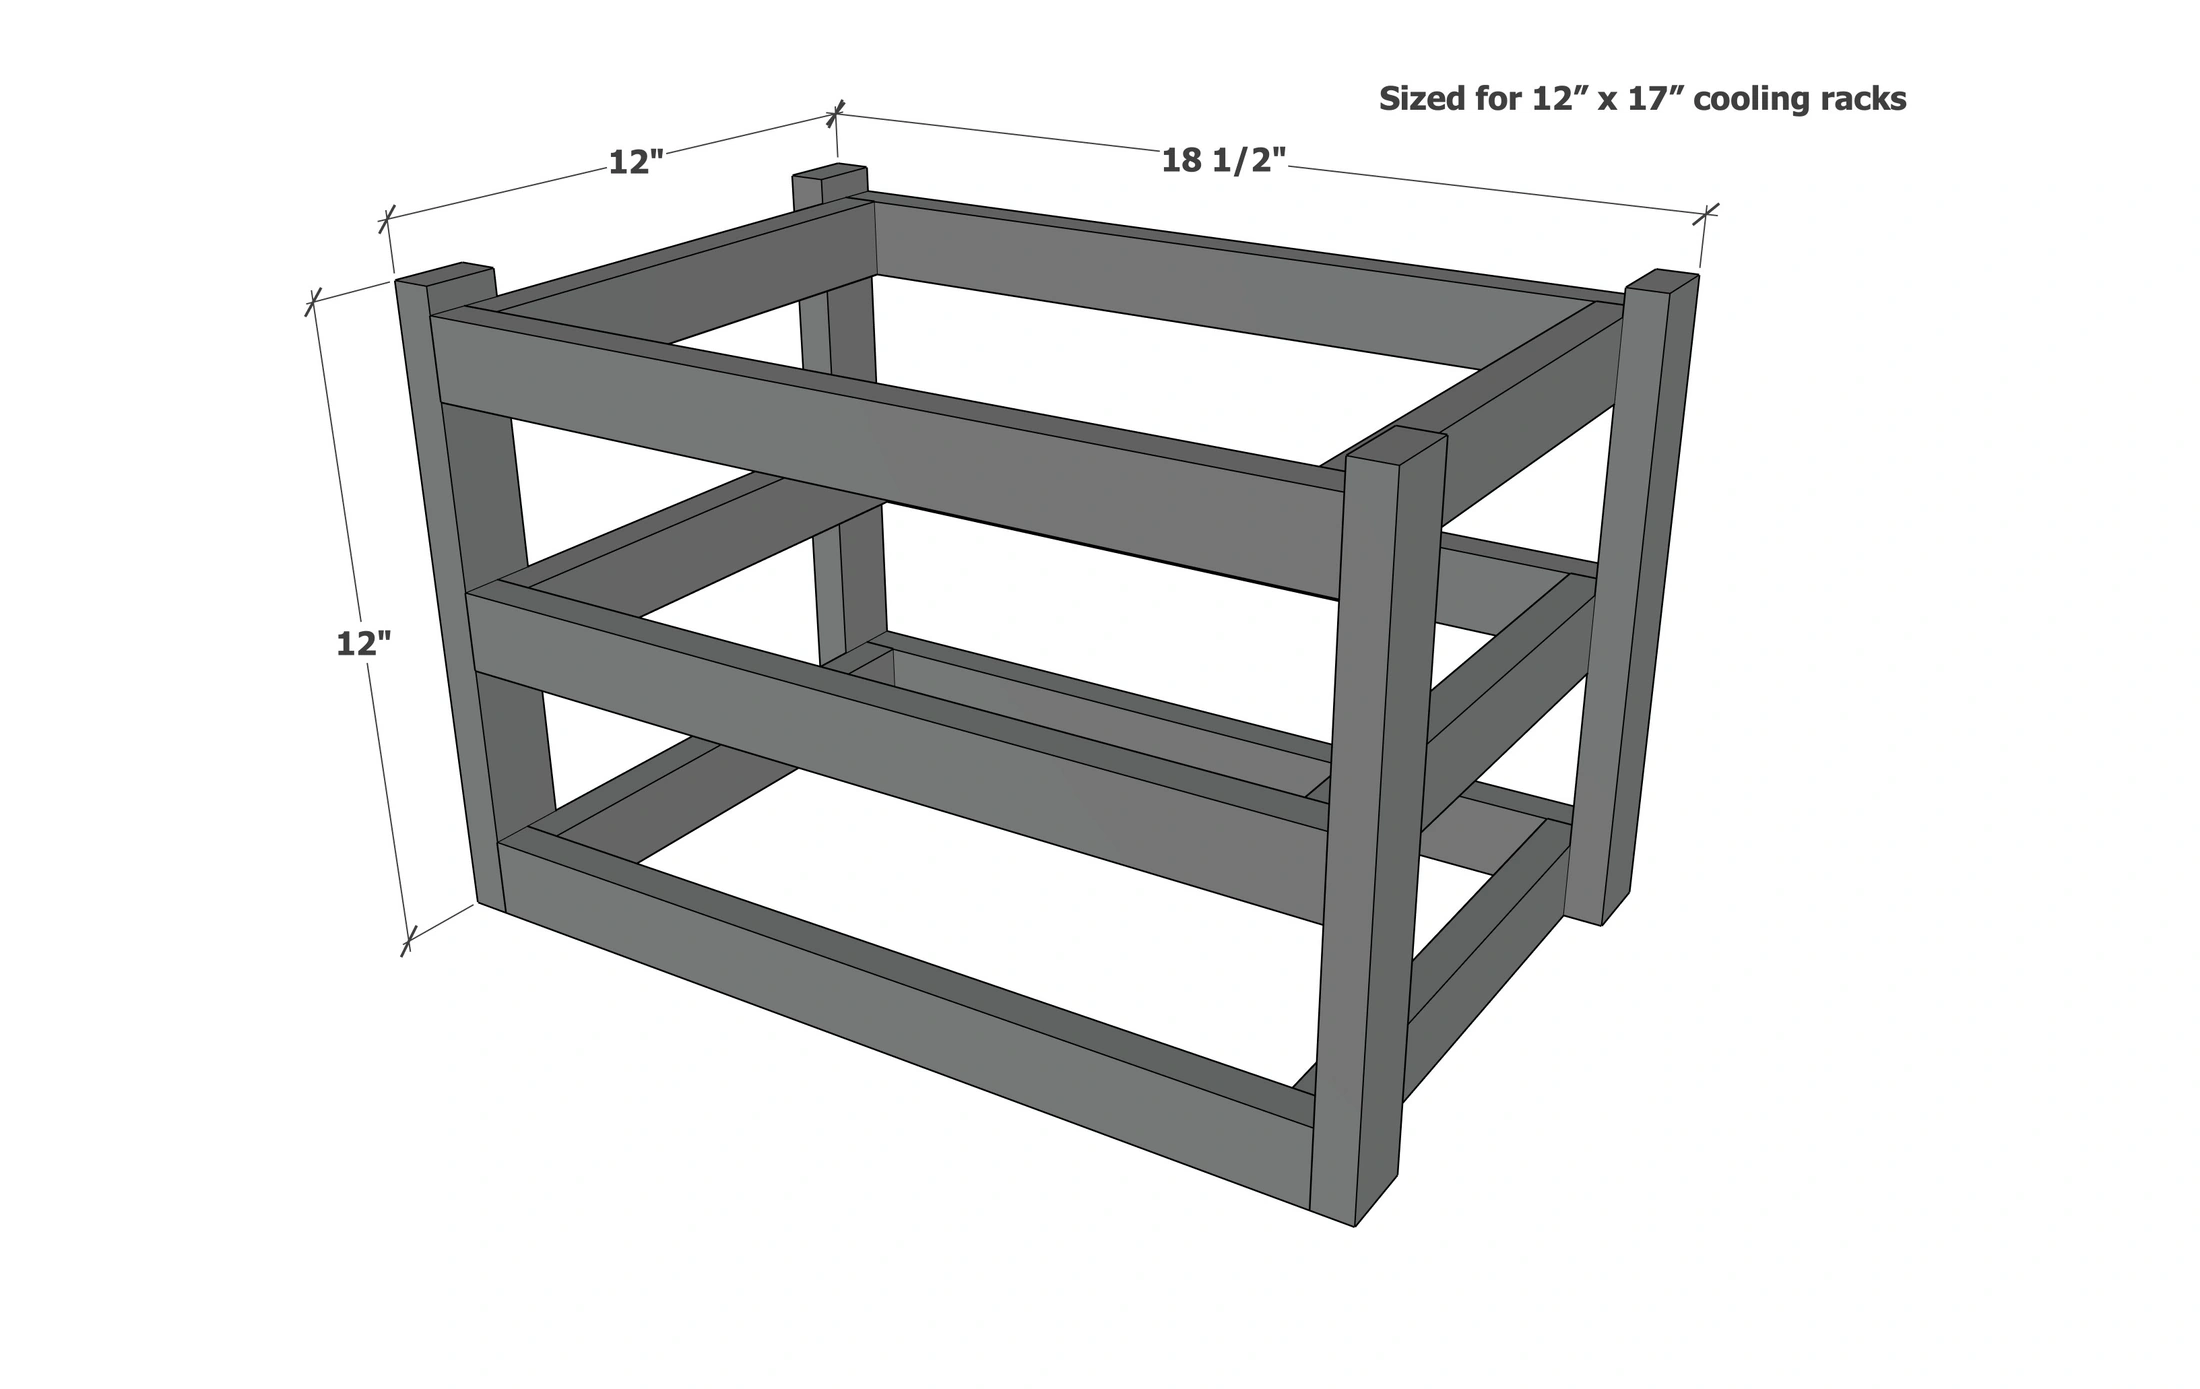
Use the size-specific shopping and cut lists below.
What you need
- 3 - 1x2x8
- 3 Trays - These measure 11 3/4" x 17"
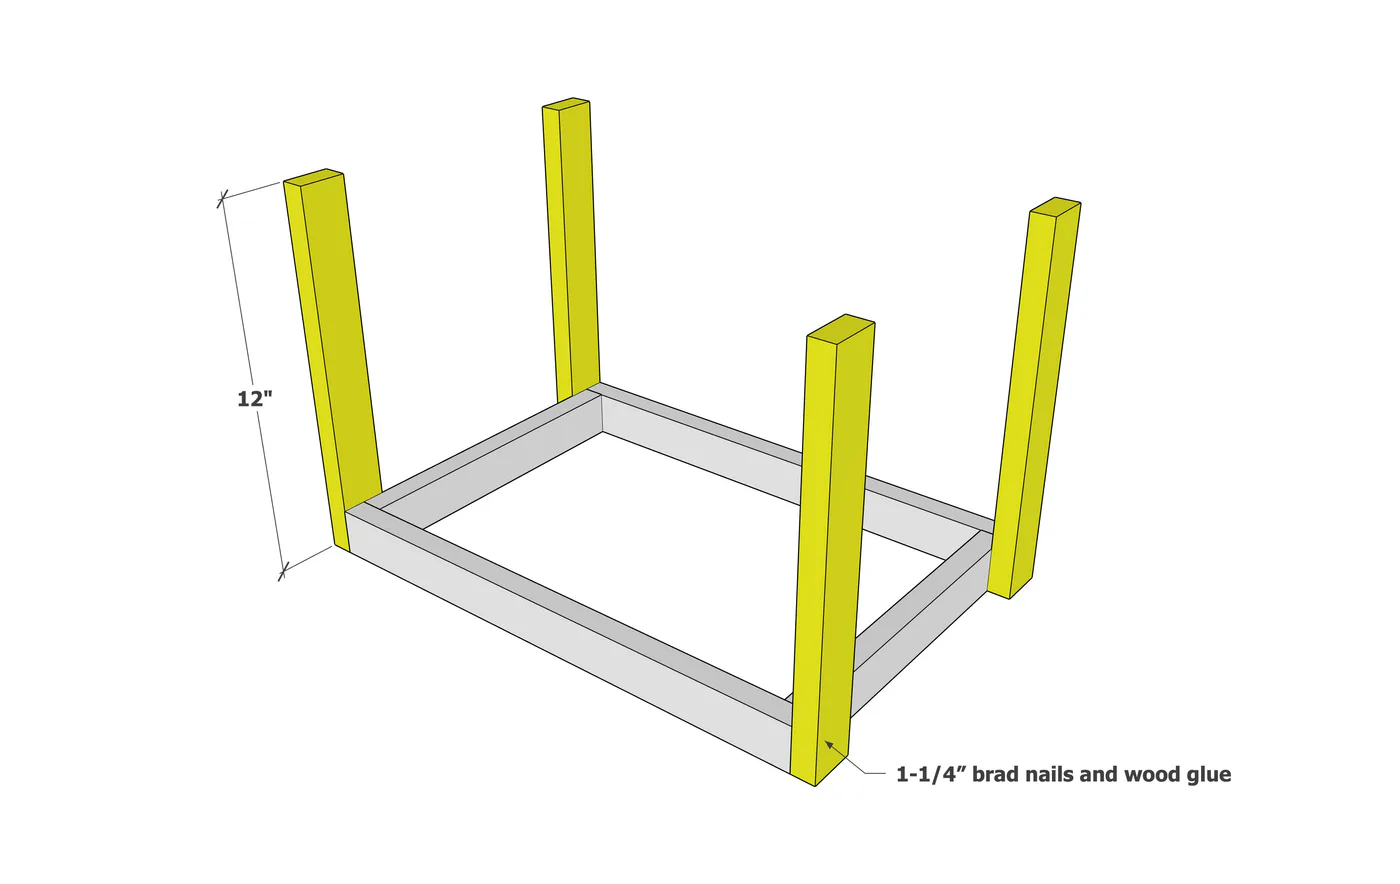
- 4 - 12" (Legs)
- 6 - 10-1/2" (inside cleats) - or the depth of your rack MINUS 1-1/2" (add about 1/4" clearance)
- 6 - 17" (front horizontal pieces) - or the width of your rack (add about 1/4" clearance)
- measuring tape
- pencil
- safety glasses
- hearing protection
- drill
- circular saw
- nailer
- sander
Step by step
Step 1
Build three tray frames as shown, about 1/4" bigger than your tray so its easy to put your tray in the rack.

Step 2
Add the legs to the bottom rack.
Step 3
Add the remaining trays to the legs.

Finishing
Sand all surfaces, starting with a medium grit and finishing with fine. Wipe off the dust, fill any holes or gaps with wood filler, and sand smooth once dry. Apply primer if you're painting, then finish with your choice of paint or stain and seal with a durable clear topcoat. For outdoor projects, use exterior-rated primer, paint or stain, and sealer so the piece stands up to the weather.