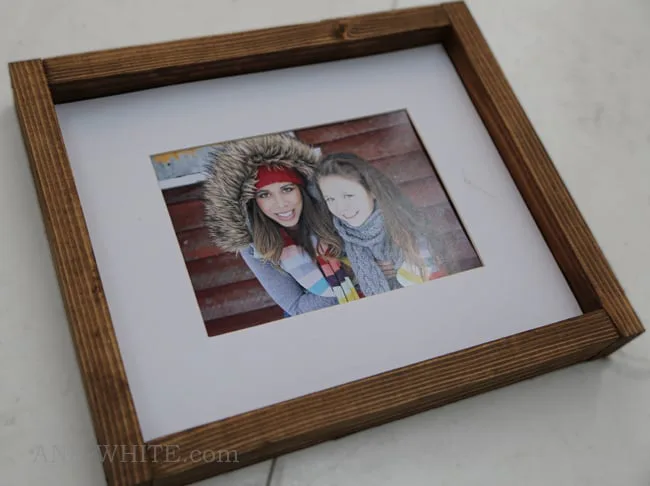
Collapsible Standing Wood Christmas Tree Shelf
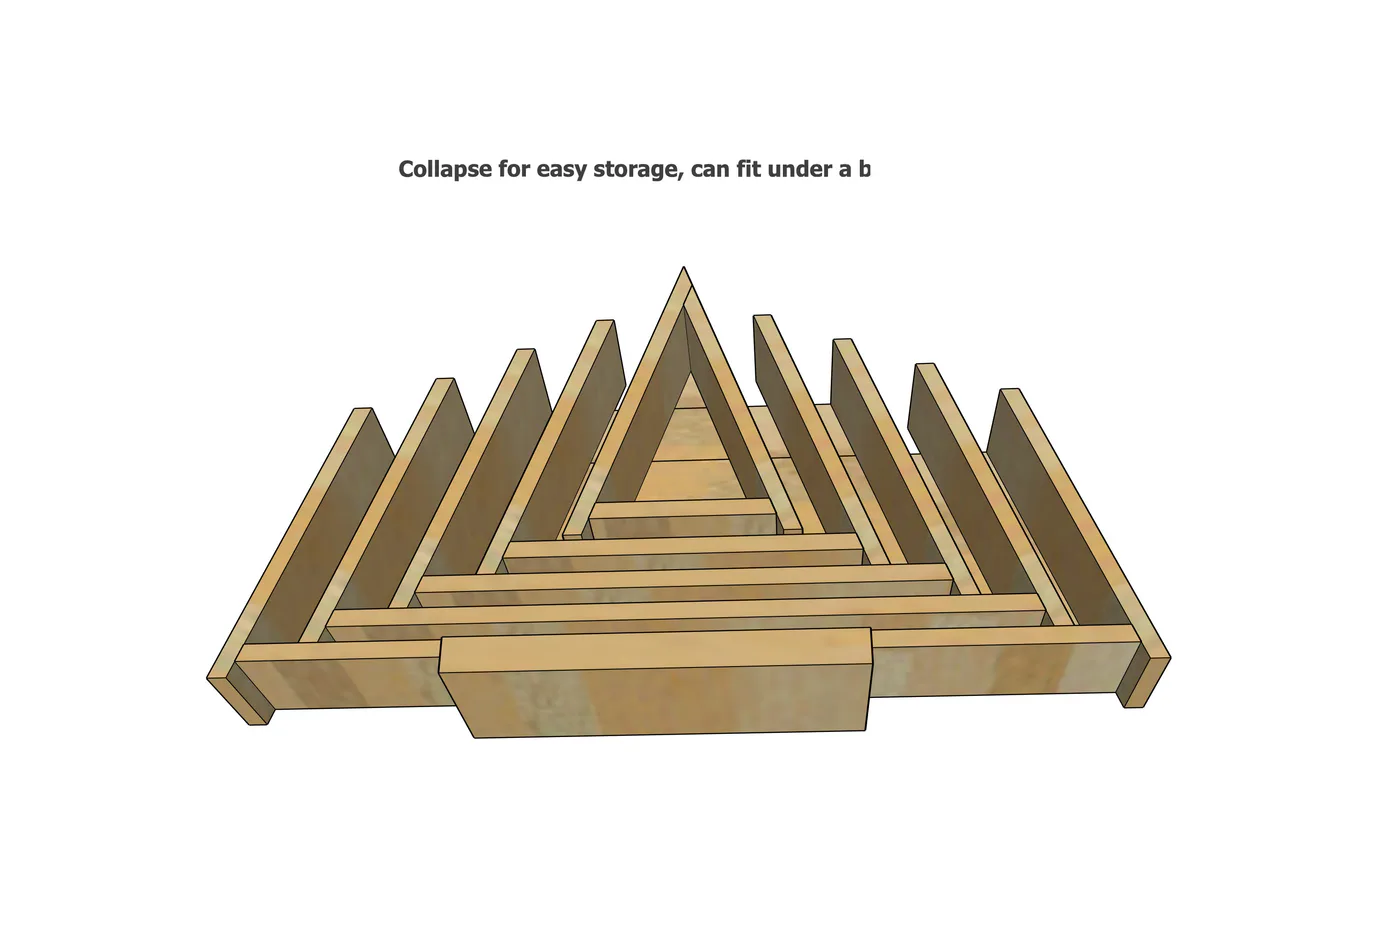
Looking for a space-saving, mess-free way to bring holiday charm into your home? This Collapsible Standing Wood Christmas Tree Shelf gives you all the joy of a tree — without the needles, water, or clutter. • No wall mounting required — it’s floor standing, so you don’t have to damage walls. • Collapses for easy storage — tuck it away when the season ends. • Multi-use decorating display — the “tree” can hold cards, ornaments, small gifts, or seasonal knickknacks. • Beginner-friendly & budget smart — assemble with basic tools and affordable lumber. •! Yep, completely you can browse before you build!

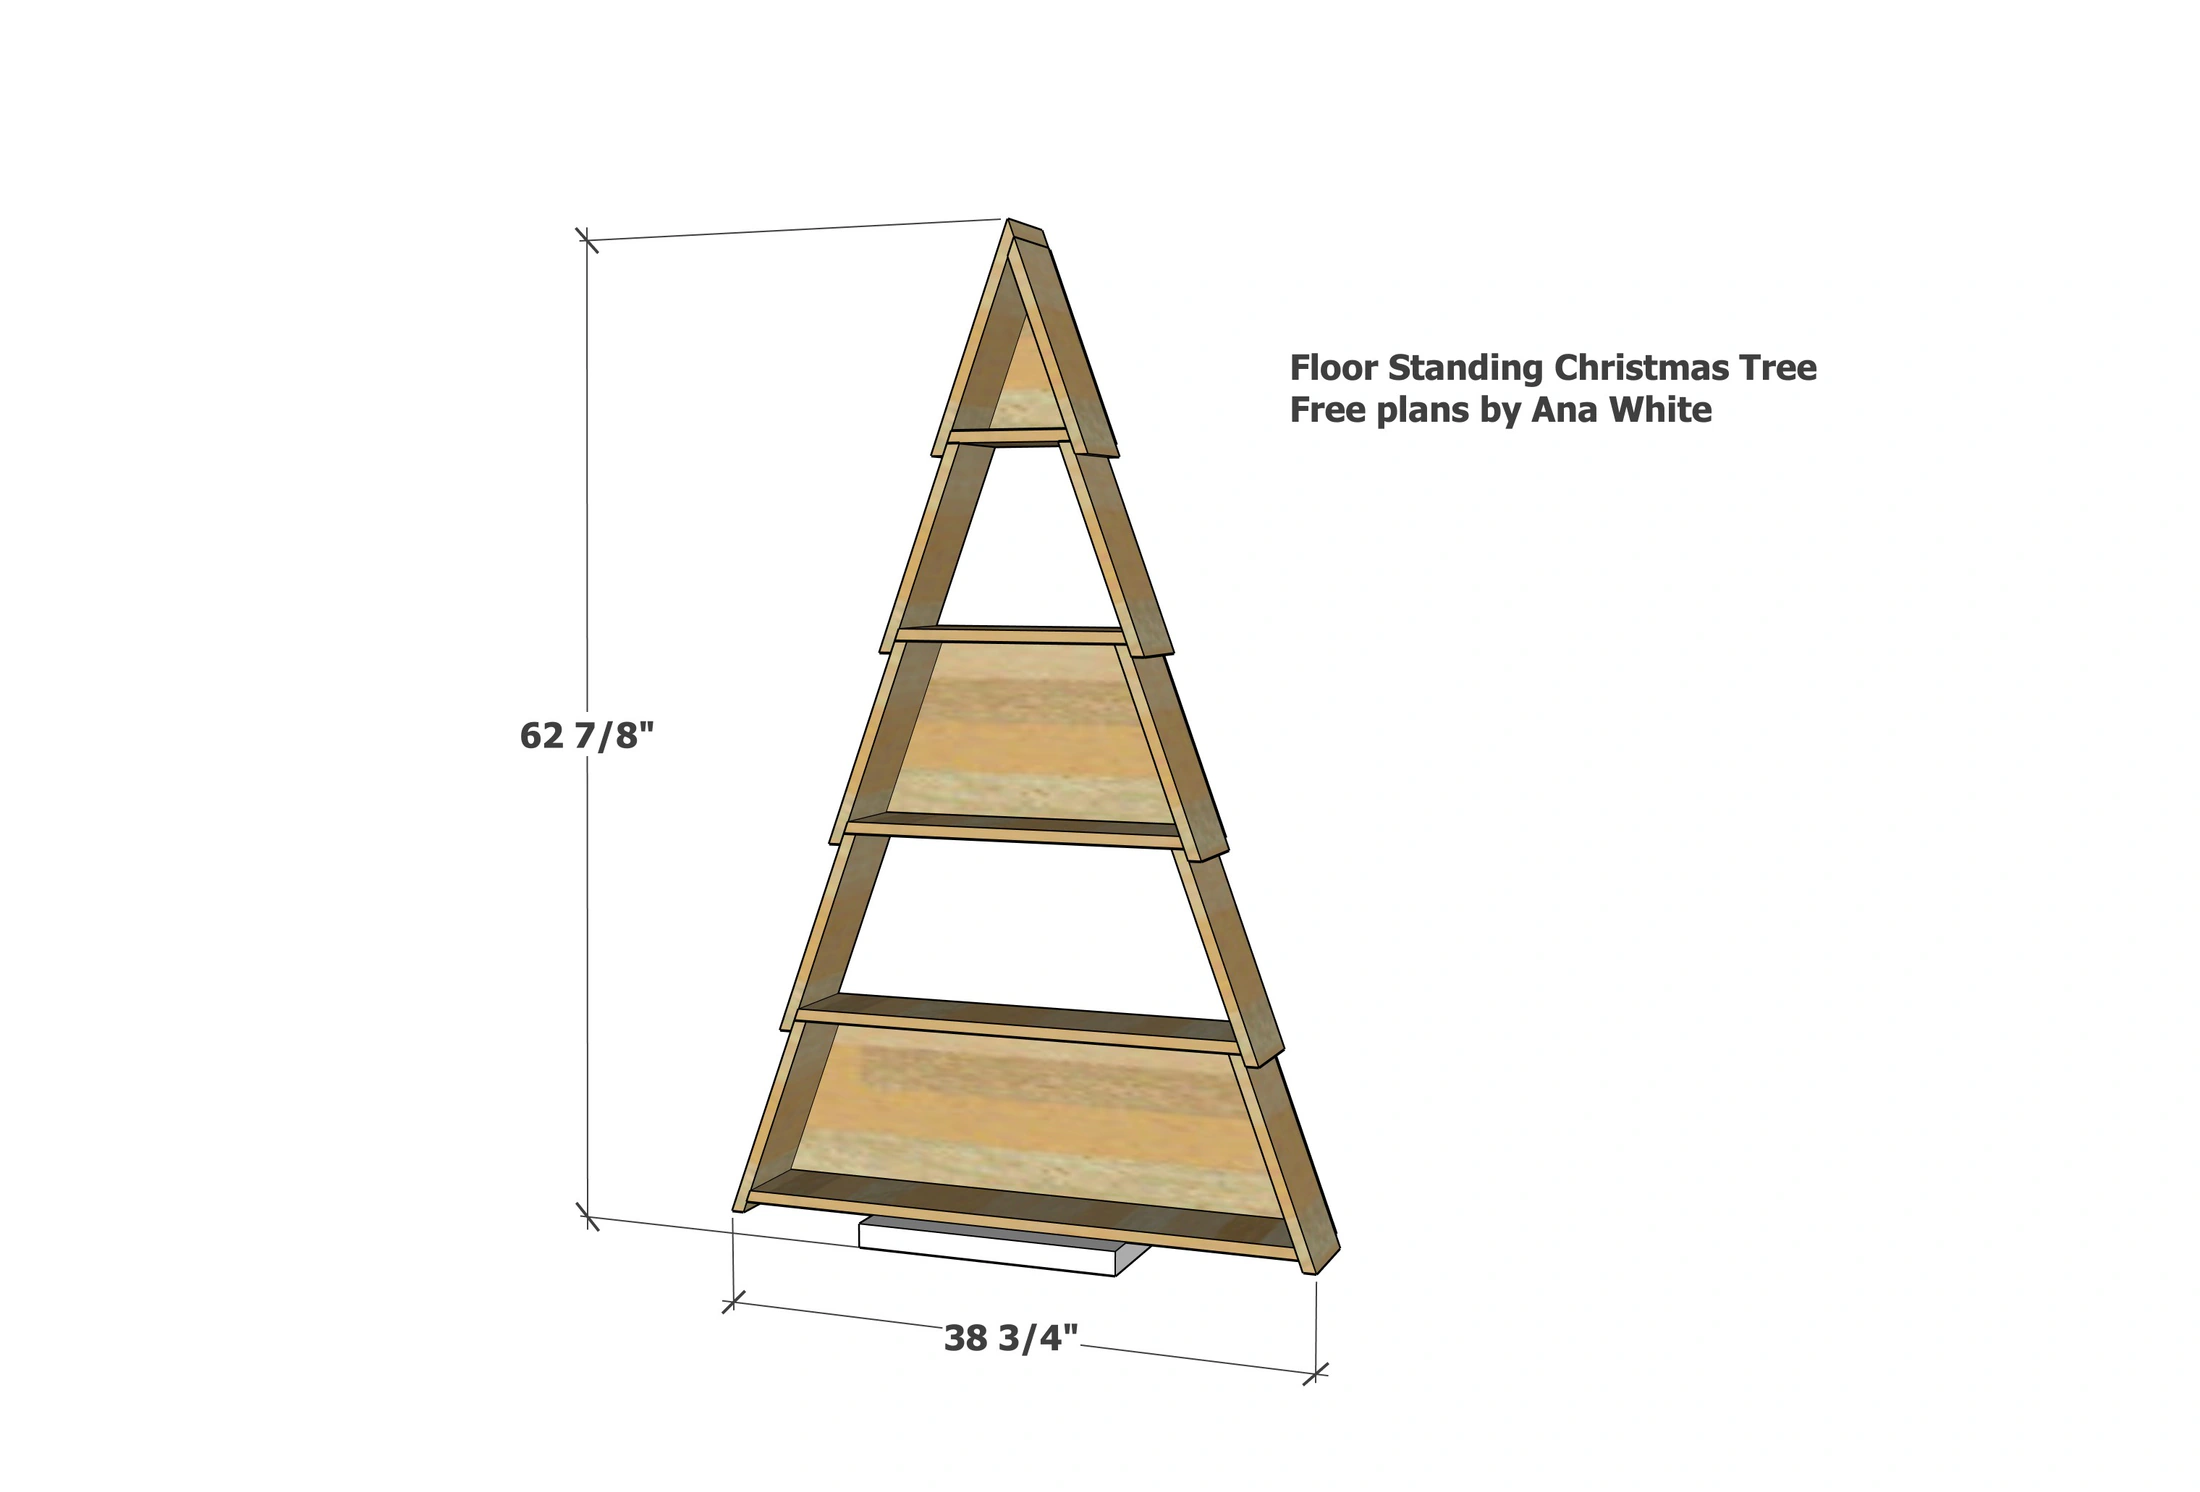
Dimensions
Use the size-specific shopping and cut lists below.
What you need
- 6 - 1x6 or cedar fence pickets, 6 feet long (not dog eared)
- 1-1/4" and 3/4" collated brad nails
- wood glue
- 1-1/4" self tapping star bit screws
- 2x8 or larger for the base, at least 16" long
NOTE: I used (4) 1x6 for the frame and cedar fence pickets for the back, I choose this because the 1x6 are a little thicker and there's a little more width to nail into.
- 1 - 1x6 or fence picket @ 14-7/8" - long point to long point, ends not parallel, top end is cut at 50 degrees, bottom end is cut at 20 degrees off square (top, longer piece)
- 1 - 1x6 or fence picket @ 13-5/8" - long point to long point, ends not parallel, top end is cut at 50 degrees, bottom end is cut at 20 degrees off square (top, shorter piece)
- 8 - 1x6 or fence picket @ 13-5/8" - long point to short point, both ends cut at 20 degrees, ends parallel (sides, lower layers)
- 1 - 1x6 or fence picket @ 8" - long point to long point, both ends cut at 20 degrees off square, long point to long point measurement (top, shelf)
- 1 - 1x6 or fence picket @ 15-1/8" - both ends cut at 20 degrees off square, long point to long point measurement (second layer, shelf)
- 1 - 1x6 or fence picket @ 22-1/4" - both ends cut at 20 degrees off square, long point to long point measurement (third layer, shelf)
- 1 - 1x6 or fence picket @ 29-1/2"" - both ends cut at 20 degrees off square, long point to long point measurement (fourth layer, shelf)
- 1 - 1x6 or fence picket @ 36-5/8" - both ends cut at 20 degrees off square, long point to long point measurement (bottom, shelf)
- 2x8 or larger for the base, at least 16" long
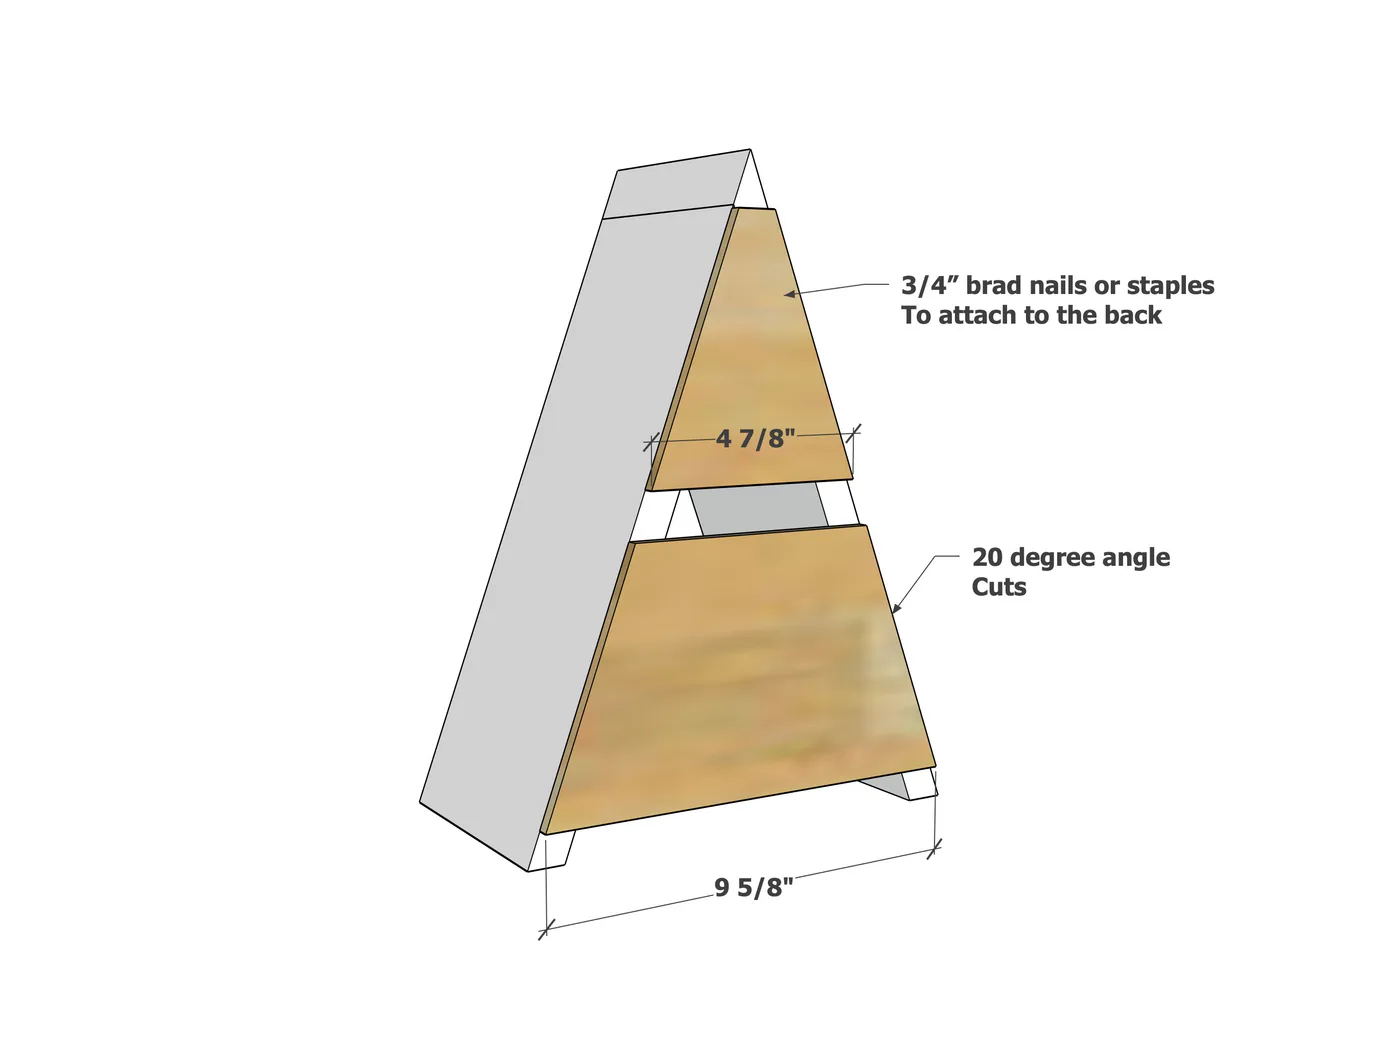
- 4-7/8"
- 9-5/8"
- 19-1/8"
- 23-7/8"
- 33-1/2"
- 38-1/8"
MAIN FRAME PIECES
BACK PIECES, in order of top to bottom, long point to long point measurements, both ends cut at 20 degrees off square, ends NOT parallel
- measuring tape
- pencil
- safety glasses
- drill
- compound miter saw
- nailer
- staple gun
Step by step
Step 1
Cut the top pieces and match. Attach together with glue and 1-1/4" brad nails.

Step 2
Use two rows of cedar fence pickets, with a small gap in between, to cover the back. Attach with 3/4" brad nails and glue.
Step 3
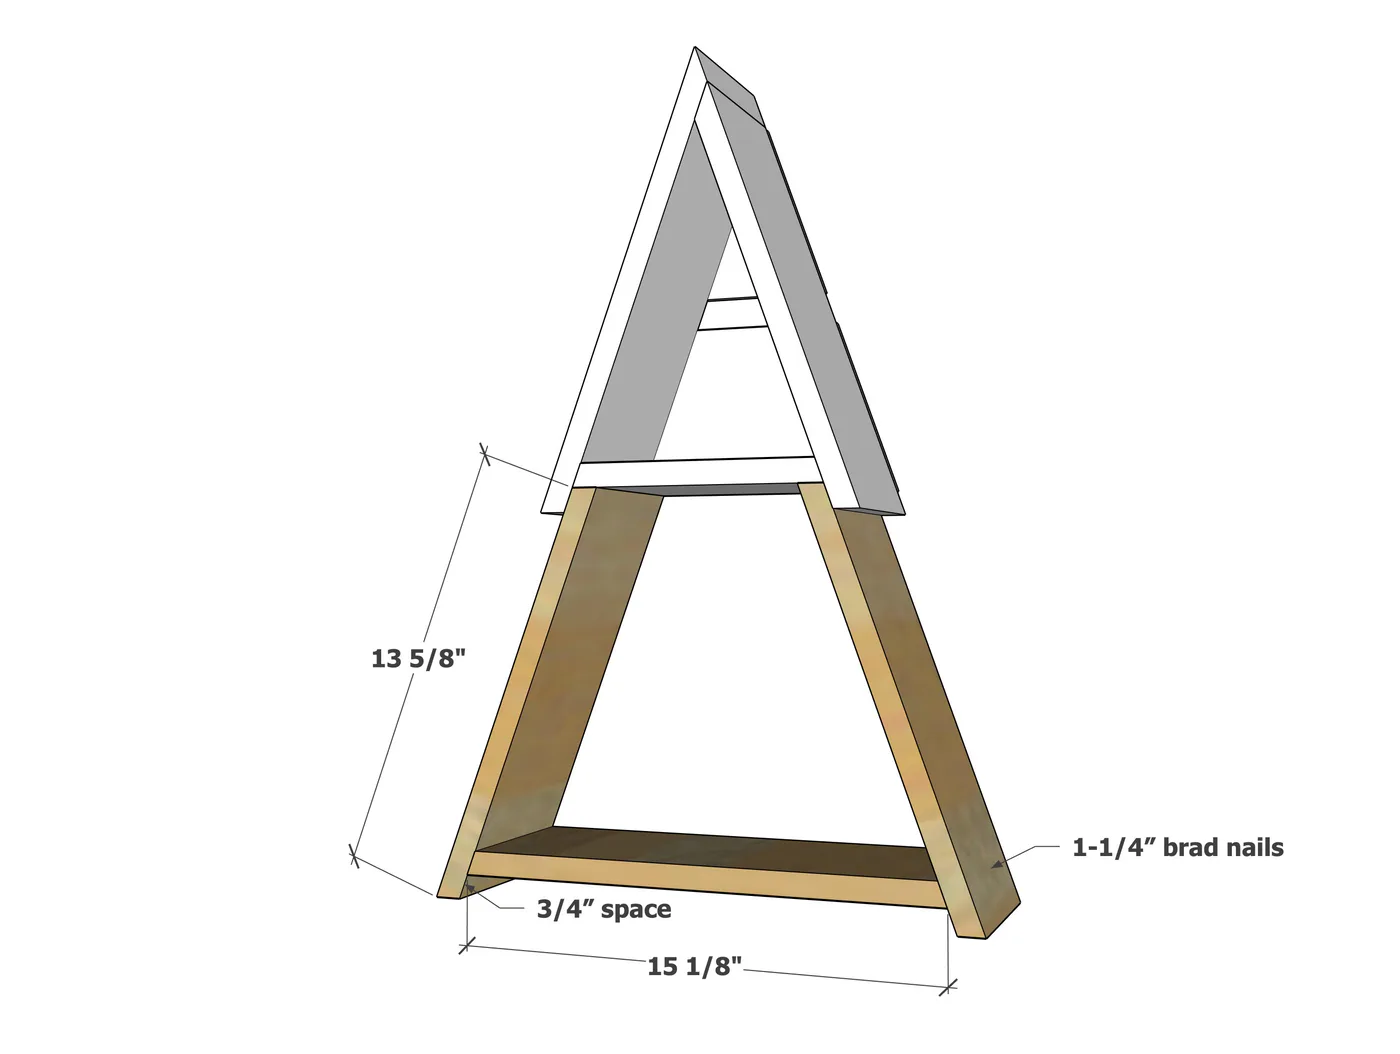
Build the next layer using 1-1/4" brad nails and glue. Test that it fits under the top. Do not attach to the top at this time.
Step 4
Layout the next row, and build.

Step 5
To the back of the third row, add cedar fence pickets as shown and attach with glue and 3/4" brad nails or staples.
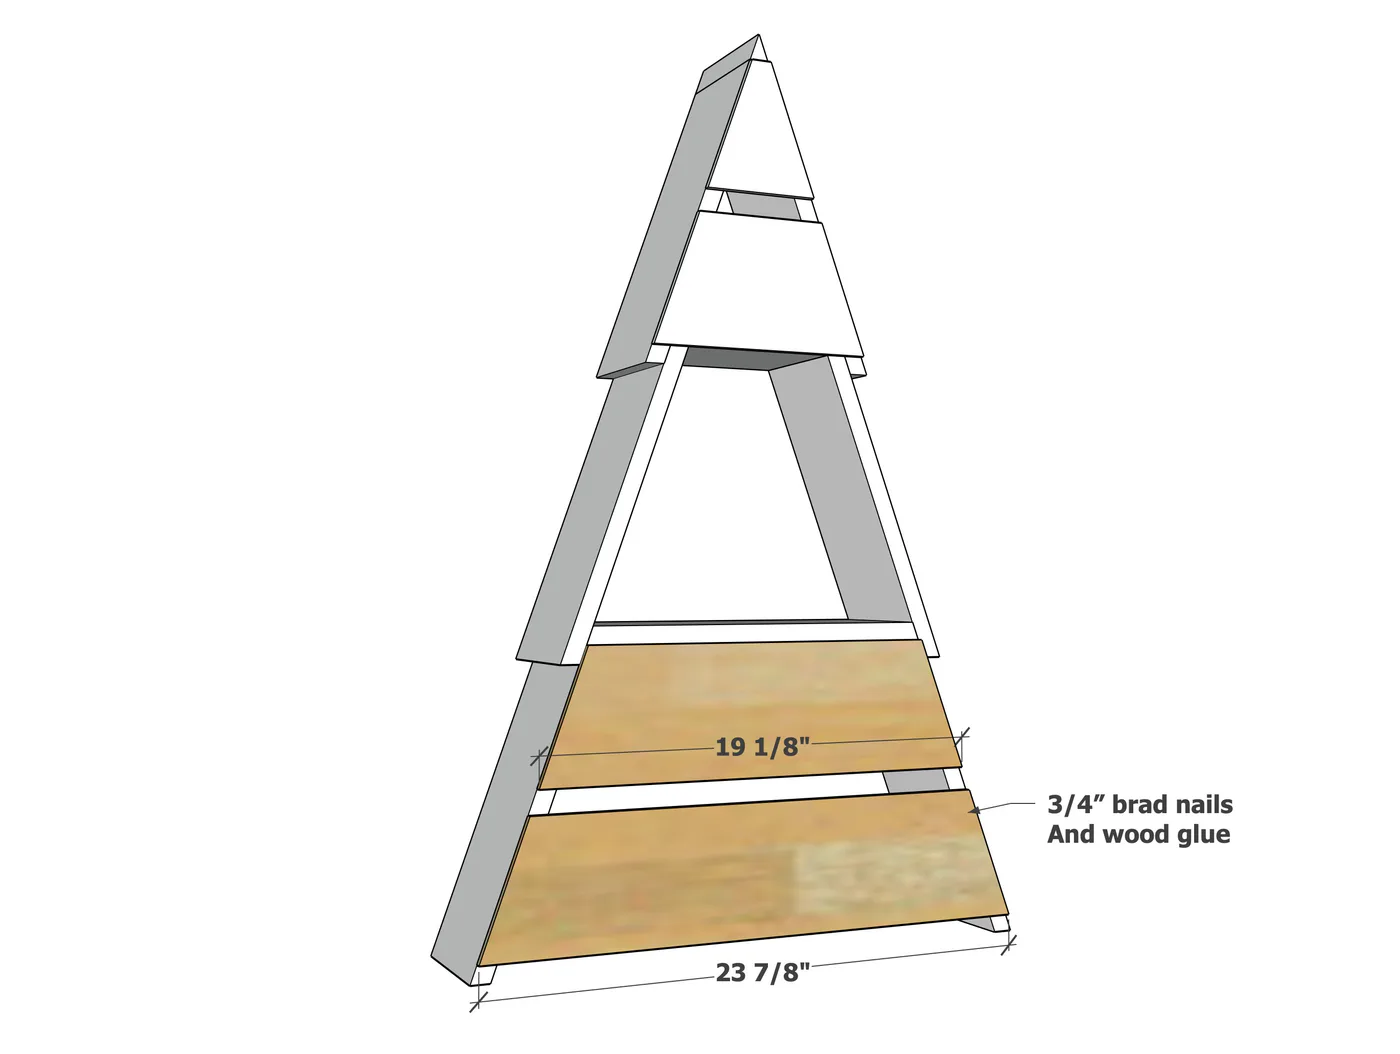
Step 6
Repeat for the fourth row.

Step 7
Add the final row, attach a back to it.
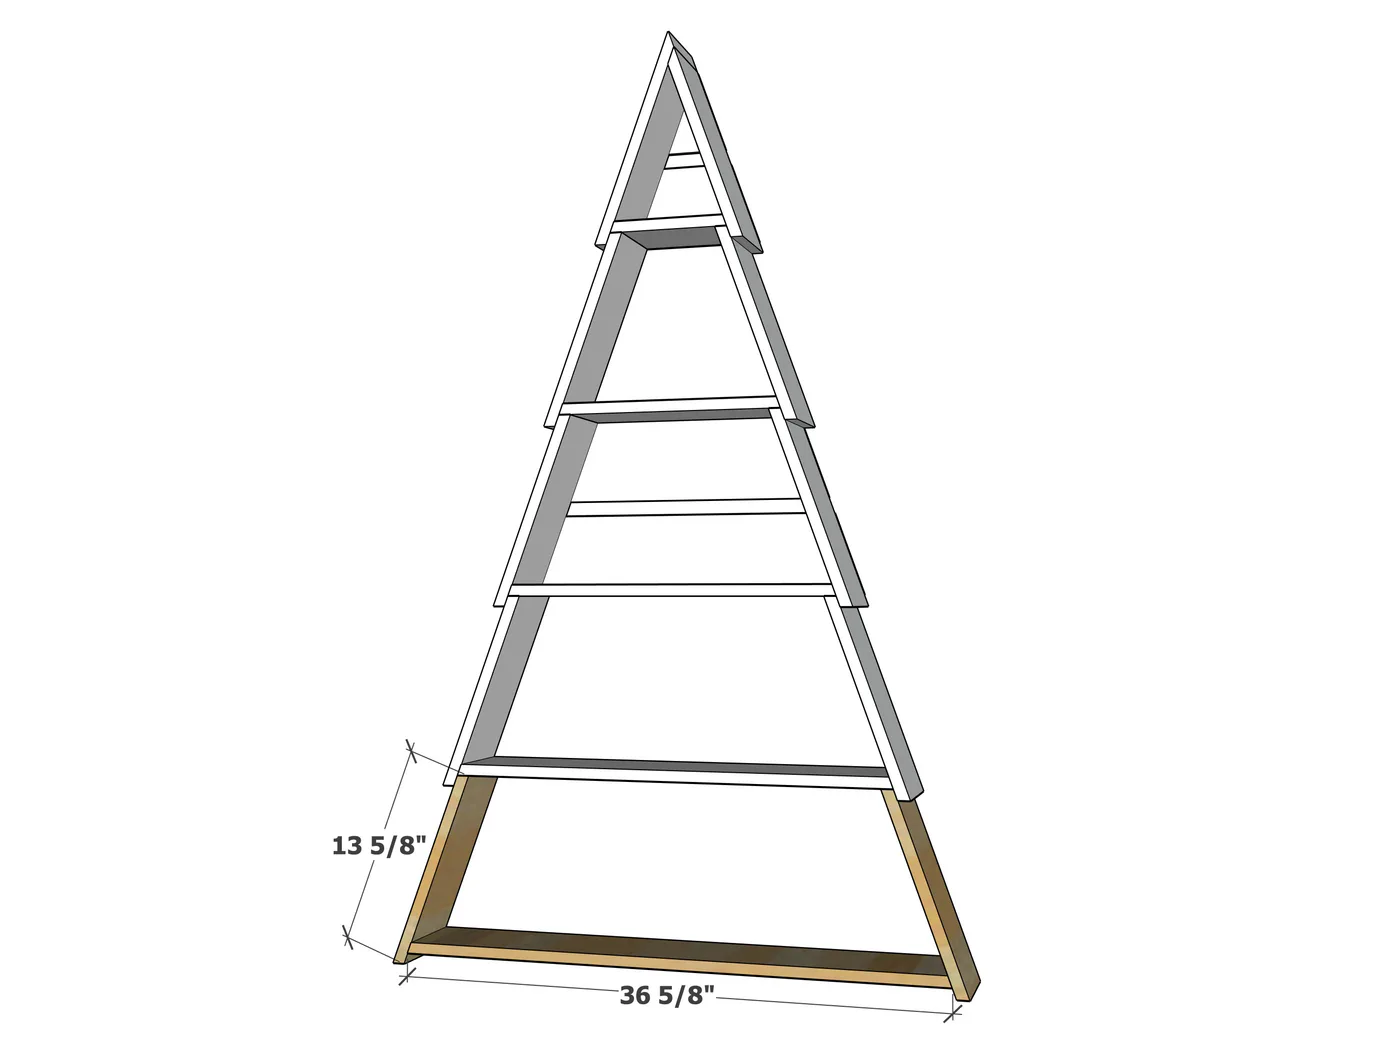
Step 8
Add back pieces to the back of the bottom row.
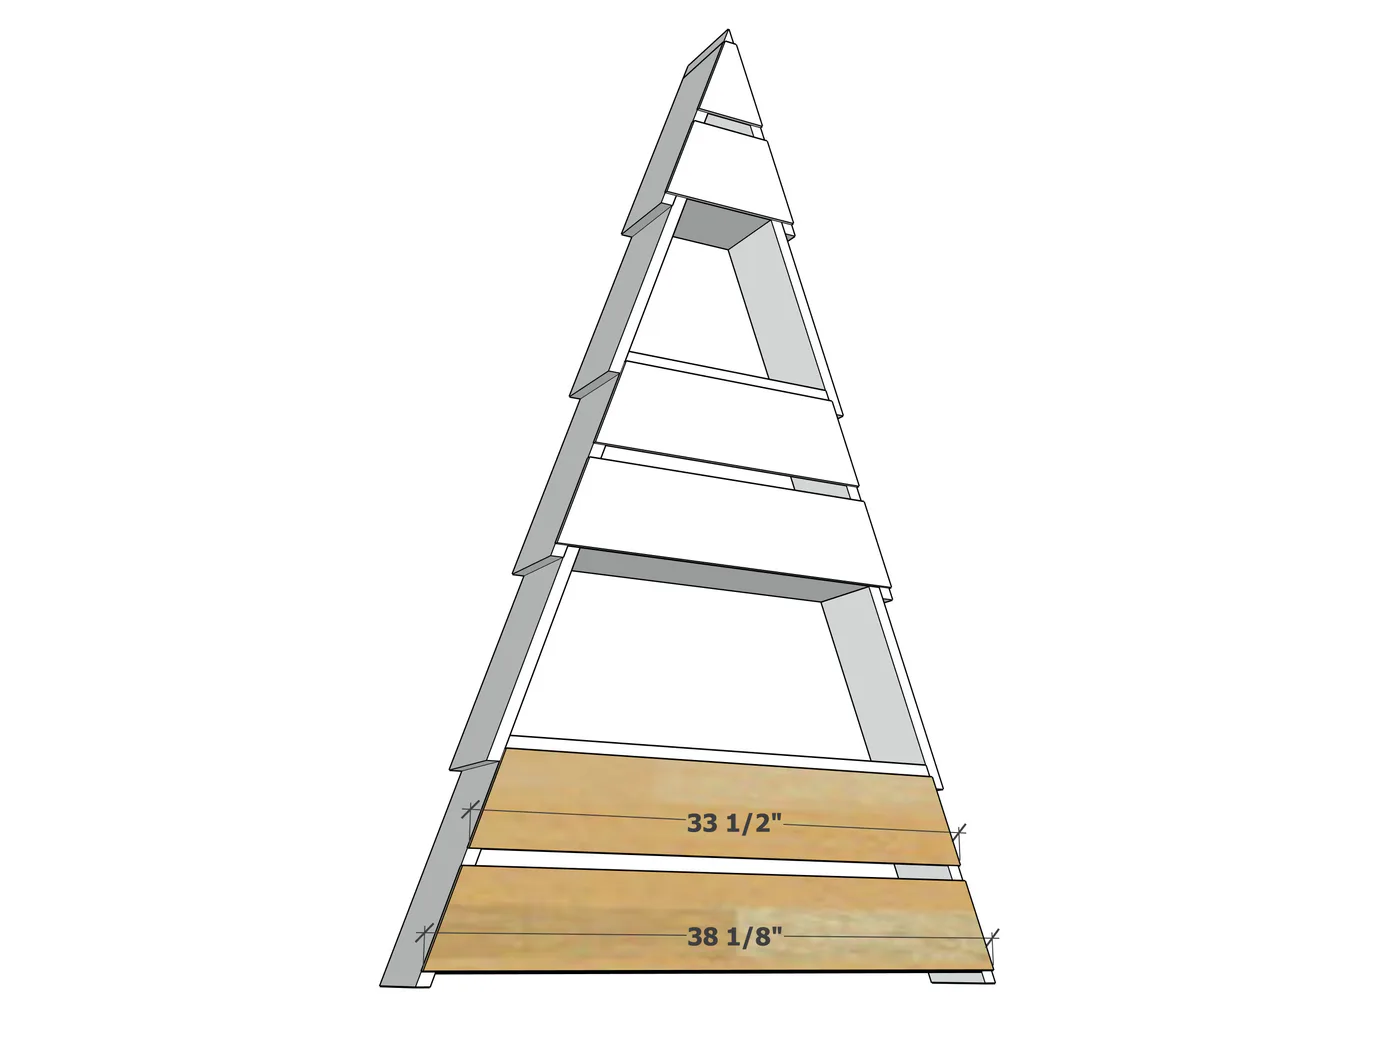
Step 9
Attach the base to the bottom with 1-1/4" screws.
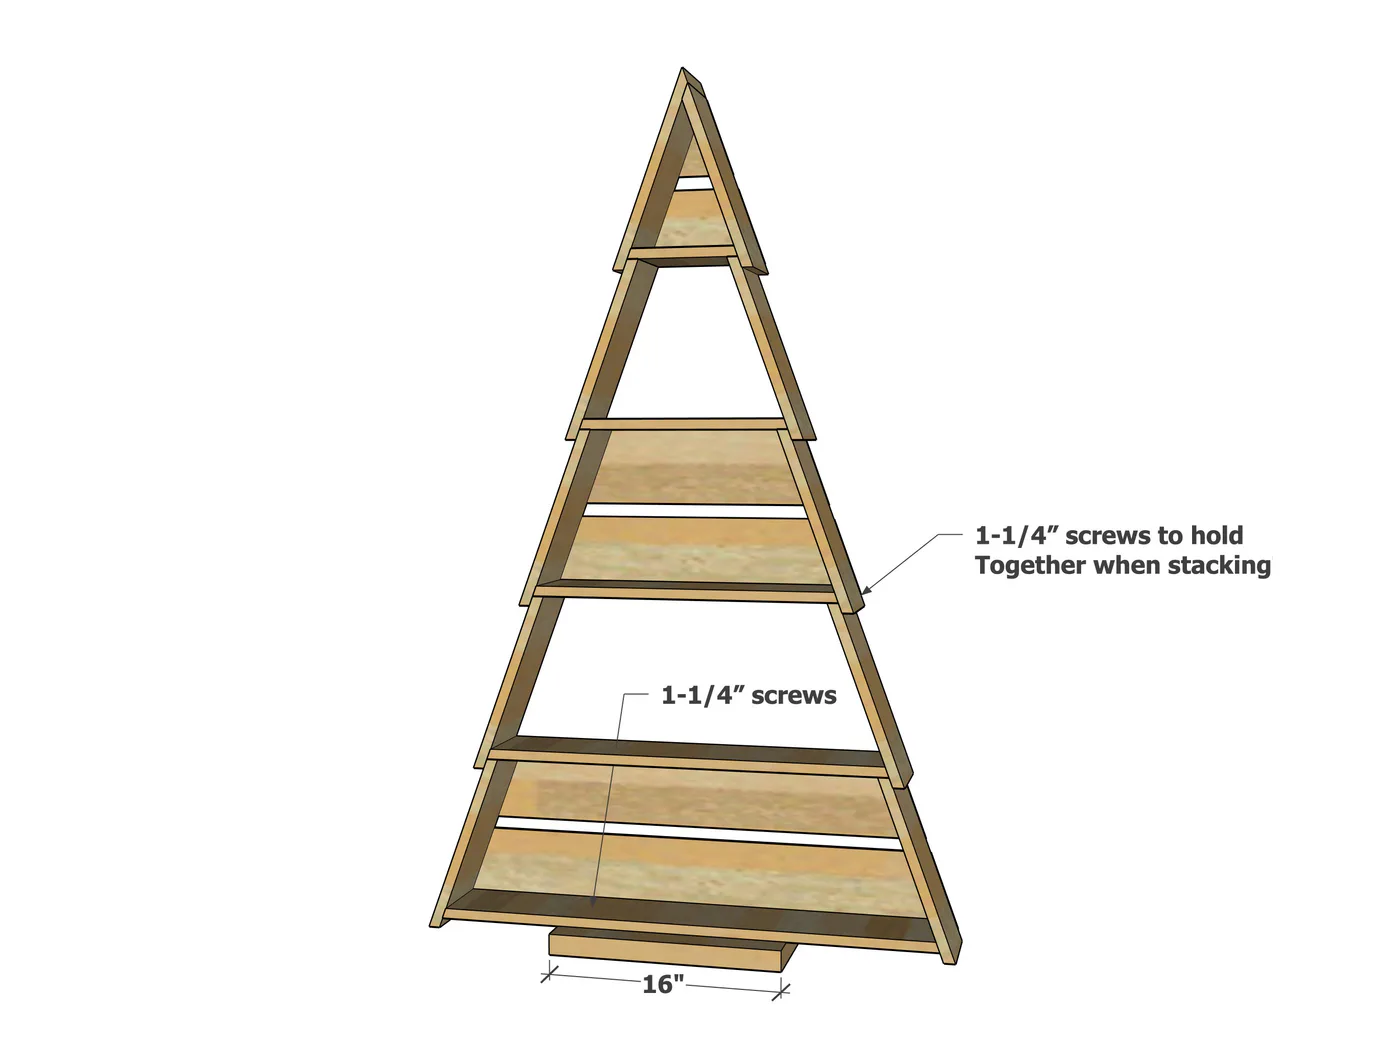
Separate out the pieces and finish with a stain.
To reassemble, stack and then attach where the sides lap with 1-1/4" screws.
Finishing
Sand all surfaces, starting with a medium grit and finishing with fine. Wipe off the dust, fill any holes or gaps with wood filler, and sand smooth once dry. Apply primer if you're painting, then finish with your choice of paint or stain and seal with a durable clear topcoat. For outdoor projects, use exterior-rated primer, paint or stain, and sealer so the piece stands up to the weather.