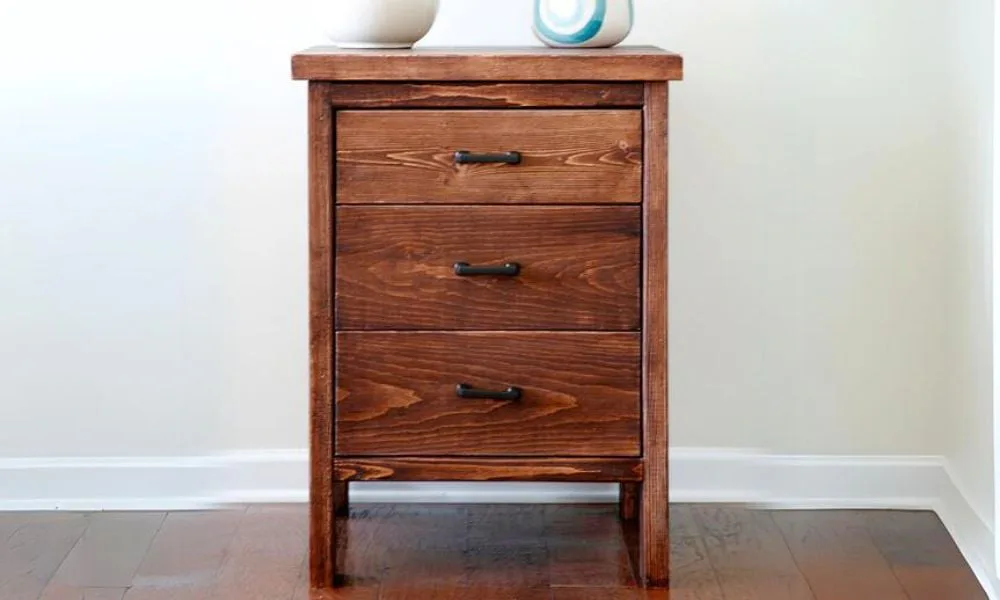
Chest of Drawers from 2 by 4s
I made this project from an old work table and some wood left over from another project for Ana's scrap wood competition I have drawn up a cut list for you though as if you were using full size boards.
What you need
- measuring tape
- square
- pencil
- safety glasses
- kreg-jig
- drill
- compound miter saw
Step by step
I made the inserts for the sides from 4 four pieces of 2 by 4.
Put the pocket holes on the inside and also put a pocket hole in the top and bottom of each piece to fix to the top and bottom rails. If you prefer you can use a piece of plywood for a solid panel look instead.
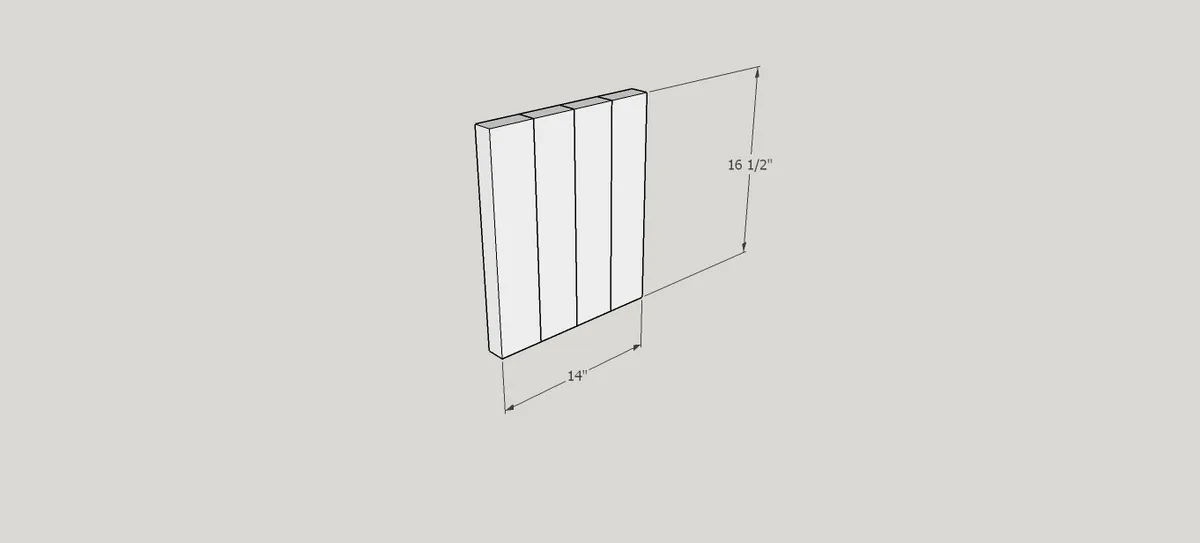
Make the side frame by attaching the two 29.5 inch legs and the 14 inch 2 by 4s as the top and
bottom rails. The actual width of the 2 by 4s may not be exactly 3.5 inches and so you may need to trim the 14 inch side rails slightly once you have the insert part made.
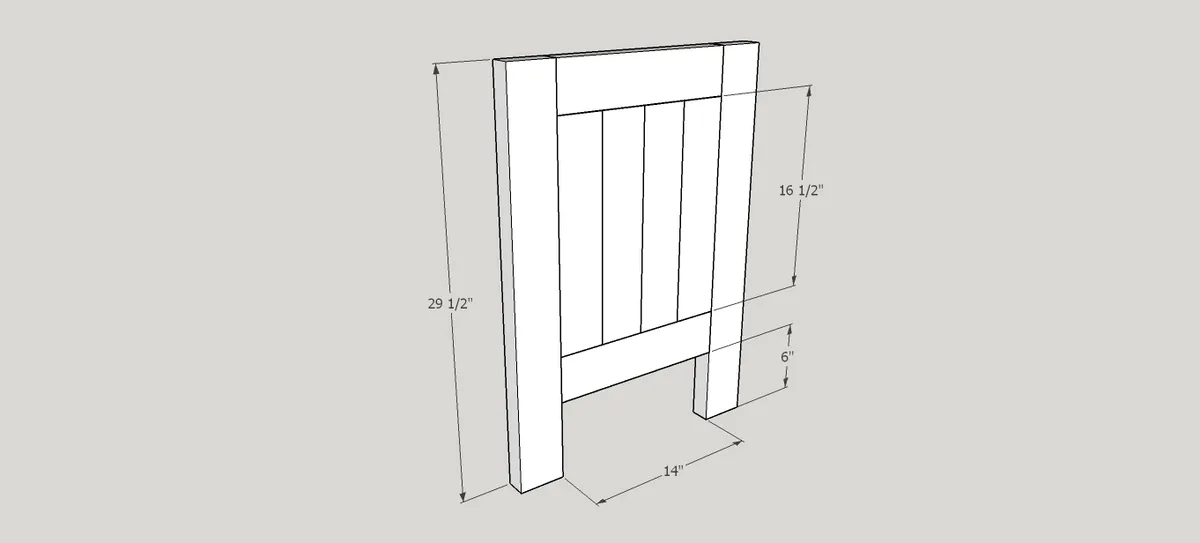
Add the 2 by 4 pieces of back rail as shown.
Make sure the pocket holes are on the inside. The pocket holes should be drilled on the narrow part of each piece.
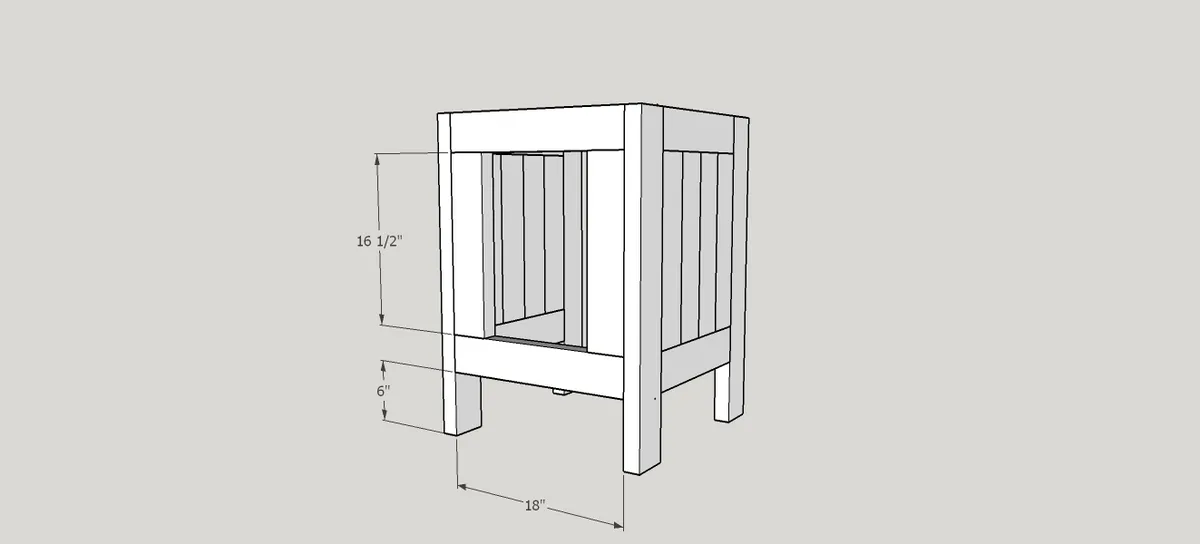
Add the 2 by 4 front rail pieces as shown.
I put the pocket holes for the top rail on the top so would be hidden by the top. For the bottom rail I put them underneath so they would be hidden. The pocket holes should be drilled on the narrow end part of each piece.
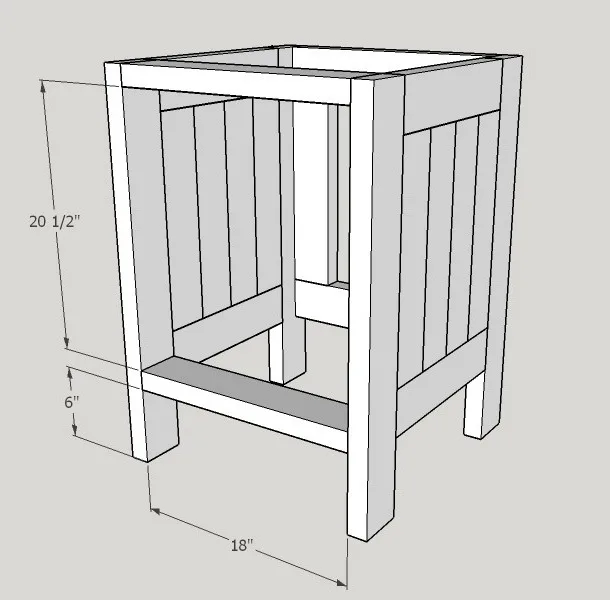
Step 5
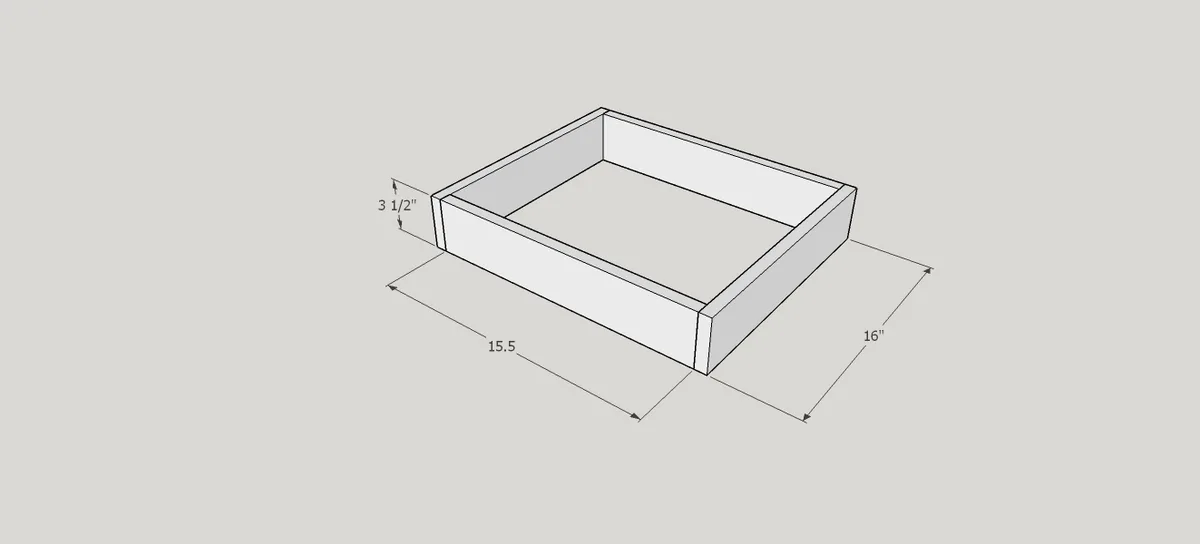
Make the two larger drawers.
Drill pocket holes in the both ends of the 15 ½ inch length 1 by 6 drawer pieces. Join the 16 inch pieces to the 15 ½ inch lengths to form the drawers. You can either route the sides to fit ¼ inch plywood base inside or fix the base to the bottom. Fit the drawer slides to the bottom of the drawers as well.
Follow the instructions of your slides to fit them to the sides of the cabinet.
Usually there should end up being half an inch gap between the bottom of the drawers and top of the rail underneath it but follow the instructions that come with your drawer slides.
Fit the drawer fronts.
The small drawer front is the 1 by 6 piece measuring 17 ¾ inches long (1/4 inch narrower than the space they are fitting). Measure and cut to fit your project though. The large drawer fronts are the 1 by 8 pieces measuring 17 ¾ inches long (1/4 inch narrower than the space they are fitting). Measure and cut to fit your project though. Fit the drawer fronts ensuring equal gap at top and outer edge for both. Drill two holes through the inner drawer front and then fix the outer drawer front by screwing through the inner drawer front into the outer drawer front using 1 ¼ inch screws.
Step 9
Make the top from the four 2 by 6 pieces measuring 22.5 inches long (this gives a ¾ inch overlap on each side.
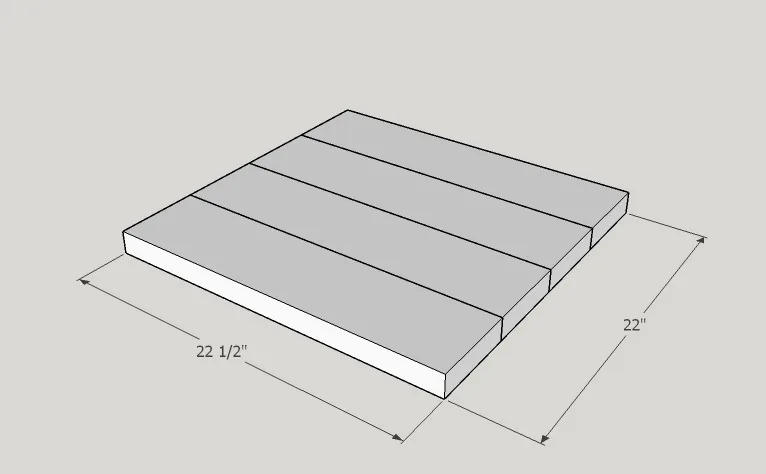
Step 10
Drill pocket holes on the side and back panels facing upward for screwing the first top layer to with 2 ½ inch pocket hole screws. Drill through the top of the front 2 by 4 rail so the top can be screwed on from underneath. Place the top with the good side down and then place the upturned cabinet on top. Make sure you have equal gap all around and then fix the sides and back with 1 ¼ inch pocket hole screws and the front edge with 2.5 inch wood screws through the front rail.
Fit the back panels from the inside.
I suggest you leave at least half an inch gap around the edge and use ¾ inch finishing nails to fix it. Dimensions given in plan (12 inches by 17 ½ inches) allow for 1 inch overlap around each side.
Sand well to smooth our joints and remove any wood glue residue.
Apply Pre stain and your choice of color or paint as desired. The example in these plans was finished in Varathane Carrington and Varathane Matte Poly.
Step 13
Add hardware of your choice to the drawers (you will need to temporarily remove the front drawer parts).
Finishing
Sand all surfaces, starting with a medium grit and finishing with fine. Wipe off the dust, fill any holes or gaps with wood filler, and sand smooth once dry. Apply primer if you're painting, then finish with your choice of paint or stain and seal with a durable clear topcoat. For outdoor projects, use exterior-rated primer, paint or stain, and sealer so the piece stands up to the weather.