Build Michaela's Kitchen Island
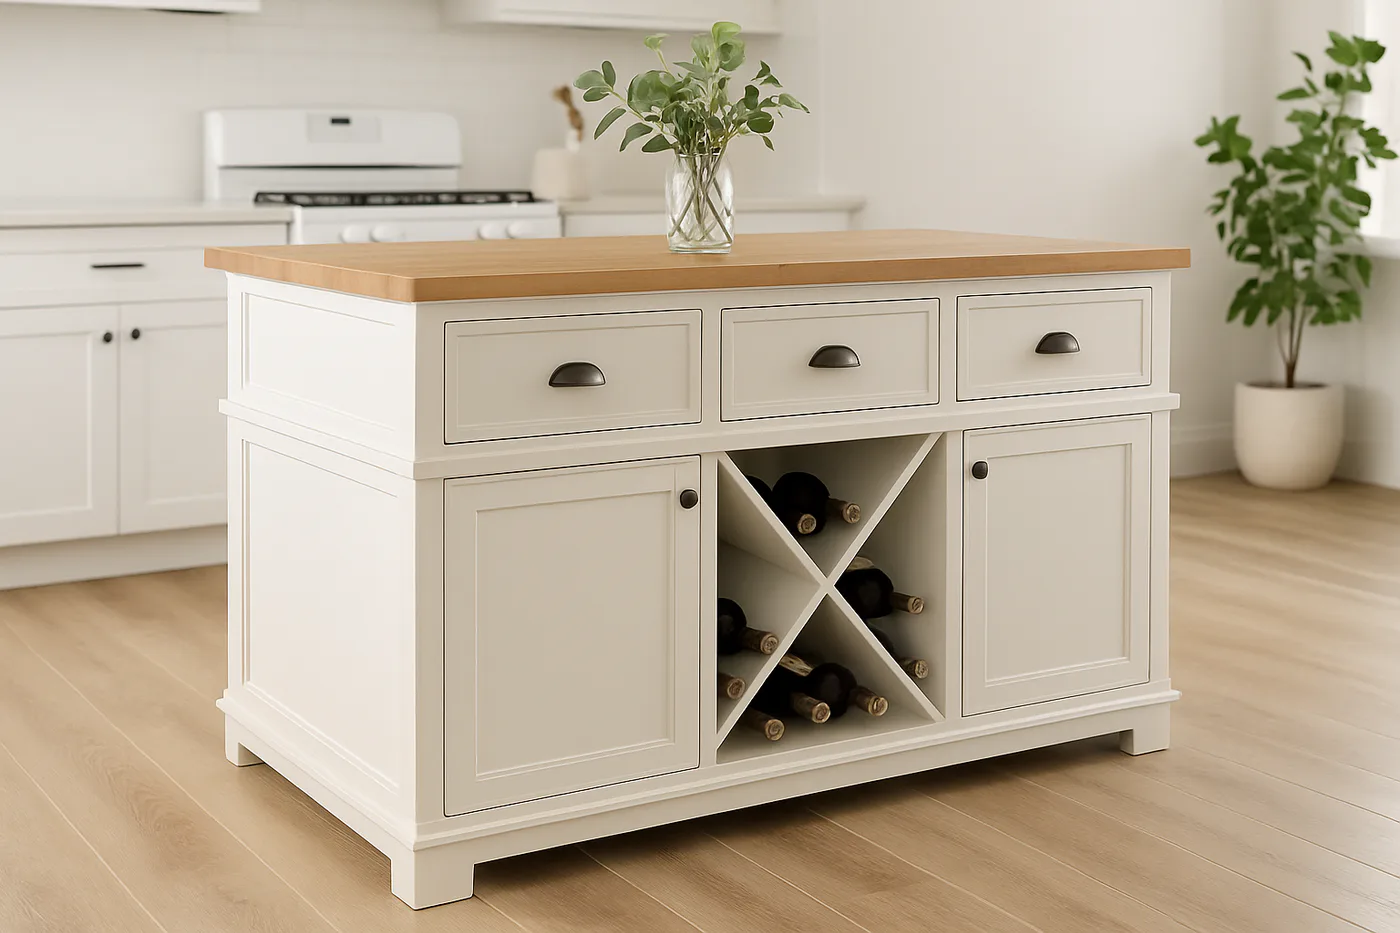
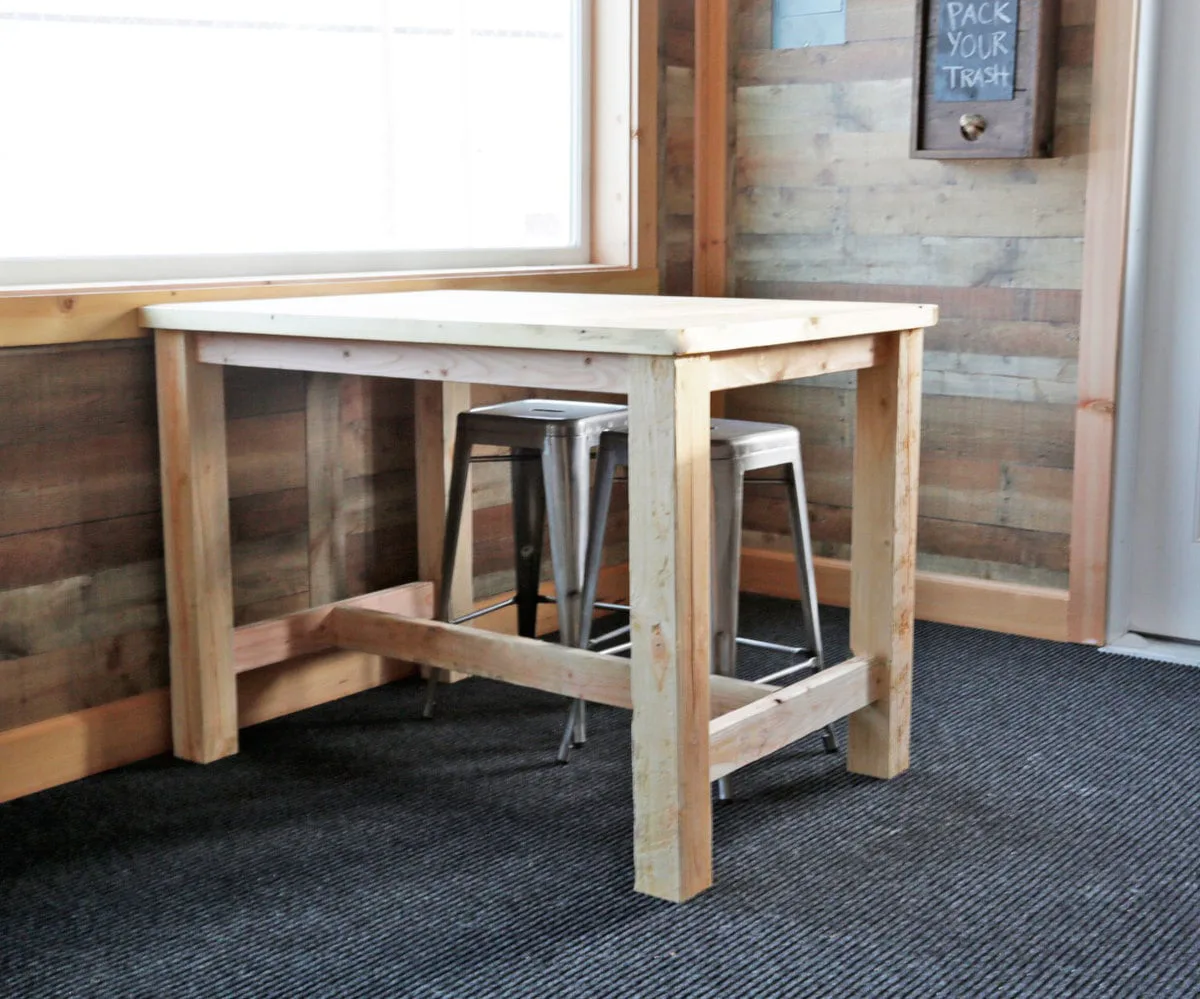
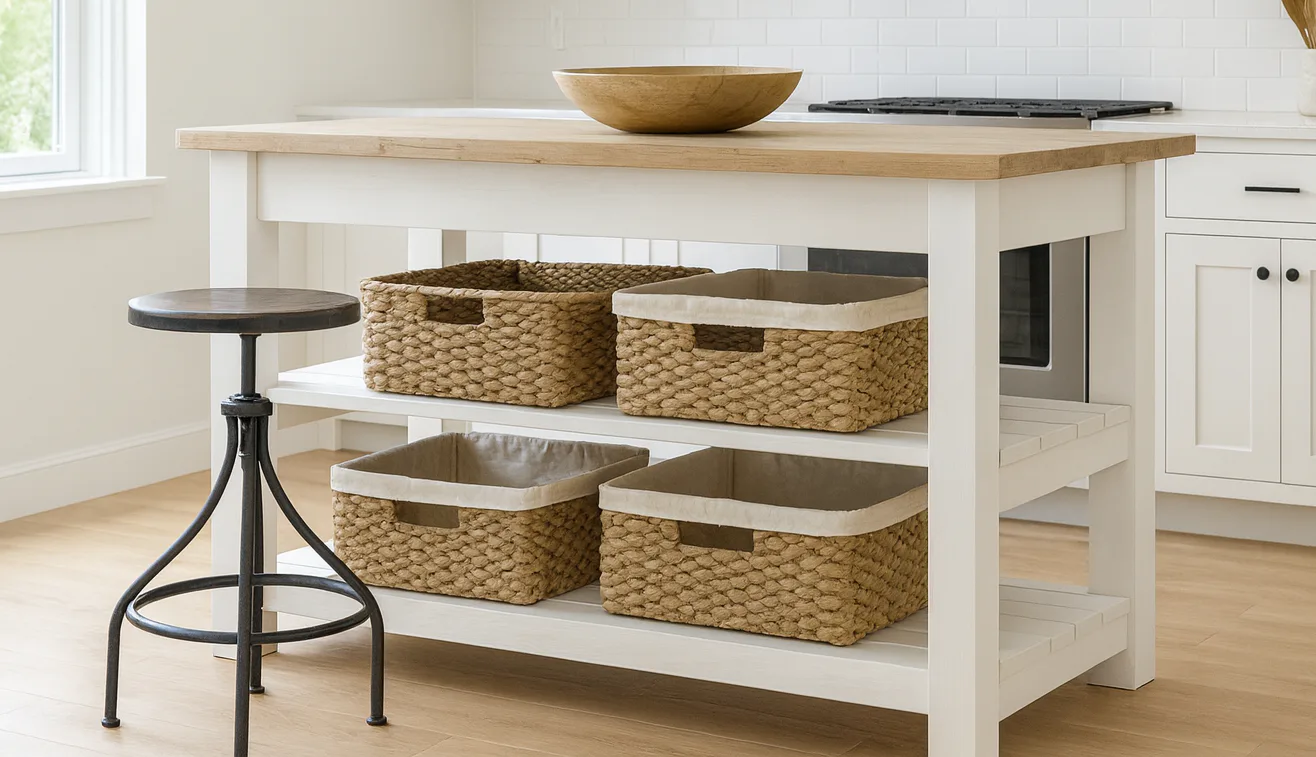
Simple Kitchen Island (No Pocket Holes) Build a beautiful, functional kitchen island without fancy joinery or special tools. This minimal tool design uses only basic cuts, butt joints, screws, and glue—making it the perfect project for anyone looking to create extra counter space, storage, and farmhouse charm without investing in a pocket hole jig. The plan includes a full cut list, step-by-step instructions, 3D diagrams, and color photos so you can follow along from first cut to final finish. Ideal as a prep station, baking table, or open shelving island, this piece adds warmth and practicality to any kitchen. Features • No pocket holes required — simple butt joints & screws • Sturdy construction with 4x4 legs and wide aprons • Two spacious slatted lower shelves for baskets, cookware, or pantry storage • Solid wood top option (perfect for butcher block, pine planks, or reclaimed boards) • Beginner-friendly build — minimal tools needed • Easily customizable dimensions to fit your kitchen • with diagrams, cut list, and assembly steps.
Dimensions
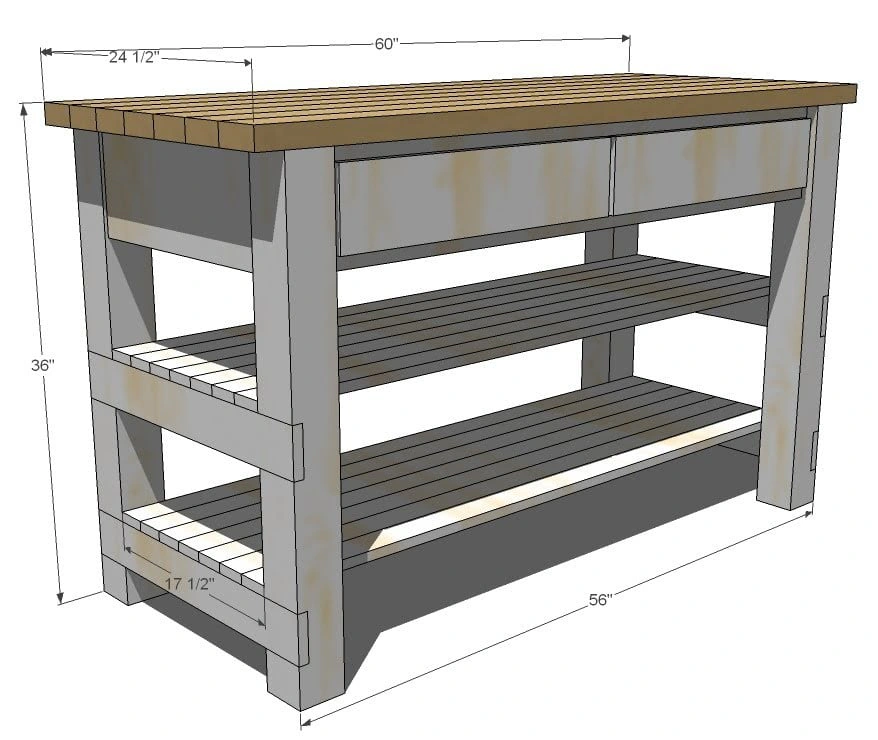
Use the size-specific shopping and cut lists below.
What you need
- 1 – 10′ 4×4 Post, Untreated
- 14 – 1×3 Boards
- 7 – 2×4 boards, stud length or 8′ Length
- 1 – 1×8 board, 8′ Long
- 1 – 2×8 Board, 8′ Long
- 2 – 1×2 Boards, 8‘ Long
- 3 – 1×4 Boards, 8′ Long
- 1 – 1×6 Board, 4′ Long
- 1/4 Sheet 1/2″ Plywood
- 21″ Drawer Slides
- Handles or Knobs for 2 Drawers
- Cutting List
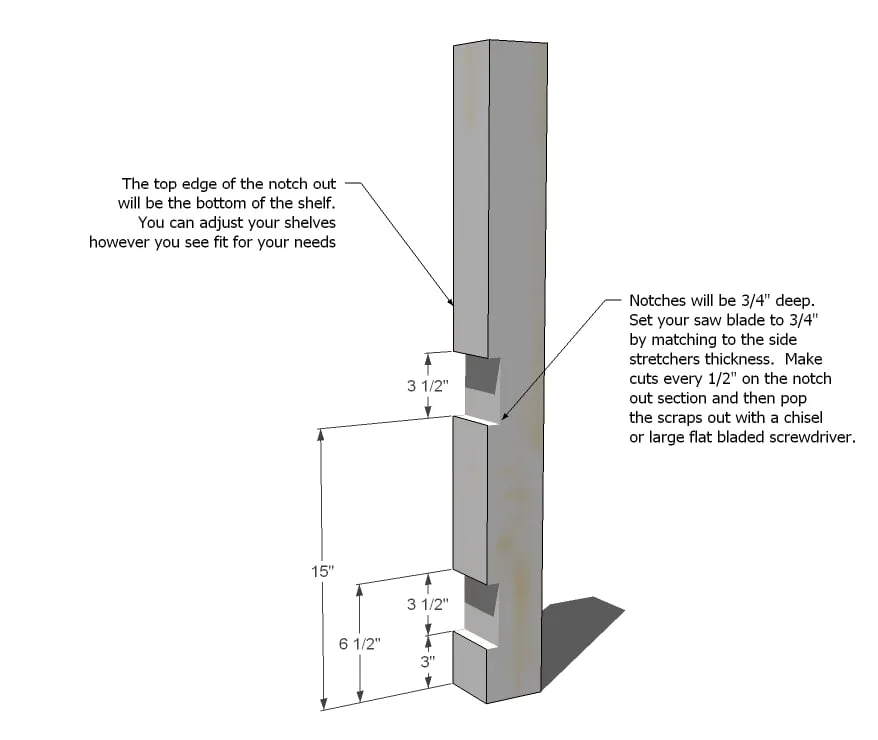
- 4 – 4×4 Posts @ 34 1/2″ (Notched out for shelf stretchers)
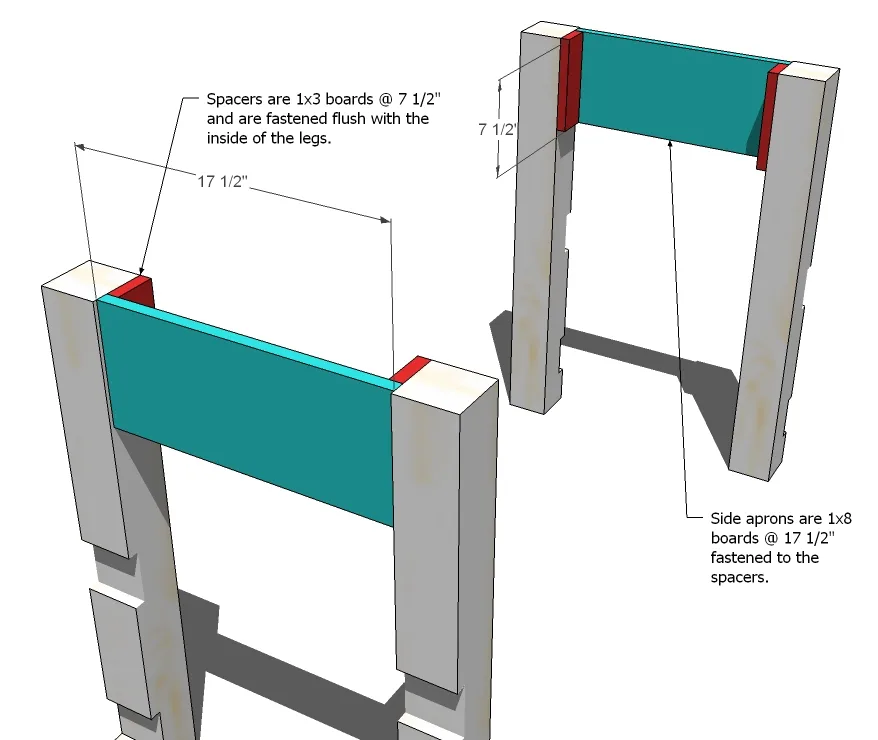
- 4 – 1×3 @ 7 1/2″ (Spacers)
- 2 – 1×8 @ 17 1/2″ (Side Aprons)
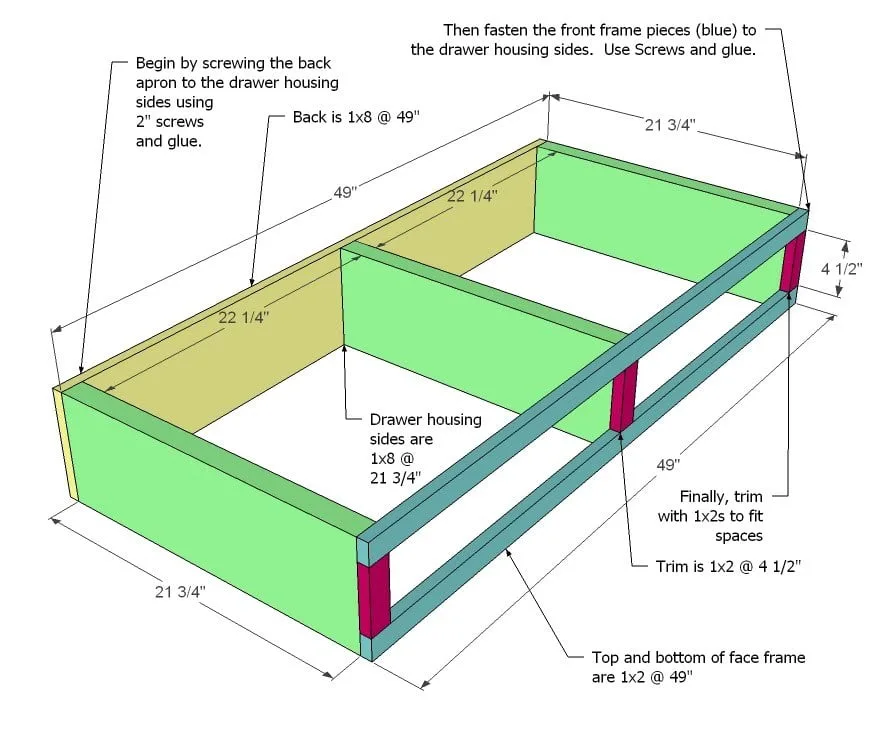
- 1 – 1×8 @ 49″ (Back Apron)
- 3 – 2×8 @ 21 3/4″ (Sides of Drawer Housing)
- 2 – 1×2 @ 49″ (Face Frame Top and Bottom)
- 3 – 1×2 @ 4 1/2″ (Measure to fit exactly, space trim on face frame)
- 4 – 1×4 @ 24 1/2″ (Shelf Supports)
- 14 – 1×3 @ 58″ (Shelf Tops)
- 6 – 2×2 @ 21 3/4″ (Top Supports)
- 7 – 2×4 @ 60″ (Countertop)
- 2 – 1/2″ Plywood @ 21″ x 21 1/4″ (Drawer Bottoms)
- 4 – 1×4 @ 21″ (Drawer Sides)
- 4 – 1×4 @ 19 3/4″ (Drawer Fronts and Backs)
- 2 – 1×6 @ 23 3/4″ (Drawer Faces)
Cut List for Drawers
- measuring tape
- square
- pencil
- hammer
- safety glasses
- hearing protection
- kreg-jig
- drill
- circular saw
- sander
- level
Step by step
Step 1
1. Legs. Notch out your legs as shown above. You can modify the notches to the needs of your kitchen. For example, if you have baskets or bins that are taller, you may wish to have only one shelf. There is a video here of me notching out legs on my table.
Step 2
2. Spacers. Begin by attaching a spacer to each of the insides tops of the legs, as shown above. Notice how the spacers will be in different positions depending on the leg. The easiest fastening method is to use your 2″ finish nails, but if you do not have a nailer, you can use 2″ screws and glue. Keep the top inside corner flush. Side Apron. Also shown in the above diagram is the side apron (in blue). Use glue and 2″ nails to fasten the side apron to the spacers.Keep top edges flush. Check for square.
Step 3
Drawer Housing. As shown above, build the drawer housing. Start by fastening the back apron to the drawer housing sides. Use the measurements above to guide you. Then attach the face frame pieces. Finally, measure and fill in the spaces between the face frame with 1x2s. You must build this housing perfectly square or your risk your drawers not sliding properly.
Step 4
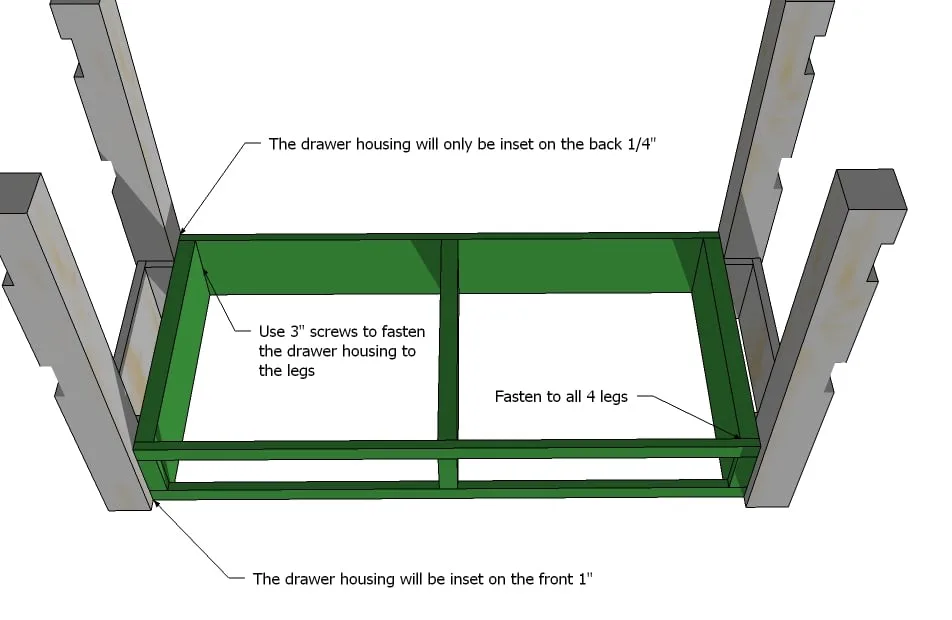
Fastening the Drawer Housing to the Legs. Turn everything upside down on a clean level surface. Attach the drawer housing to the legs 1″ inset from the front and 1/4″ inset on the back. Use glue and 3″ screws. Check for square. Get some help flipping it all over after the glue dries.
Step 5
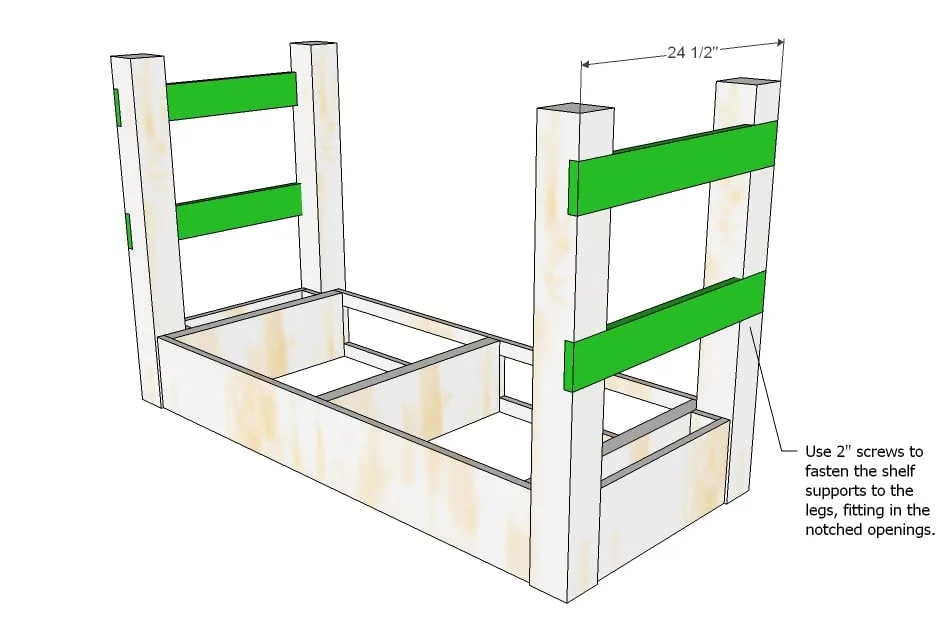
Step 6
Shelf Tops. Fasten with 2″ screws the shelf tops to the shelf supports. Check for square. There will be a 1″ overhang on the ends. Please note that you can use other types of boards for the shelf.

Step 7
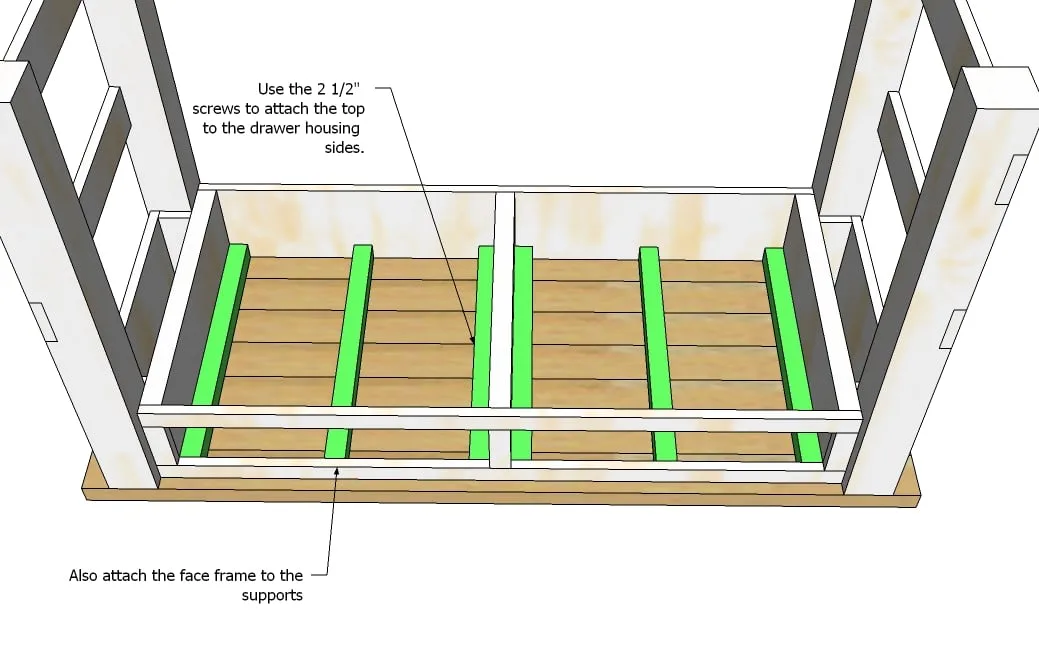
Top. One a clean level surface, lay out the tabletop boards. Then position the supports on top as shown above. Take great care to be exactly square, fasten the spacers to the tabletop pieces. Minimize the gaps between the tabletop pieces as you go. Leave a 1 1/2″ gap on the center, wide enough to accommodate the 2×8 drawer housing sides.

Step 8
Attaching the top. To keep the top free of screw holes, lay the top on top of the island. The drawer housing sides should sit flush with your supports. Fasten through the supports into the drawer housing sides. Also fasten through the tops of the face frame into the supports. You will not see these screw holes because the drawer face will cover it. If you do not use glue, this gives you freedom to remove the top and replace or refinish if desired.
Step 9
Drawers. Begin building the drawers by cutting the bottoms of the drawers out of the 1/2″ plywood. You must cut your drawer bottoms very square or they will not fit properly in your drawer housing. Then fasten the red boards, sides to the bottoms using 2″ screws and glue. Then fasten the fronts and backs to the sides and bottoms. NOTE: Check your drawer slides before constructing the drawers. Different drawer slides need different clearances, and you may need to adjust your drawer size for the slides. You can also use any scrap 1x3s to create drawer partitions at this stage. Drawer partitions will strengthen your drawer and save you tons.

Step 10
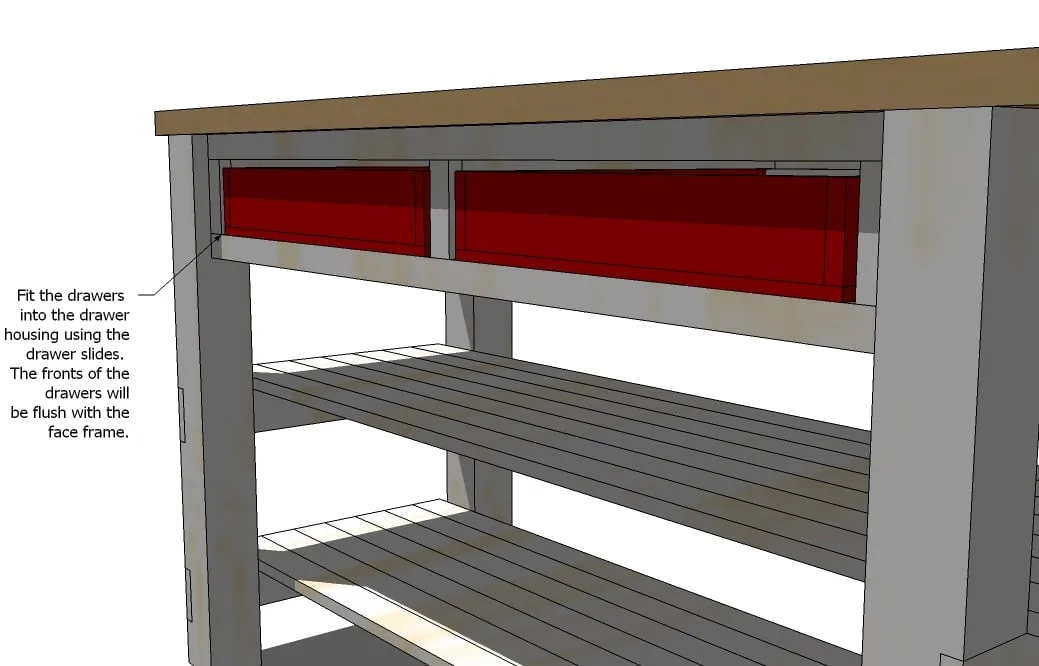
Inserting the Drawers. Using the drawer slides, fit the drawers without the faces into the drawer housing. When completely inserted in the drawer housing, the fronts of the drawers will be flush with the face frame.
Step 11
Drawer Faces. So you want your drawers to be perfectly lined up. Here’s my trick. With the drawers inserted into the housings all the way, position your faces on the drawer fronts. Leave a 1″ gap on the tops and bottoms of the faces, and a 1/2″ gap between the drawers. Then with your nailer and 1 1/4″ nails, fasten the faces to the drawers. You only need just a couple of nails. Avoid where your hardware will be placed. Then carefully open the drawer and from the inside of the drawer, use your 1 1/4″ screws to secure the face to the drawer front.

Finishing
Sand all surfaces, starting with a medium grit and finishing with fine. Wipe off the dust, fill any holes or gaps with wood filler, and sand smooth once dry. Apply primer if you're painting, then finish with your choice of paint or stain and seal with a durable clear topcoat. For outdoor projects, use exterior-rated primer, paint or stain, and sealer so the piece stands up to the weather.