Arts and Crafts Play Table
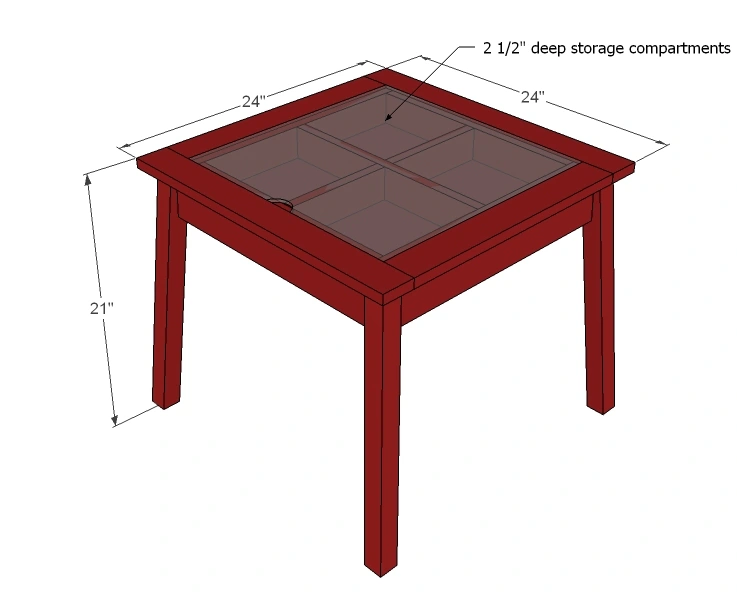
Plans for a play table with storage compartment hidden beneath acrylic glass.

Dimensions
Use the size-specific shopping and cut lists below.
What you need
- 1 - 2x2 @ 8 feet long
- 2 - 1x4 @ 8 feet long
- 2 - 1x3 @ 8 feet long
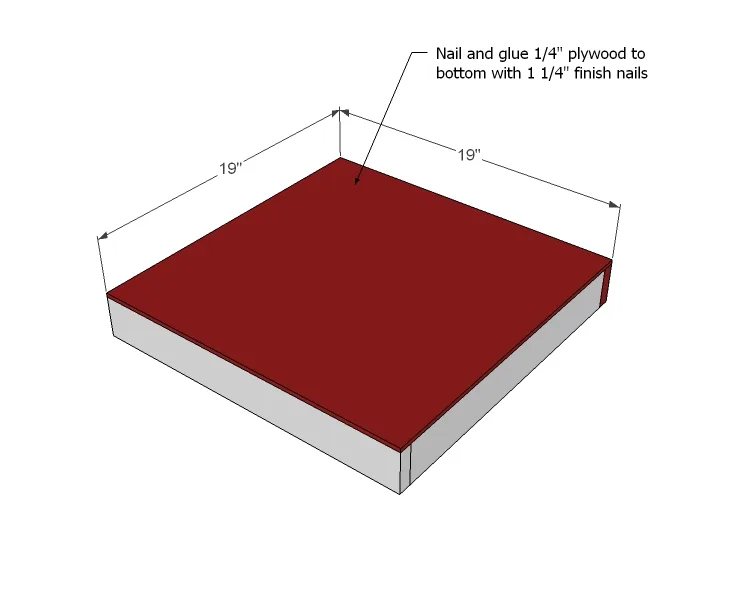
- 1/4" plywood 19" x 19"
- 1/4" acrylic glass 19" x 19"
- 4 - 2x2 @ 20 3/8" (Both ends cut at 5 degree angle/5 degree bevel off square - ends are parallel to each other)
- 4 - 1x4 @ 19" (Short point to short point, both ends cut at 5 degree angle off square, ends are NOT parallel)
- 4 - 1x4 @ 5 1/2" (Both ends cut at 45 degrees off square, ends not parallel, long point to long point)
- 2 - 1x3 @ 19"
- 3 - 1x3 @ 17 1/2"
- 2 - 1x3 @ 8 3/8"
- 1/4" plywood @ 19" x 19"
- 2 - 1x4 @ 19"
- 2 - 1x4 @ 24"
- 1 - 1/4" acrylic glass @ 19" x 19"
- measuring tape
- square
- pencil
- safety glasses
- hearing protection
- kreg-jig
- drill
- compound miter saw
- sander
- countersink drill bit
Step by step
Step 1
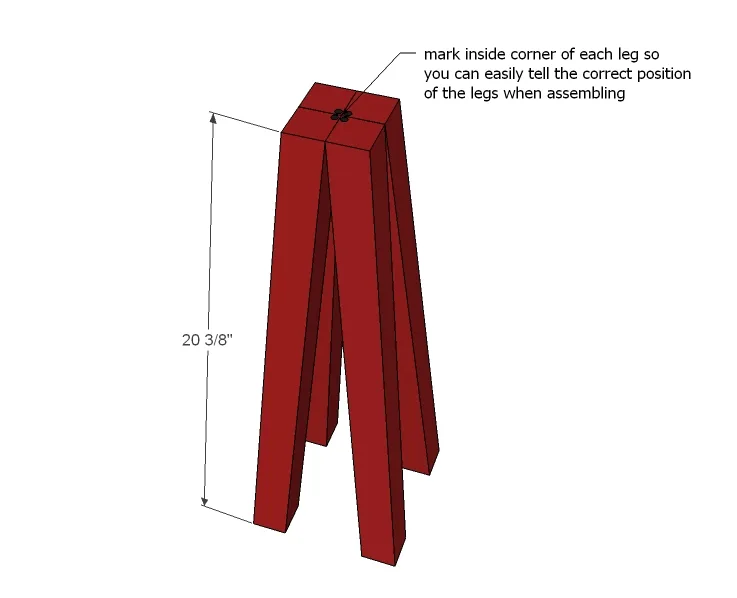
I always do this first when working with double bevels so I know the position of each leg. Things can get confusing once you start working when your angles are this slight.
Step 2
Attach aprons to legs with tops flush, notice that the bottom inside corners of the aprons meet the insides of the leg edge. TIP: Drill pocket holes for 3/4" stock around all top apron edges for attaching the top in later steps.

Step 3
These work to strengthen the table and hold the storage compartment in place. I used pocket holes on the underside, but you could also use 2" screws from the outsides as well. Note that the supports sit down 2 1/4".

Step 4
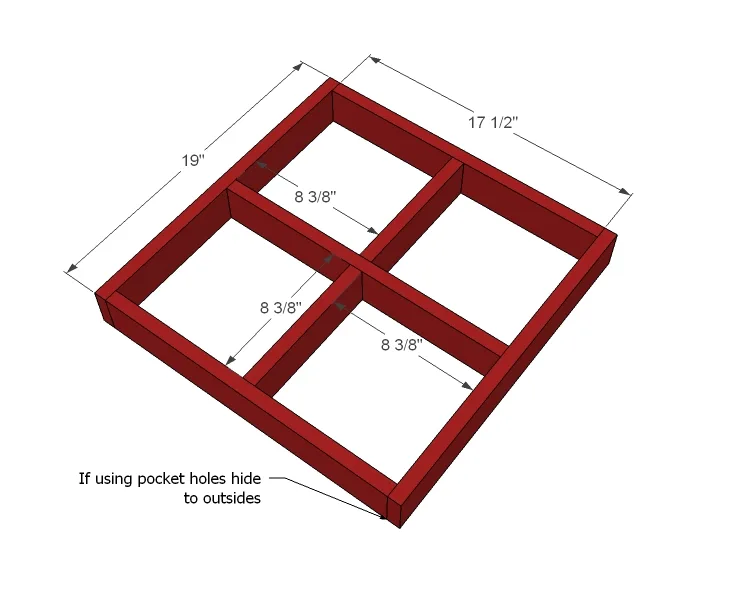
At minimum, you should build the storage compartments as shown above. I added a few more. Hide screw holes to outsides.
Step 5
Step 6
You probably already did this - dry fit the storage compartment into the table.

Step 7
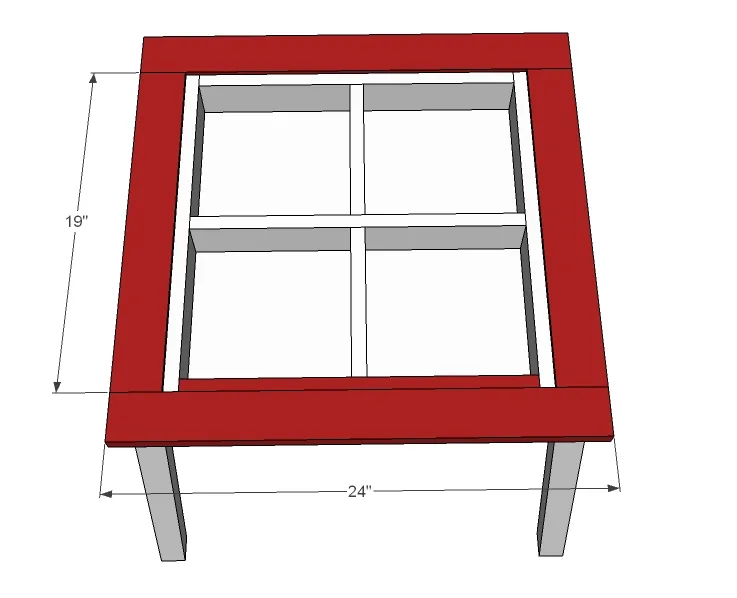
I built the frame first with pocket holes on the underside, and then fit around the storage compartment, then attached with glue. We also siliconed the space between so paint an be easily wiped up if that every happens - I'm sure it will.
Step 8
Finally, we cut the acrylic glass to fit and then drilled a hole for access.

Step 9
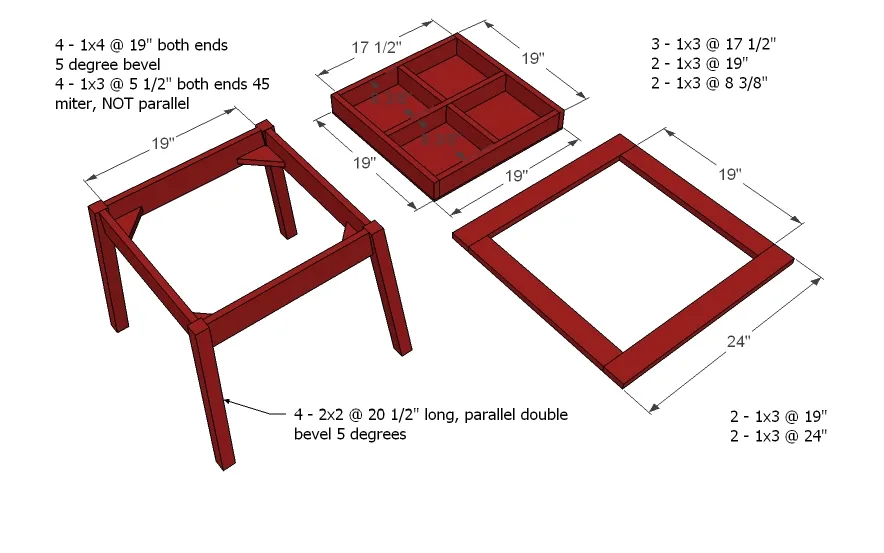
And here is my cheat sheet. Best luck building!
Finishing
Sand all surfaces, starting with a medium grit and finishing with fine. Wipe off the dust, fill any holes or gaps with wood filler, and sand smooth once dry. Apply primer if you're painting, then finish with your choice of paint or stain and seal with a durable clear topcoat. For outdoor projects, use exterior-rated primer, paint or stain, and sealer so the piece stands up to the weather.