36" Wall Cabinet, Double Door
Plans for 36" wall kitchen cabinet.

Dimensions
Use the size-specific shopping and cut lists below.

What you need
- 12 feet of 1x2s for face frame
- 27" of 1x3s for face frames
- 3/4" plywood ripped into strips 10-1/4" wide (for 12" overal depth wall cabinets including face frames and full overlay doors)
- 1x4 or plywood scrap for the back support
- 1/4" plywood for back
- 1-1/4" pocket hole screws
- 3/4" finish nails for attaching back
- edge banding for finishing shelf fronts
- shelf pins for adding shelves
DOORS and 2 sets of 1-1/4" concealed hinges for FACE FRAMES
- 2 - 3/4" plywood @ 10-1/4" x 30" (Sides)
- 2 - 3/4" plywood @ 10-1/4" x 34" (Top/Bottom)
- 1 - 3/4" plwyood OR 1x4 @ 34" (Back Top Support)
- 1 - 1/4" plywood @ 30" x 25-1/2" (Back)
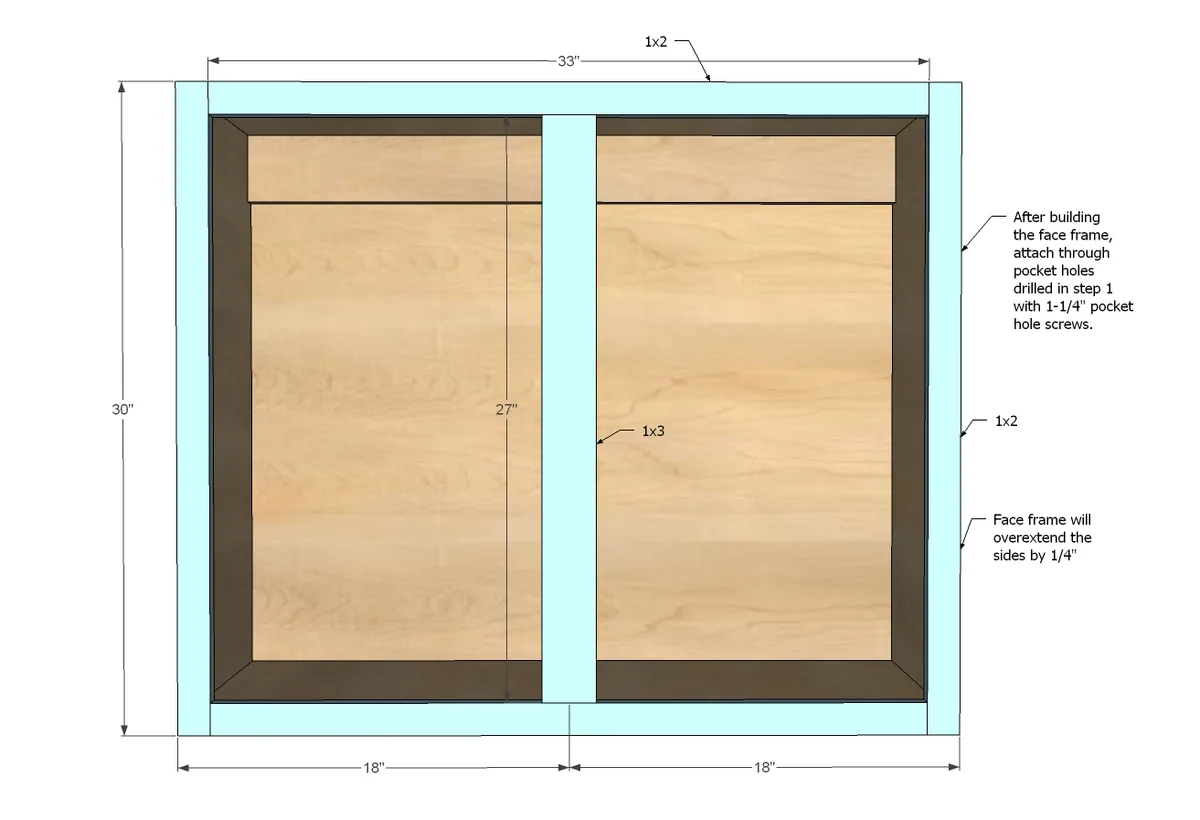
- 2 - 1x2 @ 30" (Face Frame stiles)
- 2 - 1x2 @ 33" (Face Frame rails)
- 1 - 1x3 @ 27" (Face Frame mid stile)
Shelves should be cut to fit depending on attaching and if you use edge banding
FULL OVERLAY DOORS (2) SIZE 17-1/2" x 29"
- measuring tape
- square
- pencil
- safety glasses
- hearing protection
- kreg-jig
- drill
- compound miter saw
- table saw
- nailer
Step by step
Step 1
First, make up your sides by drilling shelf pin holes on the insides for adjustable shelves (I use a Kreg Shelf Pin Jig ) - it's much easier to do this now than after assembly - and drill 3/4" pocket holes facing the front for attaching face frames in later steps (I use a Kreg Jig for drilling pocket holes). For taller shelves, you would simply just cut the sides taller. For deeper shelves, you would simply adjust your plywood rip width.

Step 2
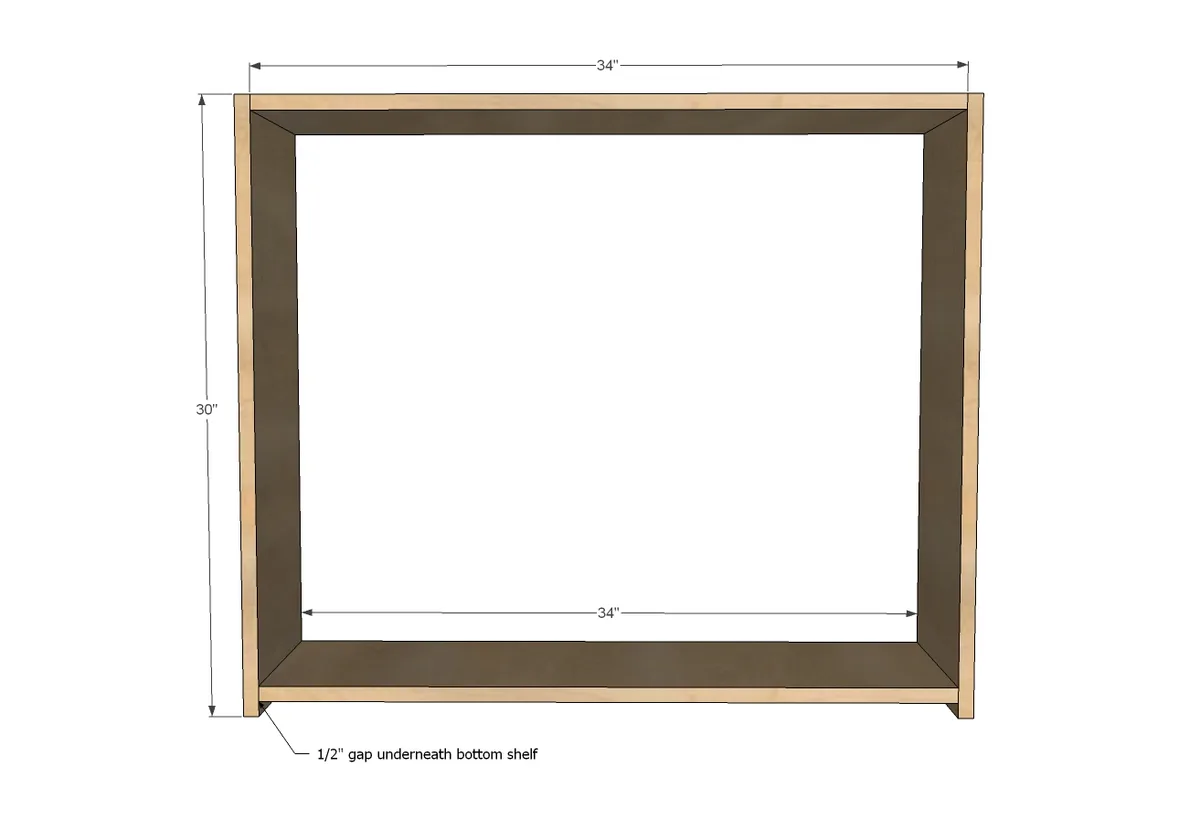
Drill pocket holes facing forward along front edges of top and bottom for attaching face frames in later steps (as done with sides). Drill 3 3/4" pocket holes on each end of the top and bottom and attach to the sides, using 1-1/4" pocket hole screws. All pocket holes should be on the outsides of the cabinet and the inside of the cabinet should have no visible joints or holes.
Step 3
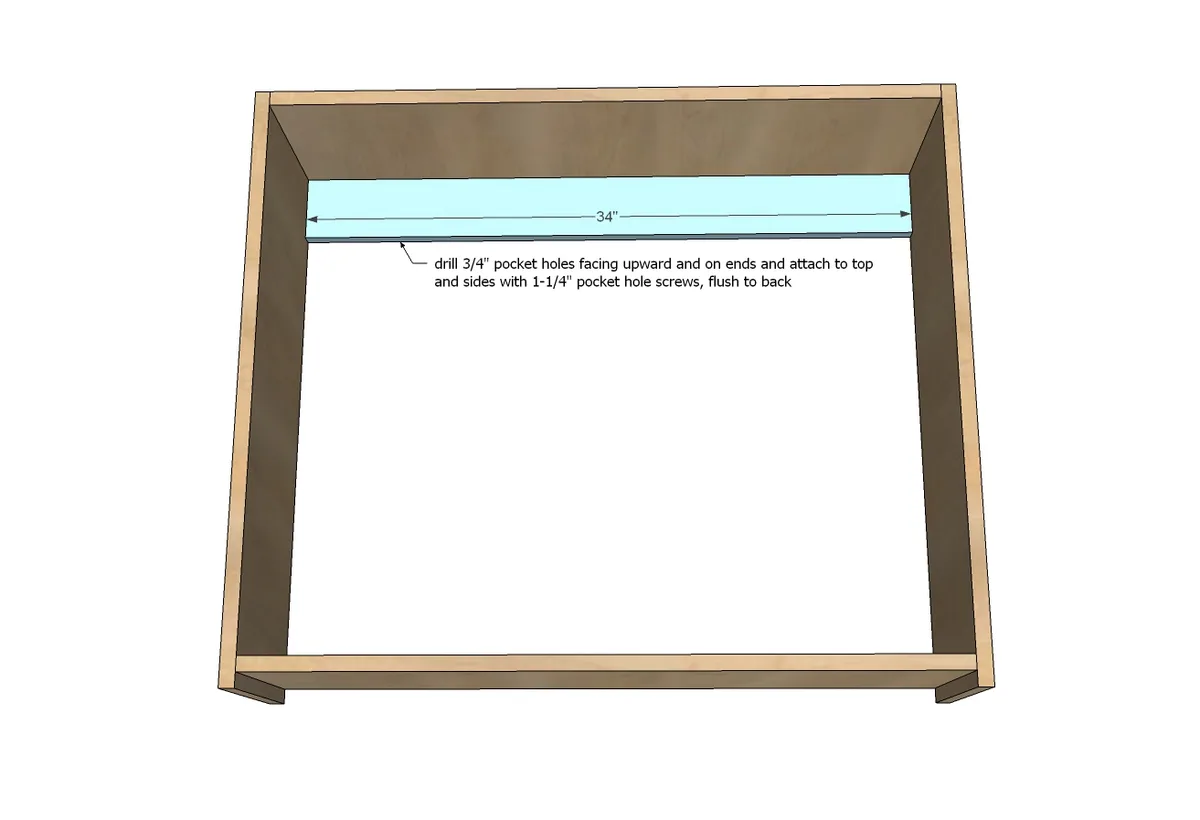
Attach back support inset at the top of the wall cabinet, hiding 3/4" pocket holes on back side. When you hang the cabinet on the wall, screw through this board into a stud in the wall. For additional support or heavy cabinets/contents of cabinets you can add a second support at the bottom of the cabinet as well.
Step 4
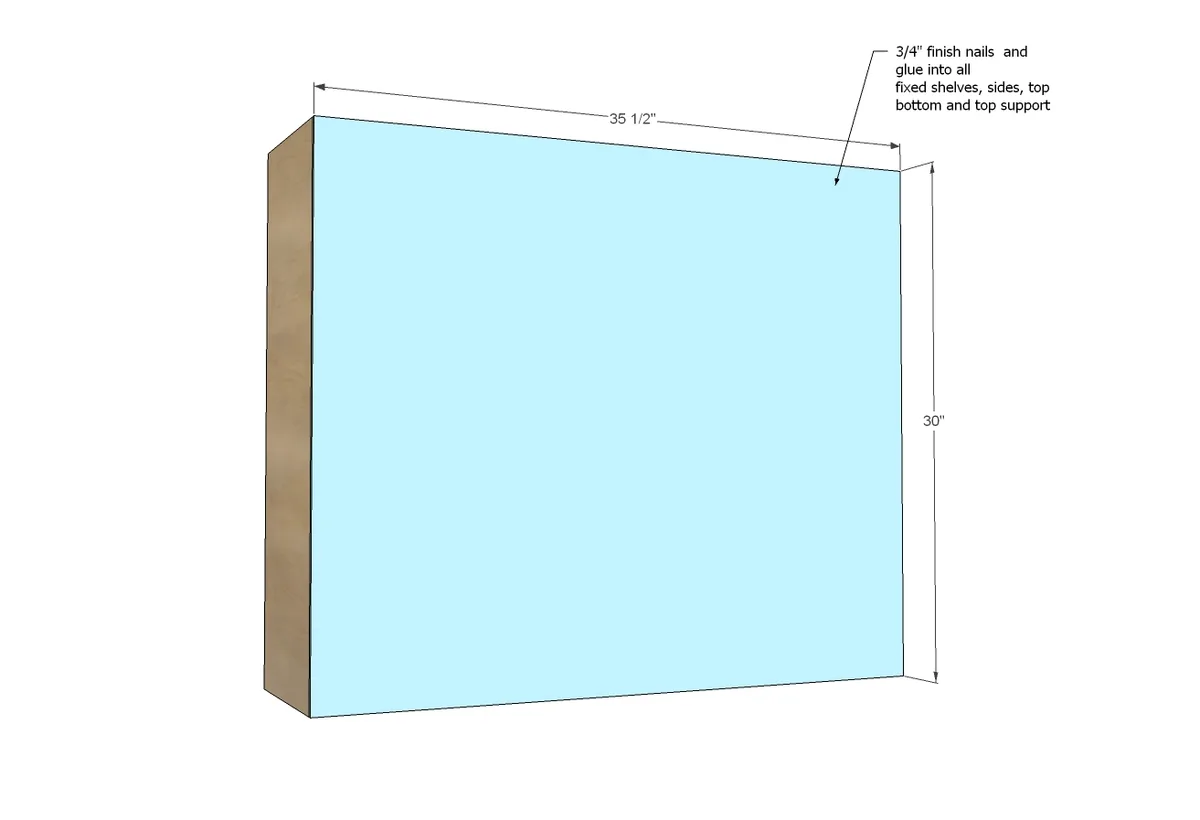
The back is not structural but finishes out the inside of the cabinet. It should not be used for hanging the cabinet. Use glue and nails to attach.
Step 5
Step 6
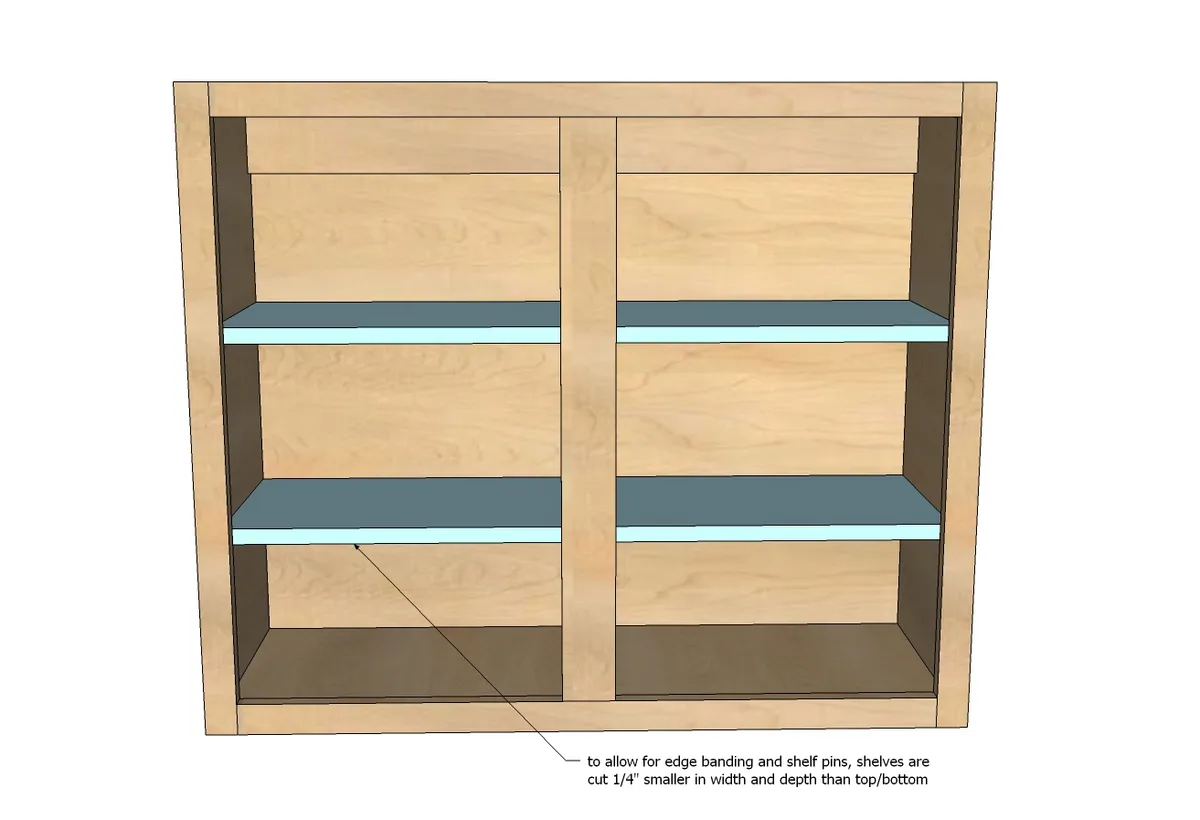
We used shelf pins for adjustable shelves, and cut the shelves 10" deep by 33-3/4" wide, and applied edge banding to the fronts of the shelves.
Step 7
We opted for a full overlay door using 1-1/4" overlay concealed euro face frame hinges for the doors.

Finishing
Sand all surfaces, starting with a medium grit and finishing with fine. Wipe off the dust, fill any holes or gaps with wood filler, and sand smooth once dry. Apply primer if you're painting, then finish with your choice of paint or stain and seal with a durable clear topcoat. For outdoor projects, use exterior-rated primer, paint or stain, and sealer so the piece stands up to the weather.